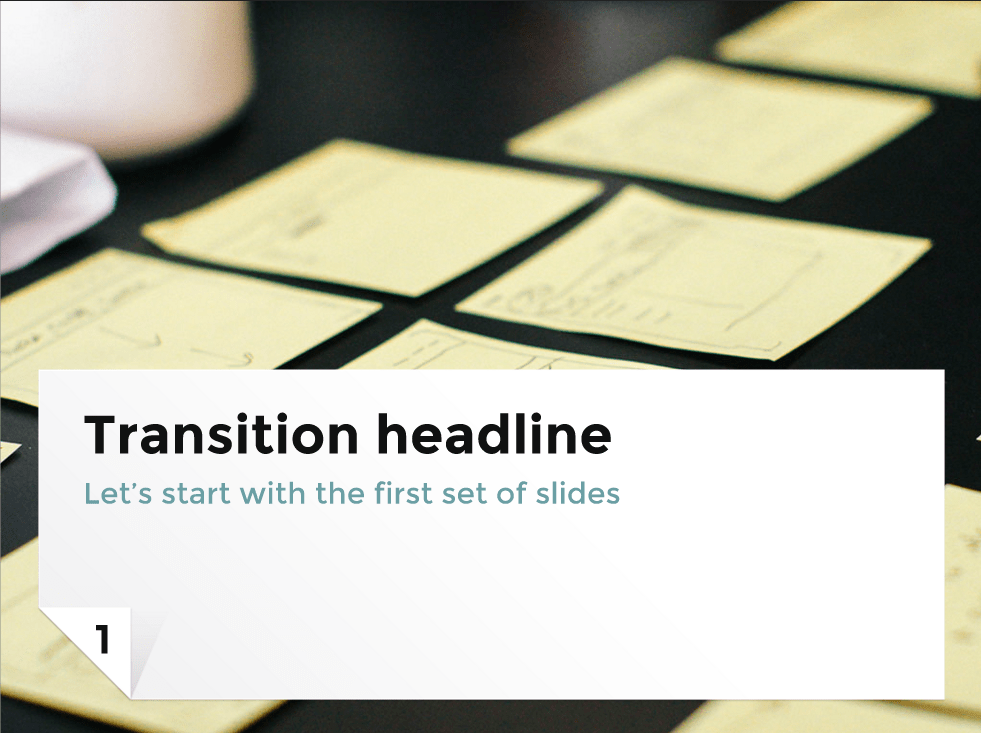
Nowadays even schoolchildren need the skill of creating presentations. Not a single report is complete without visual materials. Visuals make information more interesting and digestible. Therefore, everyone needs to learn how to make a presentation on a computer.
What is a presentation, for what purposes is it created?
A presentation is a document that includes text and graphic data, and sometimes audio. The pages that make up a presentation are called slides. The purpose of creation is to improve the perception of information by listeners, and this is also done in order to make the report more exciting and memorable.
It can be presented:
- electronic;
- through a projector;
- printed on a printer in the form of graphic materials;
- posted on the Internet.
The presentation is created in special programs developed for this purpose. One such program is PowerPoint.
Main components
Any presentation consists of:
- text;
- tables;
- charts and other graphs;
- drawings;
- animation.
Some reports also use video and audio materials.
How to make a presentation on your computer using PowerPoint - step-by-step guide with screenshots
One of the most popular programs for creating visual materials for a report is called PowerPoint. It is included in the Microsoft Office package along with Word and Excel, so almost everyone has it on their computer. Therefore, anyone can learn how to make presentations.
Work begins with creating the required document. This is done like this: on the desktop, right-click the taskbar, in which you need to select the “Create” command, and in the window that opens, select “Microsoft Office PowerPoint Presentation”. After selecting this command, a document will be created on the desktop, named “Presentation” by default.
By double-clicking the left mouse button, the document opens, it looks like this:
The newer the version of PowerPoint, the more modern its design
You can select a different type of slide using the “Layout” subsection
After this, you can start working with its content.
General design
It’s better to get started by starting with choosing a design. This is what the design will be. "Design" is the third tab in the upper left corner of the window:
All slide designs are compatible with both old and new versions of PowerPoint
Here you can choose the overall design of the slides, color scheme, fonts and applied effects. Here's what you can choose from in each of these tabs:
You can also use the effects found in the “Transitions” tab
You can choose a color design from the proposed spectrum, or you can create your own design style:
Do not choose variegated and eye-pricking colors
In the “Fonts” section you can also choose from those offered or enter something of your own:
There is no need to choose a rare font if you are going to show the presentation on another medium: it may not recognize it
Another important component of PowerPoint themes is effects, they provide customization of appearance. Theme effects can be applied automatically, regardless of whether a theme has been applied previously or not. You can also apply effects related to a different theme by clicking the Theme Effects button, which is located in the upper right corner of the Design tab.
Work with text
One of the main components of a presentation is information in text form. Text is inserted into the body of the slide, usually from a Word document using the “Copy” - “Paste” command.
In addition, to work with text in PowerPoint, there is a “Review” tab, with the help of which you can perform the following actions:
- checking for spelling errors;
- translation into other languages (using the “Directory”, “Thesaurus”, “Translation” tools), and to mark text or individual words for a specific language, use the “Language” button:
If you wish, in the “Home” section you can change the font and other text parameters:
PowerPoint is easy to understand thanks to its easy-to-understand interface
Working with Images
Images add clarity to the report and make it more interesting for listeners. You can insert an image into a slide like this:
- save the desired picture to the desktop;
- sequentially select the “Insert” - “Drawing” tabs in the upper left corner of the window, the “Insert Figure” window will open, where you need to select a graphic document, in this case it is the “225” file, which you need to click on:
If your drawing is not found during the search, try changing the search to "All drawings" in the lower right corner
The result will be the following:
You can adjust its size on the slide yourself
Working with tables and graphs
Inserting tables and graphs into the body of a slide is carried out in the same way as adding pictures through the “Insert” button (to do this, here you need to select the “Diagram” button, after which a window with types of charts will open; you need to select which type you need:
You can also change the colors of chart objects and their number
As a result, 2 windows will pop up: one is, in fact, with a chart of the selected type, and the second is with a table of source data for the chart:
Inserting tables into a slide is done in the same way (see the left side of the window):
If there are more than eight columns, then you can add columns yourself by right-clicking on any column and selecting the desired location
After creating a table, the “Designer” tab opens, where you can adjust the table format, color and other data
Here you need to set the necessary table parameters and fill it with data.
Working with video and sounds
The video is inserted in the same way as photos and drawings, but when you add a video clip, the “View”, “Sound Volume” and other tools for working with video files appear in the upper left corner of the window:
As you can see, you can select videos from both your computer and the Internet
If the video will be shown on another media, then you must download the video and transfer it to it, otherwise the video will not be displayed
Working with animation
Animation is needed to customize the playback of slides, namely, the features of their appearance one after another. In the “Animation” tab, you can choose the following methods for changing slides:
Animations make a presentation more interesting
- lack of animation (slides will simply turn on one after another without any additional effects);
- discoloration;
- fade to black;
- cutting;
- cutting through black;
- dissolution;
- appearance from above, below, right, left;
- symmetrical circular slide change.
Here you can adjust the speed of changing slides, as well as the sound design of the transition.
Saving and running
There are two ways to save a document:
- Via the “Office” button: in the drop-down window, select “Save” or “Save As” (in the latter case, you can give the presentation your name and select the location on the computer where it will be saved).
- Via the “Save” button: in this case, you just need to click on it and then close the presentation:
The presentation is launched through the “Show” button, which appears when you right-click on the presentation:
You can also do this in PowerPoint in the “Slideshow” tab.
After clicking this button, the presentation opens, after which you can start showing the slides:
You can switch slides using the spacebar
Additional Information
When showing slides, you can use various graphical tools for clarity, for example, the pointer (it is called up by right-clicking on the screen):
In PowerPoint 2016, the pointers are in the bottom left corner along with other features
The selected pointer (for example, a laser pointer) will look like this in the presentation:
The dot in the picture is the pointer
Other programs for creating presentations, including online
In addition to PowerPoint, there are other tools for creating presentations. Let's look at some of them:
- Impress. Almost similar to PowerPoint. Unlike PowerPoint, Impress allows you to export a document not only to standard view, but also to HTML and SWF formats, but converting it to a video file is not possible.
- Kingsoft Presentation. Allows you to work on several presentations at once. You can insert text, graphics, charts, tables, and videos in Flash format into slides. The document is saved in Kingsoft Presentation (.dps) or PowerPoint (.ppt) format. You can also convert your presentation to pdf.
- ProShow Producer. Unlike previous tools, ProShow Producer is a professional paid program. You can download the free version for a 15-day trial. Provides ample opportunities for working with templates, including adjusting brightness, contrast, and eliminating red-eye.
- PromoShow. A program for creating advertising presentations and clips containing 3D effects. Allows you to work with text, video, photos. Includes about 120 effects. But for ordinary, for example, educational presentations, such a program is simply not needed.
- Prezi. English-language program for advertising presentations. Like the previous one, it presents a wide range of possibilities for creating clips, but subject to proficiency in English.
- VideoScribe. A program for creating animated presentations. This approach allows you to present information in the most interesting way, for example, to interest potential customers. The program contains a large selection of animation methods.
- SlideDog. SlideDog is a program for combining various graphic objects, text documents, videos, animations, audio tracks, web pages and even YouTube videos. The program can even be synchronized with a mobile application and control the presentation from your phone.
- Hippani Animator. A program for creating video presentations, it can also add audio. By saving your presentation as an HTML document, you can perform remote broadcasts. The program is paid, trial period is 30 days.
- Wink. Makes presentations from actions performed on a computer screen. It turns out something like a video clip.
- Adobe Presenter. In addition to the same capabilities that PowerPoint provides, there are tools for creating online tests and surveys.
As you can see from the above, there is a wide range of tools for creating presentations. However, if you need a presentation for an educational report, PowerPoint will suffice.
General rules and design secrets
There are general rules that must be followed for your report to be successful:
- the presentation of information should be as simple as possible;
- graphic information should prevail over text information;
- the presenter should not read from the slides;
- text and pictures on slides should be large;
- You need to carefully prepare for the performance and rehearse it.
If these conditions are not met, listeners will initially become tense and irritated, and then may even fall asleep.
How to avoid common mistakes when creating and demonstrating
Here are the most common mistakes made when creating presentations and how to avoid them:
- information overload. Instead, present information as concisely as possible;
- black stripes on the sides of the picture on the slide (photo format 4:3). Use widescreen zoom instead;
- placement of the organization's logo and contacts on each slide. Instead, keep this information on the title slide only;
- the use of standard pictures that are copied from document to document. Instead, use original photos;
- photo with a white background on colored cards. It is better to remove such a background.
If you follow these rules and avoid basic mistakes, your audience will have a much easier time understanding the information your presentation conveys.
How to create a unique presentation in PowerPoint: video tutorial
How to work in PowerPoint 2013/2016?: training video
The skill of making presentations is useful to almost all modern people. If you do not have goals of creating professional slides (for example, for advertising campaigns), then special programs, in principle, will replace PowerPoint. There are general design rules that you should learn before making a presentation to avoid the most common mistakes.
A complete guide to creating, designing and filling presentations. There are examples, advice from Guy Kawasaki, one of the first Apple marketers, and templates that you are not ashamed to use even at the international level.
But if you don’t have such a person under your command, but you still need to make a presentation, this article will help you, where we have collected almost all the necessary information. Templates, ingenious examples and professional advice will help you create, if not a masterpiece, then certainly something outstanding!
Presentation (from the Latin praesento - I pass on, hand over) - a way of presenting information both with the help of technical means and without them; an oral presentation, which may be accompanied by visual images, aimed at conveying information to the public and persuading them to perform certain actions.
Depending on what you want to say in your presentation will determine the type of presentation. It can be informational, persuasive, image-building, motivating, survey and multi-purpose.
Guy Kawasaki, one of Apple's first marketers, advises following the 10/20/30 rule: 10 slides, 20 minutes, 30 font size. 10 slides is the optimal number that the audience can fully understand. If you have done much more, then you have failed to highlight the main points. 20 minutes is the time that viewers can concentrate without interruption. A 30-point font will allow you to place only the most necessary and important information on the slide.
Components of a presentation
To achieve the desired effect, you need to clearly understand what and when to say and show. The classic presentation structure looks like this:
- Title slide (topic, contacts, information about the speaker, product, service).
- Table of contents (optional).
- Introduction (what the presentation is about, goals, objectives. Interest the listener, why he needs to spend time on your report).
- Main part (all necessary information: may contain several sections, at the request of the author).
- Conclusion.
- Application (optional).
- Thank you for your attention (don't forget the final thank you slide).
Presentation design rules
Nowadays you won’t surprise anyone even with an interactive Prezi presentation. Therefore, others need to “take” it. First of all, excellent stylish design. And if your company does not have a single corporate template for presentations, this gives you a huge scope for creativity. Just don't overdo it.
- Decorate everything in the same style. You should not “jump” from one background to another. Follow the compatibility of colors, background and fonts. The font compatibility chart is here.
Don't use standard PowerPoint design templates. They are boring and everyone is tired of them. It is better to choose your own color palette. For example, on Piknik all the basic colors are collected, and on Color Lovers you can find ready-made selections of shades or create them yourself.
Check out tips for choosing colors for infographics from .
- As few words as possible. No one will read huge test blocks for the entire slide. Minimum 25–30 point font, readable font. Change the font to highlight quotes or notes. Use headings.

- Do not use animation or music when changing slides. Leave it to the students.
More pictures.
Replace tables and lists with infographics and diagrams.
Many presentation creation services have the ability to add videos. However, this requires access to the Internet during the demonstration to the audience.
Developer and startup advisor Zach Holman has been working with presentations for various projects for a long time. On his website he shares tips on how to design them.
Color
Choose contrasting colors. This makes it possible to vary fonts, backgrounds and other presentation elements. I have about 4 colors that I use all the time, and 8-10 with shades of them.
Size
Make your text huge, get rid of half the words on the slide, and make the remaining most important text even larger.
Usually my text is at least 90 pt, sometimes I use 150 pt and even 300 pt.
Words as forms
The letters themselves can be part of the design. The easiest way to make a slide more interesting is to play with the physical side of the letters that make up words, i.e. size.
The text (font) on almost every new slide in my presentations is different in size. This is how I separate one thought from another. It turns out to be much more interesting than just bulleted lists.

Illustrations in the presentation
Images are the basis of a presentation. A presentation in general is a visual thing, so it is important not only to choose good illustrations, but also to place them correctly on the slides.
What do we have to do:
- If you find a picture in a search engine, make sure there is no watermark on it. And if you work at a serious level, you also need a license to use!
Remember that your presentation can be viewed both from a small screen (tablet or mobile phone) and from a large one (computer screen, projector). Choose photos with excellent resolution.
Use photos as backgrounds. Of course, for this you will need to slightly adjust the image: reduce the brightness, contrast or darken the picture.
Pay attention to the hand-drawn illustrations. They will definitely add uniqueness to your presentation.
Choose an unusual, eye-catching image for the first slide. Don’t forget about the picture for the last slide (“Thank you for your attention”).
What not to do:
Do not use standard pictures and illustrations, especially from PowerPoint. They can be replaced by vectors.
Don't use too many images on one slide. The audience won't have time to watch everything. In addition, to fit everything on the screen, you will have to greatly reduce them.
Do not place the image to the edge or in the corner.
Don't overlap one image with another.
Presentation software
In addition to standard PowerPoint, there are many other excellent programs for creating presentations.
- Apple Keynote
The main competitor of PowerPoint, close to it in terms of interface. A large selection of chic templates that it would be a shame not to try. Available on all Apple devices.

- CustomShow
An excellent tool for creating business presentations from a company with more than 40 years of history. You can not only create presentations and share them with colleagues, but also organize online meetings, work off- and online and on various devices, add video and audio, upload slides from PowerPoint, change settings in accordance with brand requirements.

- Haiku Deck
A program for lovers of minimalism. The main rule is the minimum amount of information in the warehouse. One slide - one idea - one visual support (image, infographic, diagram).
Great for creating simple presentations. At the same time, editing of templates is limited: in this way, developers try to maintain high quality of work so that the user does not turn the template into a “quiet horror”.

- SlideDog
This is not a pure presentation editor. You won't be able to make your own slides, but you will be able to put everything you want into a single presentation: PowerPoint presentation, Keynote, Prezi, PDF file, video, audio file, web page. No more need to switch between different programs.

Online services for creating presentations
- Prezi
One of the most popular services after PowerPoint. The entire presentation is one field, each part of which is zoomed in with a keystroke. The ability to see the full presentation from above, which immediately gives an idea of the structure.
The tool is interesting and unique, but not very suitable for serious business presentations. There is a free version with a limited set of features. Paid costs from $4.92 per month. There is a mobile application and a separate program for PC.

- Google Slides
Very similar to PowerPoint with slightly reduced features. Allows you to make simple presentations for basic purposes. Although, if you try hard, you can make a cool one on Google presentation. - Cards
Ready-made slides with various maps.


Paid

Do you want to know how to make money online?
Download the free book by Vladislav Chelpachenko
=>> “10 steps to the first million in the information business”
Slides

Clarity of presentation slide text. We carefully choose the background and text color of the slides. If we choose a dark background, then the text should be light (white or yellow), if the background is light, then the text should be dark.
We try not to use a white background and black text, this is boring and sets the audience up to only listen to information, excluding dialogue (the student’s association in class is triggered - the quieter you sit, the less likely it is that they will be called to the board).
We do not use a slide background that is too loaded with objects; your information that you want to convey to the audience may be lost in their background. It is best to use a plain background with your logo and/or Internet address.
Presentation. How to make a presentation correctly. VIDEO
To make it easier to perceive information, watch videos from which you will learn where to make a presentation and how to make a presentation correctly.
How to make a presentation in Power Point
Watch the video on how to make a presentation in PowerPoint.
How to make a presentation correctly
Watch the video on how to make a presentation correctly.
How to insert a video into a presentation
Watch the video tutorial on how to insert a video into a presentation
Positive attitude when creating a presentation
Few people get the presentation right the first time, so don’t despair. Sooner or later, all failures come to an end.

A lot of useful information awaits you ahead. In order not to miss, subscribe to.
P.S. If you want to learn how to make money online, then the best place to start is affiliate programs. So that you have no doubt that making money in affiliate programs is a reality, I am posting one of the screenshots of my affiliate rewards.
Do you want to know what mistakes beginners make?
99% of beginners make these mistakes and fail in business and making money on the Internet! Make sure you don't repeat these mistakes - “3 + 1 ROOKIE MISTAKES THAT KILL RESULTS”.


A presentation is a brief and intelligible presentation of information that allows a person to explain the essence of the issue much more effectively. Presentations are created by many users at different stages of life: schoolchildren, students, businessmen, etc. Today we will take a closer look at creating a presentation.
First of all, a few words about the program for creating presentations. Today there is a fairly large selection of office applications, some of which are distributed on a paid basis, while others are completely free. These include LibreOffice, OpenOffice, Microsoft Office and many others. Today we will look at the process of creating a presentation using the example of perhaps the most popular program for these purposes - Microsoft PowerPoint.
A few words about the material
Before you start creating a presentation, you must take care of the material:
1. Text. Of course, the entire textbook should not fit into the presentation. The presentation should include the shortest possible text that will eloquently speak about the essence of the issue and explain certain important points.
2. Pictures. A presentation without pictures not only looks dull, but can also explain the topic that concerns you less clearly to your audience. Use both your own pictures and those downloaded from the Internet in your presentation. The main thing is that the pictures are strictly on topic.
3. Graphs and diagrams. Graphs and diagrams are developed during the presentation process. Another good way to clearly demonstrate information.
4. Video and music. Optional, but if you have video or audio related to the topic, you can add it to your presentation.
5. Plan. Without a pre-created plan, presentations, in most cases, completely lose their information content. Be sure to set the goal of the presentation, think step by step where the presentation will begin, how you will get to the heart of the matter, and how it will end.
Getting started in Microsoft PowerPoint
Creating and deleting slides, setting up a template
Each presentation has separate slides that briefly demonstrate certain information.
To add a new slide to PowerPoint, in the tab "Home" click the button "New slide" .

If you click on the icon itself, a simple slide will appear on the screen, which can be modified later if necessary. If you click on the inscription itself "New slide" , an additional menu will appear on the screen, in which you will immediately be asked to select a slide template.

Switching between slides is carried out in the left area of the window, where their thumbnails are located. If necessary, slides can be moved to a new position in the presentation. To do this, hold the mouse cursor on the slide, and then move it to a new presentation area. As soon as you release the mouse button, the slide will lock in its new position.

Extra slides can be deleted. To do this, right-click on the slide thumbnail and in the window that appears, select "Delete slide" .

If you want to change the slide template, then right-click on the slide and in the window that appears, go to "Layout" . An additional window will open on the screen in which you can select a new template for the slide.

Change the appearance of your slides
All slides are white by default. To add variety to your slides, you can give them a new background.
To do this, go to the tab "Design" and pay attention to the block in the program header "Themes" . There is already a set of selected themes where the fonts and background are configured. If you're in a hurry, use themes for your slides.

To see how a theme will look on your slide, just select the slide thumbnail and hover your mouse over the theme you like. If you like the theme, apply it by simply left-clicking on it once.
After applying the theme, the block to the right will change "Options" , which provides several options for the appearance of your theme.

There is a button further to the right "Background Format" . By clicking on it, an additional menu will open in the right area of the window, in which more detailed background settings can be made: it is possible to apply and adjust the fill, add your own image available on the computer, etc.

By default, the selected background will be applied only to the current slide, but, if necessary, all slides can be given a similar background - you just need to click on the button "Apply to all" .

Working with the text component
And so we smoothly moved on to working with text. Adding text is very easy: just click on the desired block of the slide, after which you can enter the text or paste it from the clipboard.

Pay attention to the small icons that appear around the perimeter of the frame: circles allow you to expand or, conversely, reduce the block in which the text is placed, and the arrow is responsible for rotation, i.e. you can rotate the text at any angle.

Go to the tab in the program "Format" . Here you can make detailed text settings, as is done in Microsoft Word: font, color, size, location on the page, gap, etc.

Working with charts, graphs and tables
We smoothly move on to a visual demonstration of information.
Charts and graphs allow you to clearly show the dynamics of something, for example, profit figures for the last and current quarter.
First of all, go to the slide where the chart or graph will be located. If the slide contains several blocks reserved for images and graphics, then select the one you need with a mouse click.
To add a chart or graph to your presentation, go to the "Insert" , and then click on the item "Diagram" .

A window will appear on the screen in which you will need to select the appropriate graph or chart option.

A table with indicators filled in for example will be displayed on the screen. In the first column you will need to enter the names of the parameters, and in the second - indicators for each of the specified parameters.

If you need to place a table on a slide, open the soft slide and select the block in which the table will be placed.

Go to tab "Insert" and select "Table" .

A simple table editor will open on the screen, in which you will need to manually specify the number of rows and the number of columns.

After creating the table, a tab will appear on the screen "Constructor" , in which the appearance of the table is configured in detail.

Filling out the table is carried out in the usual way - you just need to select a cell, after which you can proceed to filling it out.

Working with pictures
Let's move on to the images. To add a picture to a slide, go to the desired slide, select the block in which the image will be added, go to the tab "Insert" and select "Drawings" .

Windows Explorer will open on the screen, in which you will need to insert the desired image.
An image will be displayed in the desired area of the window, which can be stretched, narrowed and rotated in the same way as it was done with text.

Also, a tab will automatically open on the screen "Format" , in which the display of the picture is configured: borders, correction, adding effects, etc.

Working with music and video
Inserting sounds and video into a presentation is done in the same way: go to the desired slide, select the block into which the media file will be inserted, open the tab "Insert" and select "Video" or "Sound" .

Working with Animation and Transitions
When the main part of the presentation is ready, you can move on to setting up animations and transitions. Transitions will ensure a smooth and beautiful change from one slide to another, and animation will allow you to beautifully display the contents of the slide.
To configure transitions, open the tab "Transitions" , and then select the appropriate one from the suggested transition options.

You can optionally apply a different animation to each slide, but if you want to keep the same transition style for all slides, click the button "Apply to all" .

You can also adjust the duration of the transition from one slide to another, and, if necessary, each transition can be accompanied by sound, and you can choose one of the proposed sounds or upload your own.

By default, the program moves from one slide to another with a mouse click, but, if necessary, the program can do this automatically. To do this, you will need to uncheck the box "On the Click" , and then specify the time for which the slide will play.

Now a few words about animation. To add animation to a slide, go to the tab "Animation" , select the desired slide, and then the object for which the animation will be applied. Next you just have to click on the item "Add Animation" .
A fairly large list of available animations will be displayed on the screen. After applying the animation, the system will immediately demonstrate it, after which you can leave it as is, change it to another, or delete it altogether.

To the right, you can configure whether the animation will play automatically or on a mouse click, and adjust the duration of the animation, as well as the delay.

Saving a presentation
The creation of the presentation has come to its logical conclusion, which means it’s time to save it to your computer.
To do this, click on the button "File" and go to the tab "Save" . If necessary, specify the name of the presentation and location on your computer, and then click on the button to the right "Save" .

Show presentation
And a few words about how to show a presentation. In order to show the presentation on your computer, you need to open it in PowerPoint, go to the tab "Slide show" , and then select one of the options: "At first" or "From current slide" .

If, when setting up transitions, you set the slides to automatically change, then you just have to wait for the presentation to complete; if not, you will switch between slides yourself with mouse clicks.
A small conclusion. And although we have not covered all the nuances of working with PowerPoint, this article will give you a comprehensive idea of working with this program.
Our age is the age of computer technology, a time when everything goes digital and is created on a computer. Today, at various events, it is no longer enough to just talk about your idea, it needs to be presented as best as possible. Presentations made on a computer began to open up new opportunities, for which they gained immense popularity. Today, we will teach you how to create an interesting presentation in Powerpoint (part of the Microsoft Office suite).
1. To avoid losing the attention of your audience, try to keep your presentation small.
2. Choose the right size, color and font that will be visible and understandable to everyone.
3. Use no more than 25 words on your slide.
4. The background of the slides should not blend in with the color of the text.
5. Check your spelling.
Instructions. How to make a presentation in powerpoint?
Step #1. Correctly prepare the information you want to present through the presentation. Remember that this is a supplement to your report, not a replacement for it.
Step #2. Let's launch the program.
Step #3. To create a presentation, click: “File→Create→New Presentation.”

Step #4. You can decorate your presentation using the “Design→Themes” function. Among the proposed topics, you can choose the most suitable one for the topic of your presentation.

Step #5. All entered information can be edited by changing the font, color and size of the text.

Step #6. You can also place the information you need in the form of graphs, diagrams, tables, pictures and other things.
Using the "Insert" tab.

Step #7. How to make a presentation with music? Just like graphic files, you can add music by setting all the playback settings. In the Insert tab, click Media Clips, then Sound. After which a dialog box will pop up, through which we select the audio file you need.

Step #8. Each inscription or picture can be embellished a little by adding an animation effect. The “Animation” tab, after selecting any element.

Step #9. We make switching slides more beautiful by using the “Move to next slide” function in the “Animation” tab. The program offers more than a dozen transitions, the choice is yours!