Dear friends!
Schedule of BATIK classes for March 2019
ATTENTION! Monday, Thursday and Sunday - from 12!!! until 20:00 we are painting silk. Come at any time and practice Batik with ready-made paints, reserves and on professional frames for 250 rubles. at one o'clock!
After our batik classes you leave with finished work: a scarf, scarf, stole, dress or panel, secured and optionally trimmed.
Classes are held at: Moscow, metro Krasnye Vorota (300 meters from the metro!!!), Novaya Basmannaya st., building 12, building 4, Design Center.
The best teachers professional artists with many years of experience working in silk, will share with you the most important secrets silk painting and teach the skill.
SCHEDULE FOR MARCH:
3-all- We paint a scarf, a panel, a scarf with palm leaves, ferns and other tropical plants, hot batik, creative activity, fabric of your choice. Teacher Natalya Safonova
4-mon- We paint a scarf, a panel, a scarf with palm leaves, ferns and other tropical plants, hot batik, creative activity, fabric of your choice. Teacher Natalya Safonova
7-Thu - cold batik, painting flowers on underpainting. Secrets of two-layer painting. Teacher Victoria Kibalchich.
10-Sun-- Hot batik, learning how to spray with wax, using stencils and various brushes. Creative activity. Fabric of your choice. A scarf, panel or small scarf. Teacher Natalya Safonova
11-Mon- - Hot batik, learning how to spray with wax, using stencils and various brushes. Creative activity. Fabric of your choice. A scarf, panel or small scarf. Teacher Natalya Safonova
14 th - cold batik, free painting. Secrets of working without contours. Teacher Victoria Kibalchich
17-Sun- No classes
18-Mon- Multilayer hot batik, creative activity. Shawl, scarf, panel on nautical theme. Crepe de Chine, toilet. Teacher Natalya Safonova
21-Thu - cold batik with thickening. How to combine these techniques to complicate the work? Secrets of mastery. Teacher Victoria Kibalchich
24-Sun – Multi-layered hot batik, creative activity. Shawl, scarf, panel on a marine theme. Crepe de Chine, toilet.
25-Mon- Multilayer hot batik, creative activity. Shawl, scarf, panel on a marine theme. Crepe de Chine, toilet. Teacher Natalya Safonova
28 th - cold batik, knotted batik with subsequent modification using contour drawings on the background. Teacher Victoria Kibalchich
Silk painting is ancient and exciting beautiful art. A huge selection of different colors, pigments and contours helps you create magnificent works in the most different styles. The softness of the flowing fabric, the amazing play of colors - this type of needlework cannot but captivate. It makes it possible to create unique and inimitable fabrics with your own hands. They can be used not only for decorative purposes, but also to create designer products. It could be an elegant postcard, an artistic panel, or even a delightful exclusive scarf. All these things will bring joy to both their creator and the person for whom they were intended.
This technique is like applied arts, has a textile style. Its magnificent example is the traditional Azerbaijani scarf self made, which is made using ancient technology. The products are mainly created by applying reserve lines to the fabric, which act as stops for the dyes. Painting on silk and batik fabric is a direction that allows you to create wide patterned lines, leaving part of the fabric unpainted.
Modern and traditional silk painting techniques are characterized by a combination of color spots, lines, ornaments and decorative painting. Most often, textile graphics are planar in nature, and there is no foreground or background. In general, there are a number of decorative techniques for painting on silk, each of which has its own traditions.
Equipment and materials
Usually, after seeing the magnificent works of masters, many become eager to try their hand at this and take up painting on silk. Such enthusiasts are interested in what it takes to paint on silk. There are many devices for this technique, but you can start doing it even with only the most necessary equipment.
Light pongee is an excellent material for beginning artists. This fabric is well suited for training exercises and samples, as well as for making holiday cards, scarves and pictures. During your work, as you gain experience, you can try working with other types of silk fabrics.
- Dyes and paints for silk
- Contour mixtures and gutta
Drawing lines, which serve as a barrier against paint spreading on the fabric when painting on silk, is a mandatory element of this technology. Barrier lines are applied using gutta and other contour compounds.
- Thin metal attachments
There are special metal attachments that can be attached to the applicator spout to adjust the thickness of the contour. Nozzles with a diameter of 0.3–1.0 mm are available.
- Dye thickener
To change the way the dye flows, special thickeners are added to silk dye.
- Primer composition
It is applied to the fabric to change the silk's ability to absorb dye.
- Effective salts
They are used to produce spectacular patterns based on changes in the texture of the pattern.
For ease of painting, the silk is stretched over a frame, which facilitates the correct and uniform distribution of the dyes. More effective are special sliding frames of different designs.
- Tools
These include cat hooks for tensioning silk on a frame, molds for coloring, flat and round brushes of different sizes, tubes for applying reserve, etc.

Basic painting techniques
Almost all types of silk painting are done on fabric stretched over a frame. The first and one of the main stages is creating a contour line. It is applied with a reserve compound, which creates a barrier and prevents the paint from spreading. To obtain a neat contour line you need a certain skill that comes with experience. The drawing can be applied using a template or directly by hand. This, of course, is more difficult, but it gives a certain freedom of imagination, because you can show your individuality in this way.
To create very interesting paintings, you can apply a step-by-step outline with a colorless reserve. To do this, use a reserve line, which is necessary to control the distribution of dyes and to outline the contour of the pattern. When working this way, the lines are less noticeable, resulting in a less patterned and softer image.
When applying contours step by step, the decorative role of the line is minimized. But you can create unique patterns using invisible reserve lines. Using gutta, wax or water-soluble reserve, you can apply the desired design and then, after coloring it, remove the entire outline from the finished product. To obtain clear geometric patterns or borders, you should learn to draw straight lines. After some practice, they can be drawn by hand. To begin with, you can train by placing a long ruler on two blocks.
Using paint thickeners, designs can be applied to fabric using stamps and seals. Beginning craftsmen can purchase such aids at special store, where there is a fairly large selection of finished products with a wide variety of prints. Experienced craftsmen who create unique patterns make stamps themselves or to order.
- Painting "wet on wet" to create a watercolor effect
When using this technique, color flows freely. At the moment when the spreading of paint over the fabric stops, a decorative layer is formed, which is called a “drip”. If you place streaks of water in certain places, they can be made part of the design. They look especially beautiful in landscapes where trees and mountains are depicted. In plant motifs, with the help of decorative streaks you can create the outlines of flower petals and leaf veins. This is a rather complex technique, because you need to be able to control the movement of dyes.
- Working with effect salts
Dry salt has the ability to absorb paint or liquid dye, allowing you to create amazing “frosty” patterns. The size of the patterned color spots can be adjusted by using different sized salt granules and crystals. Using table salt you can make very small dots, and using household and special effect salt for batik helps to get a larger pattern.
When working in this technique, the salt is scattered onto the silk while the paints are still wet. Salt will not be able to absorb the dye and form a pattern if the fabric is already dry. In this case, instead of impressive flowing stains, you will get a pattern of small stars. An unusual pattern is formed if each salt crystal has its own zone of action.

- Use of primers
Thickeners change the ability of the dye to flow freely throughout the fabric. But you can also change the absorbency of the fabric itself. After treating silk with a special compound that prevents the absorption of liquid, paints are easily applied to the material even without the use of reserves.
Primers are available in clear or white. They are applied both to the entire fabric and to a specific area. When the primer dries, the silk behaves like thick, dry paper, holding the dyes where they are applied. When working, you can follow the contours of the sample placed under the fabric or effectively create, following your own imagination. The application of primer mixtures gives the silk some rigidity, so such products are used where softness and drapability are not very important, for example, in panels, postcards, and pillow covers.
- Creating patterns from water stains
To create the most effective streaks, successive application of layers of vapor-fixed dyes, alcohol, water or solvents to dry areas of the painting is used. Each subsequent application of dye or other liquids pushes away previous layers of paint, creating what are called “wrinkled edges.” If the next coat is applied while the fabric is still damp, the bleed effect will be softened. In this case, a pattern of lighter lines or elegant rings appears on the fabric.
Here we briefly listed the basic techniques of painting on silk, with which you can create magnificent, highly artistic products to decorate the interior of your home and exclusive fashion accessories for your own wardrobe. If you decide to seriously take up this exciting business, you will learn other additional techniques where you can work not only with smooth silk, but also with silk velvet. In the meantime, you should master the basics of the skill. And believe me, painting on silk will give you true creative pleasure!
The master class was conducted by Elena Stepankina.
Silk painting is, of course, a very delicate work. But with the help of contours, each of us can draw our first picture!
Materials:
natural silk without impregnation;
wooden frame the right size;
buttons;
acrylic paints for batik;
palette;
synthetic and core brushes;
reserve staff (black);
Glass tube for reserve;
rubber bulb;
gasoline for rinsing the tube;
pipette;
a simple pencil;
hair dryer;
iron;
coarse sea salt.
How to paint a picture. Batik.
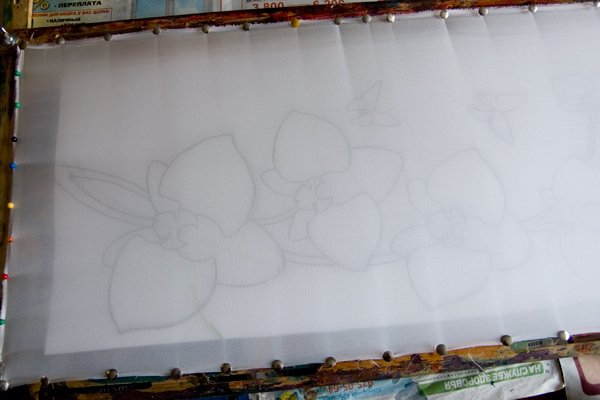
Print out the picture at the desired size and transfer it to tracing paper. Stretch the fabric onto the stretcher using buttons, place the design under it and trace the lines with a pencil.
Trace the pencil lines with the reserve compound using a tube.

Make sure all lines are closed.
After the reserve has dried, begin painting. We advise you to check the closedness of the contours - drop water inside and see if it spreads beyond the contours. Before painting, wet each area with water (wet painting) to achieve smooth color transitions from light to dark. Color the sky and the sun.

Scatter the big one sea salt over the freshly painted area to achieve a beautiful effect.

When dry, the salt crystals attract paint, creating spectacular patterns.
Paint the houses and pavement using the same technique - raw. You should not have any unpainted (white) areas left.
Colored silk scarves look both elegant and bright, they add zest to the look and help make it unique. Moreover, if we're talking about about handmade products painted using the batik technique - these are various methods of applying paint to silk. Today we will do silk painting with a simple step-by-step master class for beginners!
The art of batik has been known since ancient times; Southeast Asia is considered its homeland.
It is no coincidence that batik is also called “Chinese painting” - in this country, craftswomen knew how to paint fabrics back in the 3rd century BC. They used the so-called “hot painting” - they drew the contours of the design using molten wax.

In general, batik is a rather complex art of needlework, requiring a steady hand and the ability to work with paints. Unlike glass painting, you can't easily remove the wrong lines with solvent and start over. But if you have the desire and patience, even beginners can master painting on silk; you can take a master class for beginners using the “cold batik” technique.
Learn how to paint on silk in a simple master class for beginners
To paint on silk using the cold batik technique you will need:- a piece of silk measuring 40x160 cm (it must first be washed in warm water without adding detergents)
- paints and contours for painting on silk (for example, you can use paints from Marabu and Javana)
- transparent reserve composition based on rubber glue and gasoline (this composition is produced by the Gamma company)
- synthetic brushes No. 2, 6, 9
- wide natural bristle brush (preferably squirrel fur)
- stretcher and buttons to secure the fabric
- jar of water
- palette or regular plastic plate
- life-size sketch of the drawing on paper (you can use any image - experienced craftsmen can paint real pictures on silk. For beginners, we offer a floral pattern)
1) The fabric must be stretched onto a stretcher. Make sure that the material does not sag anywhere or form folds. Along the edges of the fabric, you need to carefully secure it with buttons so as not to damage the thin silk - first we secure the corners, and then, after wetting the fabric a little, the centers. Because we use an oblong piece of silk, first we fasten the material on the short side, and then only on the long side.
2) Place a sketch of the design under the fabric and secure it. Natural silk– this is a fairly thin fabric, so the pattern is clearly visible.
3) Now you need to outline the drawing with a reserve compound. We collect the reserve into a tube. This is done with a syringe. The syringe is compressed, placed on the wide end of the tube and the reserve is sucked inside. It will be enough to fill the tube to half the tank.
4) We outline the drawing. The technique is as follows: hold the tube so that the spout is perpendicular to the fabric. You need to move evenly and carefully, without lingering in the same place - there should be no thickenings or drops left.
5) Please note that all lines must be closed. This is done so that the paint with which we will paint the drawings does not leak onto neighboring areas.
6) To check whether all the lines are clearly outlined, you can hold the fabric up to the light. Next, leave it to dry for 50 minutes.

7) We begin to paint the background. Wet it with ordinary water using a wide brush.
8) If there are places left somewhere that are poorly outlined by the reserve, we will immediately detect them, because water will begin to seep through them. In this case, it is necessary to dry the fabric and once again circle these places with a reserve compound.
9) On the palette we prepare the colors for painting the background. Remember that this will only be the first layer of paint we apply to the background, so it's best not to be very bright.
10) You can use several shades for the background, it will be even more beautiful.
11) We begin to paint the flower petals, making transitions from light to dark. Leave to dry.

12) Using a tube and a reserve, we trace the veins on the flowers and the stems.
13) Apply another layer of paint to the background, this time in spots, creating a watercolor effect.
14) When applying several layers of paint, you need to let each spot dry and only then apply the next one - hand painting on silk cannot be rushed!
15) Paint the flower stems.
16) Paint the petals with the second layer.
17) Using a contour, we add details: we draw veins and dots on the petals.
18) For greater expressiveness, the drawings are completed with a thin brush, which should be almost dry.
19) These are the flowers we got.

20) Remove the fabric from the frame and gently iron it through a cloth for 3-4 minutes. Next, leave until completely dry for about a day. To remove the reserve compound, the material can be washed by hand in warm soapy water.
21) All that remains is to hem the edges. This can be done by machine or by hand. The last option is preferable, because in this case the seam will be softer. The scarf is ready! Having already mastered this technique, you will be able to paint not only scarves, but also any other silk products.
For those who have already mastered contour types of painting on silk, you can try free painting. With this technique, the design is applied to the fabric with aniline paints without any patterns using free strokes. This produces very delicate and unusual works with a smooth transition of shades.
Video on the topic of the article
For greater clarity, we suggest watching the following videos, in which the process of artistic painting on silk is demonstrated step by step.
The art of painting on silk (for beginners)
Silk painting is a very interesting and exciting activity. You must have certain skills - the ability to draw, artistic taste. Silk provides ample opportunities for its painting, perfectly accepting paints, giving them shine, creating play of colors, making the painting truly alive. You can express your mood on silk - create an abstraction, a landscape, a painting in chinese style, paint a scarf, scarf, dress. Natural hand-painted silk retains the brightness of colors for a long time.
For the first trial lessons, thin, smooth silk is suitable. white. Before painting, it must be washed in a soapy solution, as silk tends to shrink. In addition, it can be finished (impregnated with a special composition), which is very undesirable for painting (the dye will spread poorly).
It is better to use special paints for painting (for silk). They are attached to the fabric different ways- iron, over steam, fixative, long-term drying. For beginners, it is better to stick to paints that are fixed by ironing (due to the ease of fixation). All dyes are dissolved in water and mixed, forming unusual complex colors and shades.
To separate the planes, a reserve composition is used - transparent and colored (tinted). The reserve comes in special vials with nozzles, but you can also use glass tubes with reservoirs and spouts of various diameters. With the help of a reserve, specific designs are created, as it limits spreadability. To begin with, it is better to use a soft pencil or a colored reserve so that you can see the contour lines. If at the first stage it is difficult to use the reserve, you can purchase silk with an already applied contour.
To paint, the silk is stretched tightly onto a stretcher (wooden frame); to begin with, you can use a hoop.
It is better to choose brushes for painting fabric that are round, with a sharp tip (marten, kolinsky, synthetic), for painting the background or large areas - wide sponge brushes.
For the first acquaintance with silk, it is better to use free painting. You can apply a 20% solution of table salt to the silk so that the colors do not spread too much. You should start with abstract color spots, stripes that completely cover the fabric. Using salt crystals, you can achieve original effects on silk by sprinkling it on a damp cloth. Salt of different grinds creates patterns on silk in different ways (salt attracts water, and with it dye, forming interesting stains).
After the painting is completely dry, you can use the dry brush method for subtle accents in the work (with dark colors).
Silk painting is a very creative activity that requires expression and a quick reaction to small errors that arise during the work - the result is always unpredictable.

Cold batik batik technique
The cold batik technique appeared with the development of chemical technologies. The reserve composition does not require heating, so it is available to a wide range of artists and amateurs. The order of work is as follows:
Stage-1. (Cold batik batik technique). We draw a template for future work on paper - a linear image. We outline with a thin black marker with clear, continuous, closed lines.
Stage-2. (Cold batik batik technique). We stretch the fabric onto the stretcher using special buttons for silk (three-pronged) or buttons with a thin long leg. The silk should be taut like a drum.
Stage-3. (Cold batik batik technique). We place the template under the fabric, trace the outline using a soft pencil (preferably a simple one). As you gain experience, you will be able to immediately trace the template with a reserve on the fabric, tinting it a little.
Stage-4. (Cold batik batik technique). Using a glass tube with a reserve, we trace the lines of the pencil drawing on the fabric. It is important that the reserve has the required consistency. So, if it is too thick, it will flow out with difficulty and will not completely saturate the fabric, but if it is too liquid, it will spread, forming smudges and blots. The line should be expressive, clear, smooth, uniform, continuous.
Stage-5. (Cold batik batik technique). Then you need to dry the applied reserve lines and check their integrity. To do this, you need to drop water on individual closed areas and see if it goes beyond the contour. If there are errors, then after drying, apply the reserve to these areas again (preferably from the inside out).
Stage-6. (Cold batik batik technique). Let's start painting. We prepare paints of different saturations. In our work we use color stretches, transitions from one color to another, and watercolor techniques. We start with light areas, gradually moving to darker ones. We paint the background at the very end. When finished, leave it until completely dry.
Stage-7. (Cold batik batik technique). To finalize the product, it is necessary to fix the paints on the fabric. Professional dyes are fixed with steam.
After fixing the color, the product should be framed if it is a panel painting or the edge should be processed if it is an accessory (shawl, scarf, shawl, pareo).

Hot batik
Hot batik is one of the ancient methods of painting on fabric. The name hot batik appeared because the reserve composition (paraffin, wax), which is used in painting, is applied to the fabric in a hot (molten) form. The combination of dyed and undyed areas of fabric creates a unique play of colors and shades (multiple layers seem to shine through each other, creating soft transitions of tones). Hot batik opens up enormous opportunities to show your handwriting, individual style, and imagination. The work will be more picturesque if the painting is carried out in several layers (it is advisable to start with light colors, and make each subsequent layer darker). If you follow all these rules, you will get an excellent handmade gift (panel, scarf, scarf, etc.). Various fabrics are suitable for this type of painting: silk (preferably thick), cotton, wool.

Knot batik
This was probably the very first way to decorate fabric using dyeing, because it is much easier to tie a piece of fabric in a knot and dip it in paint. The hidden area remains white after dyeing, and even from it different sides intricate paths and patterns emerge. The main difference between knotted batik is its utilitarian nature. True, sometimes craftsmen use knot dyeing for the background of a picture with subsequent painting, but mainly it is used to decorate clothes and household items. This type of batik does not require any artistic skills. Creating a unique pattern is quite feasible at home, since the pattern is formed very simply: the fabric is tied, wrapped, folded, hemmed, and then dyed. Thin fabrics are most suitable - they are easier to tie, dye and get clearer fold lines. Many types of fabrics are suitable for this batik technique: cotton, viscose, silk. It is more difficult to work with wool, velvet, knitwear, plush, but you can get an amazing effect. The canvas does not have to be white, but the most interesting options are obtained from the contrast of a white pattern and a dark background. To work in the knotted batik technique, you need ribbons, ropes, threads, and cords. They must be strong, fit tightly to the fabric and not allow paint to pass through. The ropes themselves create a pattern of stripes - narrow or wide. Many techniques require fabric folding and pleating. It is best to iron each wrinkle as it forms. In addition, you will need pebbles, beads, peas, clothespins, clips, planks and sticks. There are a lot of techniques for creating patterns by folding and stitching fabric - from simple to complex. You can vary as much as your imagination allows, and different quantities tying and multi-color dyeing will give an endless variety of options. The ties create the pattern and the folding helps distribute the patterns in the best possible way.
Folding
Folding creates geometric patterns on the fabric, and also allows you to repeat the pattern formed by the windings as many times as the fabric was folded. The fabric can be folded in different ways: straight and diagonally.
By folding the fabric in four and pleating it diagonally, we get a cross-shaped star.


The flowers are made as follows: pleat the fabric folded in half, and then fold the corners inward on the top fold. By changing the number of windings, you can achieve a more interesting option.


An orange-purple wreath can be achieved by partial dyeing in different colors.


Source: batikdesign.narod.ru
Thin cotton fabric is most suitable for knotted batik; it is easier to tie and dye. You can try using silk and viscose, but you need to choose the appropriate dye for them.
When selecting dyes, it is necessary to take into account what fabrics they are intended for; for cotton - some, for silk and wool - others. There are also universal dyes that are suitable for several types of fibers at once. However, to avoid disappointment, it is better to try dyeing a small piece of fabric first.
You will need a large container for dyeing. It should be such that the fabric to be dyed floats freely in it. A large enamel basin is best.
You will also need #10 cotton thread and cotton rope of varying thicknesses. Ropes and cords are needed not only to secure the folded fabric, they themselves form a pattern of thin or wide stripes. Ropes made of artificial materials cannot be used, since when dyeing they will let the paint pass through and you will not get a pattern on the fabric.
Many knot-dyeing techniques require folding the fabric. In order to better fix the folds, you will need an iron.
In addition, you will need pebbles, beads, buttons, and dried peas.
Dyeing
Dilute the dye in a jar according to package directions and strain before pouring into the dyeing bowl. Add the required amount of hot water and gradually heat on a gas stove to 40-45 °. Then dip the fabric into the paint. Slowly bring the dye to a boil and continue to simmer over low heat.
If you are dyeing cotton fabric, then after 20 minutes. When boiling, take it out, add table salt (2 tablespoons per 2-5 liters of water) and lower the fabric into the solution again. After this, boil for another 30 minutes. When dyeing wool or silk fabric, instead of salt, add 1 tablespoon of vinegar essence per 4-5 liters of water. Having finished dyeing, leave the fabric in the solution until it cools to 60-70 °, then rinse it first in warm (35-40 °), then in cold water. Finally, remove the wrappings, untie the knots and rinse the fabric again. In the last rinse, add 1-3 tablespoons of vinegar per 10 liters of water.
To partially dye fabric in different colors, it is suspended over a tank and the desired part is dipped into a boiling solution. In this case, it is better to leave it dry and dry it before the next dyeing.

For multi-color dyeing, you can pre-paint the fabric with stripes, circles, spots, or splashes of color, and then fold, knit, and dye the fabric as usual.
Or you can dip the fabric into the paint repeatedly. After the first dyeing, rinse the fabric without untying it, straighten out the folds, tie new knots and windings and dye it in a darker tone. This process can be repeated many times, each time dyeing the fabric a darker color.
Stitching
Fabric stitching is usually used in combination with folding and wrapping techniques with threads and ropes. First, you need to mark the drawing with a simple pencil, then sweep the fabric along the marked lines with a coarse thread (No. 10). The stitch length should not be long - no more than 5 mm. After this, the thread is tightened tightly so that the paint does not penetrate into the folds. The ends of the threads serve as a winding, but it can be reinforced with rope if desired.
By sewing the fabric diagonally, you will get inclined stripes.


The combination of folding and stitching produces a clear diamond pattern .


You can create any geometric patterns: zigzags, squares, curved lines, ovals and more complex shapes - almost any image can be made using the stitching technique.


Free silk painting
Free painting is the most quick way create an interesting painting (it actually looks more like painting than batik). A composition is created on primed fabric, as on paper. The paint retains the shape of the stroke, since the primer does not allow it to spread. This method is also the most difficult - it requires the artist to freely handle fabric and paints, and the ability to create a drawing without a pencil sketch. It is necessary to observe the laws of color science and composition. In this type of painting on fabric, the artist’s handwriting, his individual style and skill are revealed. All types of silk are suitable for free-form painting. Wide opportunities are opening up for improving the technique and technology of free painting and artistic techniques. The essence is that the fabric is impregnated with a so-called primer, as a result the spreading of paint is limited. It creates the opportunity to apply a drawing with free strokes, saturate it with light and color, leaving no boundaries. For thickeners, starch, sodium chloride solution, gelatin, etc. are used.
Basics of composition in batik
Composition - the basis work of art. Batik (fabric painting) is a type of decorative and applied art. Regardless of what the artist wants to depict, the entire composition is built according to the laws of textile graphics. When creating a composition, you need to think about color, tone, graphic solution. The composition is based on the following laws: integrity of perception, contrasts of shapes and colors, expressiveness of lines and volumes. Using technical and artistic techniques, the work can be given a different mood - movement, peace, dynamics, static, freshness, joy, light, warmth.
Where to begin?
Fabric preparation
Before use, the fabric must be washed to prevent shrinkage and to remove any finishing material that may be saturated with the material, since the paint does not apply evenly to such fabric.
It is best to wash fabrics intended for painting with laundry soap, since washing powders are not completely washed out and can affect the color of the paint. Cotton is washed in hot water, silk - in warm.
After washing, the fabric is thoroughly rinsed, wrung out without twisting, dried and ironed while still damp.
Transferring the design to fabric
For the first test, it is better to take a small and simple sample. First, draw a design on thick paper with ink or a black felt-tip pen with lines of such thickness that they are clearly visible through the fabric. Fasten the fabric with the sample placed underneath it on some board using thumbtacks. Trace the drawing with a simple pencil.
The lines should be dim, as they will be visible under the transparent contour composition.
If the fabric is very transparent and the design is simple, you can immediately outline it with a reserve composition. You can improvise by immediately applying the reserve to the fabric without preliminary sketching, but to do this you need to first secure the fabric to the frame.
Stretch the fabric onto the frame
First of all, wrap the frame with tape or thick paper so that the paint does not get on the frame and stain your subsequent work.
Secure the fabric with snaps first at the corners and then in the middle of each side of the frame. Then stick in the remaining buttons, the more of them, the smoother the material will be fixed.
Pull the fabric as tightly as possible; when painting, it will become damp and may sag. Make sure that the drawing is not skewed or distorted. The fabric must be stretched strictly along the grain thread.
Good luck to you in this type of creativity!!!
And these works are for inspiration......


Source - http://m-batik.ru/