There is an opinion that making airy buns is very difficult. Therefore, many housewives abandon this idea and buy them in stores. However, such buns cannot compare with homemade ones either in taste, aroma, or appetizing appearance. In addition, homemade buns do not go stale so quickly and last longer taste properties. If you follow the recommendations, any housewife will be able to prepare delicious airy buns that absolutely everyone will like.
Sweet buns made from yeast dough are one of the best ideas which can be implemented.
They will be tasty even without filling, and they are pleasant to eat with either black tea or strong coffee, as well as kefir and milk. They will come in handy in almost any situation.
Serving such buns to the table is very pleasant, because good baked goods always lift your spirits and bring a lot of pleasure.
Required Products
- 8 cups flour;
- 3 chicken eggs;
- 100 grams of yeast;
- 2 glasses of milk;
- 7 tablespoons sugar;
- 7 tablespoons of vegetable oil;
- ½ tablespoon salt;
- 1 tablespoon vanilla sugar;
- butter.
Step by step recipe
When you have all the necessary ingredients, you can start cooking:
- You need to take warm milk, but not hot, and add yeast to it. The temperature of the milk is very important, since at high temperatures the yeast can cook.
- Beat sugar and 2 eggs in a separate bowl. Add salt and a little vanilla sugar for taste and aroma.
- Combine this mixture with yeast soaked in milk. Mix everything evenly.
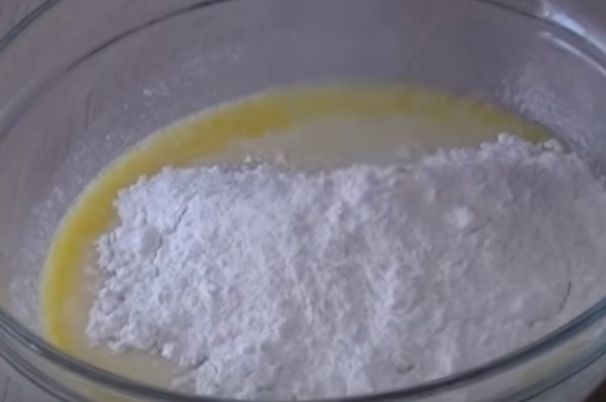
- Gradually add flour while stirring so that there are no lumps.
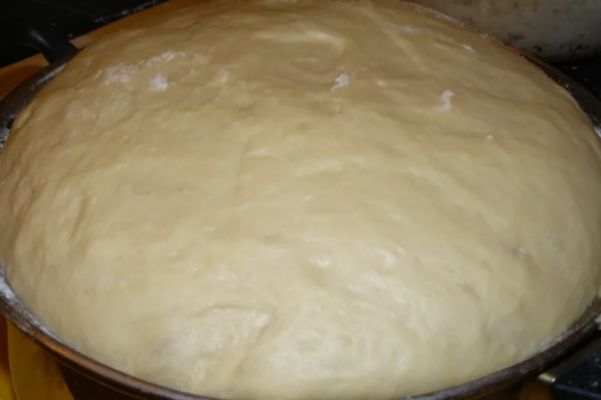
- Finally, add vegetable oil and knead the airy dough well.
- Cover the container with the dough with a towel or gauze and place it in the refrigerator to rest for 1 hour.
- After the dough has rested, it must be taken out and cut into two equal parts.
- Form the buns the way the hostess wants and place them on a greased baking sheet, where the buns will be baked.
- Don't put the buns straight into the oven. It is necessary for them to rise a little. Before putting in the oven, you need to brush the buns with egg.
- They need to be baked in an oven preheated to 200 degrees for about 40 minutes; the finished buns can be greased with butter.
Yeast dough buns can be sprinkled powdered sugar or cinnamon.
Butter buns made from yeast dough with cottage cheese

In order to diversify your diet, you can prepare delicious buns that simply melt in your mouth. You can choose cottage cheese as a filling, although both jam and condensed milk will do. You can also use dried apricots, raisins, etc. But now we will look at cottage cheese.
Set of products for preparing yeast dough
- 5–6 glasses of flour;
- half a glass of milk;
- half a glass of sour cream;
- 10 tablespoons of sugar;
- 100 grams of butter;
- 2 tablespoons vegetable oil;
- half a teaspoon of salt;
- 25 grams of yeast;
- 2 yolks for greasing the buns.
A set of products for preparing the filling
- 300 grams of cottage cheese;
- 100 grams of washed raisins;
- 2 tablespoons sugar;
- a little vanilla.
The secret of making buns with cottage cheese
- Pour the yeast into warm milk and add 2 or 3 tablespoons of flour, as well as sugar. Thus, we will have a dough that needs to be placed in a warm place for 5 minutes so that it can rise, otherwise the dish may not turn out.
- Add salt, eggs, butter and the remaining flour to it. Stir and pour in sour cream. Then knead the dough for 15 minutes.
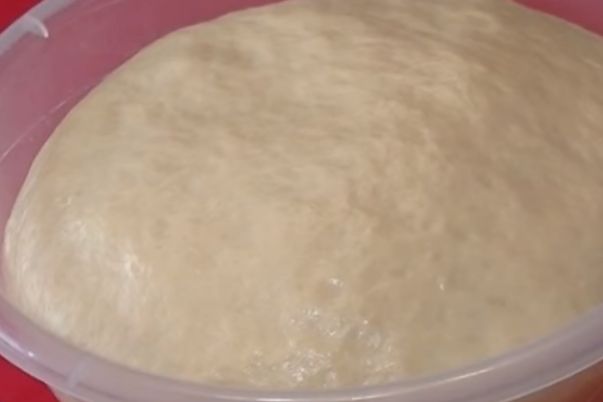
- Cover the dough with a napkin or towel and send it to warm place for it to sit there for 1–2 hours.
- Meanwhile, start preparing the filling. To do this, grind cottage cheese and sugar
- Add washed and dried raisins and vanilla to taste.
- Once the filling is ready, you can begin to form the buns. To do this, roll out the dough into a layer of approximately 2 cm.
- We cut the layer into triangles, put the selected filling in the center and wrap it in the dough, folding the triangle in half. And we pinch the edges nicely.
- Place on a greased baking sheet and leave for a while.
- After the buns have risen, they need to be greased with beaten yolk and put into the oven.
- Bake the triangles with cottage cheese for 20 minutes in a preheated oven.
These airy triangle buns will be an excellent addition to breakfast or dessert, and they are also convenient to take with you on a walk and, of course, treat guests.
Airy buns are not as difficult as they seem. You just need to put in a little effort and, of course, then the buns, which give a head start to store-bought ones, will begin to turn out better and better.
Bon appetit!
You might be interested in the recipe for yeast buns with kefir.
Exists a large number of options for preparing this pastry. Any buns, both sweet and simple, can be baked in the oven using yeast or non-yeast dough, kefir, milk, etc. The principle of preparing buns in the oven is very simple: after the yeast dough has risen, and the regular dough has been sufficiently infused in the refrigerator, you need to form blanks for the buns. The buns can be of any shape. The dough can be used to make balls, envelopes, bagels, etc. For sweet buns, a filling is also prepared, which can be anything: raisins with sugar, honey with nuts, jam, fruits, berries, etc. Yeast buns in the oven turn out more airy and tender. Children especially love buns made from yeast dough in the oven, because... They always turn out soft, appetizing and tasty. Preparing bun dough in the oven is as easy as shelling pears; you should definitely master this simple science. Delicious buns in the oven will delight you and your family on any day, on holidays and on weekdays, for breakfast with kefir or for dinner with aromatic tea. And it doesn’t matter what they are - sweet buns in the oven or simple buns. In the oven they acquire an original attractive appearance and an intoxicating aroma.
The recipe for buns in the oven is easy to follow even for novice cooks; it largely depends on the dough used. The recipe for yeast buns in the oven requires care in dosing ingredients and following the sequence of cooking steps. But, despite this, yeast dough is more often used for buns in the oven. Many people consider the recipe to be more complicated, but the main thing here is proper adherence to the entire process.
And to master the intricacies of baking this treat, it is advisable to use recipes with photographs of finished products. Buns in the oven, the recipe with photos of which you like more, most likely will turn out better for you.
For high-quality production of any buns, be they buns with sugar in the oven, yeast or plain, butter or kefir, our recommendations will help you:
When making buns from sweet dough, the filling should not be too sweet;
Before preparing the buns, carefully measure required quantity ingredients;
For this type of baking, the flour should be sifted and the milk should be heated;
The filling should not be too liquid, because... it may leak during baking;
It is recommended to leave the prepared sweet buns from yeast dough for some time in a warm place without drafts, the dough will acquire the correct consistency and structure;
It is advisable to let products made with yeast dough rise several times;
To prevent the dough from sticking to your hands, add a little vegetable oil to it;
If the dough doesn't roll out well, you can use a rolling pin instead glass bottle With cold water- the dough will roll out much easier;
To prevent the buns from burning while baking in the oven, it is recommended to pour a little salt under the pan. If the buns start to burn, you can cover them with damp paper.
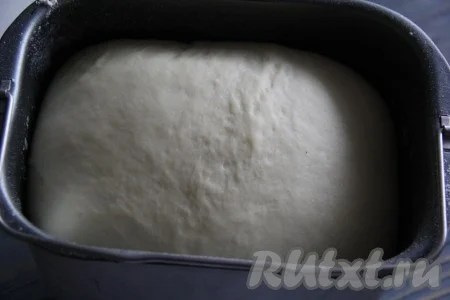
I kneaded the dough in a bread machine. Pour into the bucket warm water(no higher than 40 degrees), add butter and sugar. Then add flour, salt and yeast, placing them in different corners of the bread machine. Set the “Kneading dough” mode and turn on the bread machine. For me this regime lasts 1.5 hours.
 During this time the dough will rise well. If you prepare the dough by hand, then first you need to combine warm water, sugar and yeast, wait 15 minutes (the yeast will come to life and a fluffy “cap” will appear on the surface), then add salt, butter and flour. Knead tender dough. Leave it in the bowl for 1.5 hours, covered with a towel, the dough will rise well.
 Place the prepared yeast dough on a table sprinkled with flour, knead it, cover with a towel and leave for 35-40 minutes. Then lightly knead the dough and roll it out with a rolling pin into a layer 0.5 cm thick. Using a thin glass, cut out circles from the dough.
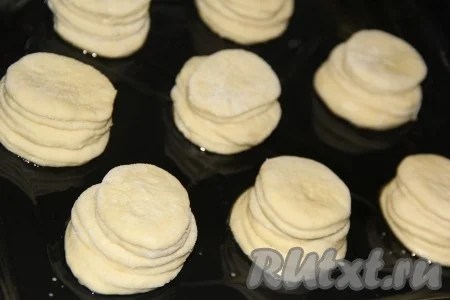
 Grease a baking tray with vegetable oil. Lay out a circle of dough, using a silicone brush, lightly grease the top of the circle with water, place the next circle on top, also lightly grease with water and place the third circle. Similarly, form all the other buns from three circles.
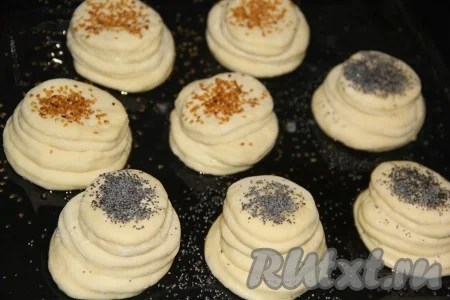
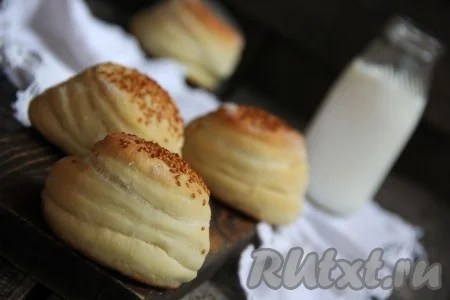
 Leave the buns to rise for 30-40 minutes. Then grease the top with water and sprinkle with poppy seeds or sesame seeds.
 Bake airy yeast buns in a preheated oven for about 25 minutes at 200 degrees (until golden brown). They will still grow in the oven.
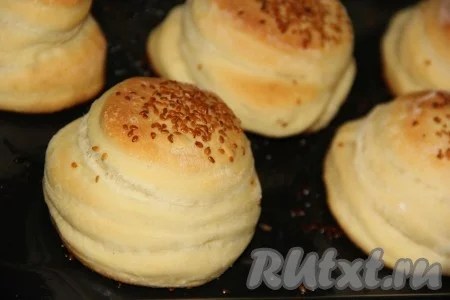 Airy buns made from yeast dough can be served warm, although they are also tasty cold and do not go stale for a long time.
 Bon appetit!
Hello, friends!
I miss baking, in the last issue we baked, and in this I advise you to move on to the sweet and charming yeast theme. On the agenda will be buns cooked in the oven. Let's learn how to bake them deliciously, so that the dough fits perfectly and the treats turn out plump and airy when they come out.
For this you will need great mood and a little bit of your patience. And a wonderful afternoon snack, and for some, a daily snack will be ready. But so that, as they say, the first lump is not a pancake, you need to know some subtleties and secrets.
After all, it is precisely such culinary products, in the opinion of many housewives, that cause a lot of trouble and many start and then abandon this idea. If you do it and follow the proven recipe, then everything will work out. So where can you find it? Right here).
A huge variety of options will help you find exactly what you are looking for. Plus, learn how to sculpt buns beautifully and attractively, because with a master class this will not be difficult to do.
Perhaps you have never bought products like those in this photo above in supermarkets, and have always wondered how chefs manage to present them so elegantly. Read about this and more below.
Does it ever happen to you that the result doesn’t always turn out the way you would like? And all because some mistakes may have been made.
Most main reason is the baking itself. It's not even dough for the most part. You can do everything perfectly, but then simply dry out the baked goods, and they will turn out stale and not tasty.
The dough will also begin to crumble and crumble, so do not overcook the buns in the oven.
And plus, of course, any baked goods like a warm temperature in the room, so that there are no drafts when rising.
We will need:
- Flour - 0.5 kg
- Milk - 1 tbsp. 250 ml
- Vegetable oil - 3-4 tbsp
- Fresh yeast - 25 g (or dry - 1 tsp)
- Eggs - 2 pcs.
- Granulated sugar - 3-4 tbsp
- Salt - 1 tsp
- Vanillin
Stages:
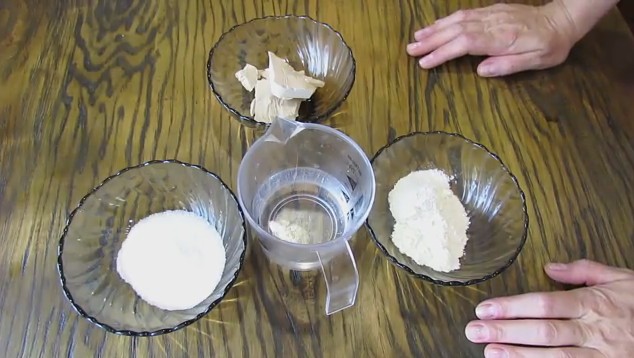
1. Prepare a dough made from milk and yeast. To activate the yeast, you need to add it to warm milk, touch it with your finger, your finger must be patient, do not make the liquid hot.
Also, to make everything play great, be sure to add sugar and salt to the mixture. And just a little flour, a couple of spoons. Stir and let stand and rise until you get a cap.

2. Then pour in vegetable oil and, of course, chicken eggs, stir. And now add flour.
Use flour sifted through a sieve so that the baked goods are as light as feathers and baked well.


4. Once it has risen, place the lump on the table and sprinkle flour on the surface.
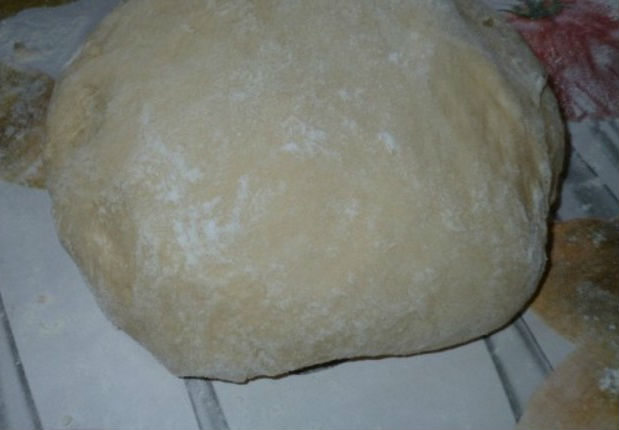
5. Roll up any buns or even pies and leave for another 40 minutes. And then bake in the oven for about 30-40 minutes until a nice light crust. Make the temperature 180-200 degrees no more. Monitor this process, do not overdo it.
If the top is already browned but the baked goods are not baked, place foil on the top of the baked goods.
These are real nice beauties, take a sample!

Lush yeast buns with kefir - recipe in the oven
In most cases, young housewives, and not only make dough with milk, I suggest first starting it with a fermented milk product. And next time try a different option.
This is because I like this method of baking much more. Look at the picture, the desire to eat has already played out. How cute and sweet they are. And if you pour aromatic fruit tea or a glass of excellent tea, it’s a fairy tale.
Oddly enough, there are still ways to a quick fix, where, in principle, the dough should rise once and you can already put the buns in the oven. And I’ll tell you about this some other time. I use it often, because sometimes I just don’t have enough time, and I want to please my beloved family.

We will need:
- kefir - 1 tbsp.
- sugar - 3 tbsp
- salt - 1 tsp
- dry yeast - 1 package 5 g
- vegetable oil - 5.5 tbsp
- flour - 3-3.5 tbsp.

Stages:
1. Start, as usual, by working your magic on the yeast. Since kefir is used as a basis here, it is necessary to dilute the yeast in warm water (3 tbsp), let it stand and bubble. For everything to go well, add sugar and salt to the water and stir.

2. Kefir and sunflower oil You will still have to warm it up slightly on the stove, up to 40 degrees. Then add the prepared dough and mix.

3. Add sifted flour and mix. Gradually add in parts until you see a steep mass.

4. It should not be too cool, in moderation, and not particularly stick to your hands. Next, cover with a lid and leave for 1.5 hours, and then knead it.

5. Meanwhile, make the filling, finely chop the apples and sprinkle them with sugar at your discretion. You can also put vanillin or cinnamon in the apples or in the dough itself.

6. Then form pies or donuts and place them on a greased baking sheet. Let it sit in it for about 30 minutes and let it sit for a while.
The top can be greased with yolk and milk so that they shine after baking, but this is not necessary.

7. Fry in the oven, set the temperature to 180 degrees, determine the time yourself, and pierce it with a stick, if it is dry, then take it out. Here is homemade baking, as always, beautiful and good. Bon appetit!

Puffed yeast buns with milk
Well, the previous recipe was based on kefir, but this one can be done with other ingredients. For my mom it is the most successful. You can bake any product from it, these include cheesecakes, curls and even bagels.
But, I want to be original and therefore I will show a method of cooking in the form of flowers. It will be such a clearing that you won’t be able to take your eyes off it. And just make the middle out of jam, just take it in more than one color. This is of course not necessary, but it will look even more stunning.
Use only when it has cooled down and, to avoid dryness, drink it with any yoghurt or cocktail. As they say, pamper yourself and your household.

We will need:
- cow's milk - 250 ml
- vegetable oil - 1 tbsp
- butter - 90 g
- chicken egg - 2 pcs.
- granulated sugar - 4-5 tbsp
- wheat flour - 0.5 kg
- salt - on the tip of a knife
- dry yeast - 2 tsp
- jam, marmalade or marmalade
Stages:
1. Be sure to warm the milk so that it is 40 degrees, this is the state that will force the yeast to do its intended job. But, be careful, too hot liquid will kill them.
So, add yeast to a cup of warm milk, set aside for 10 minutes until a cap appears. Next, stir and add granulated sugar and butter, which you melt in a water bath. Add a pinch of salt and of course eggs.
By the way, this option can be used for a bread machine, then add all the ingredients to the cup and select the appropriate mode (kneading the dough for 1.5 hours) so that everything is thoroughly mixed.

2. It should look like a lump, which you wrap with a towel on top and leave to rise for 1.5-2 hours.
It is impossible to say the exact time, since the room temperature is different for everyone. The main thing is that it doubles in size.

Once up, beat him up and move on to the next step.
3. It is necessary to make a large cake from a small piece, the thickness should reach about 1.5 cm. And using a round mold, make suns.

4. Then make cuts in a circle with a knife. But the ends need to be pinched down a little.

5. Let the flowers stand and gain “strength”. The baking sheet must be greased with vegetable oil so that nothing sticks. Press down the very center with your finger to form a core. Place a berry or jam.

Leave the baked goods to stand and rest for 30-40 minutes, while covering with a napkin so that nothing dries out during this time.
Remember that after a certain period of time the treats will increase in size, so do not place them close to each other.
6. Bake in a preheated oven at 180 degrees, about 25-30 minutes. Cover the top with foil.
The color should be golden and attractive so that you immediately want to put it in your mouth. Bon appetit!

Lacy sweet pastry with poppy seeds
You want your dough to be soft and tender. And the fragrant filling only came as an addition. Yes, sure. Then, what is needed for this to make the plan come out flawless?
You need the right recipe, namely the proportions of the ingredients and a great, inspired mood, without this you can’t go anywhere.
You also know what they say: if you have a loss of strength or feel some kind of emptiness, then eat a poppy cheesecake and all the illness will go away by itself. Here's a trick, check it works).
I suggest you make a video based on this and you will definitely be pleasantly surprised. The result will be baked goods with a crispy crust on the outside and a poppy seed filling on the inside that will melt in your mouth. After all, it is prepared according to a special recipe from Olga Matvey’s grandmother.
Breakfast buns are like fluff with sprinkles
As my husband likes to say, if you want to gain extra pounds, then run and eat any bun. In some ways he is right, if you don’t take up fitness later.
Personally, our family loves to gobble up such things, we eat them, but the noise is worth it. But we definitely flavor the buns with something, for this we use poppy seeds, raisins, jam, preserves or something else. Which is what we'll talk about now.
I remember when I was at school I always bought a large bagel, and on top it was sprinkled with some kind of sweet crumb. I never knew that it could be prepared by hand. It turned out that everything could not be simpler.
We will need:
- flour premium— 0.6 kg
- butter - 0.1 kg
- chicken yolks - 4 pcs. and plus 1 more for lubrication
- granulated sugar - 90 g
- milk - 250 ml
- dry yeast - 8-11 g packet
- vanilla sugar - 0.5 tsp
- salt - 0.5 tsp
For sprinkling:
- flour - 60 g
- sugar - 60 g
- butter -35 g

Stages:
1. Bring the milk to a warm state, then add dry yeast plus a tablespoon of sugar and two tablespoons of flour. Mix with a whisk. Cover with cling film and keep in a warm place until the mass increases.
Then add the yolks, remaining sugar, salt and vanillin. Stir with a whisk and gradually add flour. Then melted butter, sifted flour again and knead to obtain a mixture of homogeneous consistency.
Work with the dough with your hands; it should not stick to your hands.

Divide into equal pieces of approximately 60-65 g, form them into cones. Or use any other form. Place them on a baking sheet greased with vegetable oil and wait about 20 minutes for them to rise and expand further.

3. Meanwhile, do the following work. Make the topping by pouring sugar, flour and softened butter into a cup.

4. Mash all these three ingredients with your hands and get that same crumb.

5. To ensure it sticks well, brush each bun with yolk. This is what will happen.

6. Baking time - 30 minutes, and temperature - 180 degrees. Have a great tea party. It turned out to be simply delicious, a treat for everyone.

Swan buns: oh-so delicious and so light!
Well, have you tried the buns with sprinkles? Now let's move on to creative process and we will sculpt handsome men.
Moreover, to make them shine, add sugar to them instead of filling, and then turn it out slightly. You don't understand what I mean. Then I hasten to please you. Prepare everything you need and go ahead.
Imagine the dough will be on the water. Super! Is not it? You don’t always have milk or kefir on hand, but you always have water and it turns out great. For many families, especially when there is a crisis, it couldn’t be better. Budget-friendly, classy and also very pretty.
We will need:
- pressed yeast - 30 g
- water - 100 ml
- sugar - 150 g
- butter or margarine - 100 g
- salt - on the tip of a knife
- egg - 1 pc.
- flour - 550, maybe a little more
Stages:
1. For the dough, prepare 100 ml of water, plus 1 tbsp of sugar and 1 tbsp of flour and 30 g of yeast. Mix all this, remember that first dissolve the sugar in warm water, and also dissolve the yeast with your hands or a spoon. And only after that add flour.
It’s easier to mix by hand, it comes out faster and without lumps.
Then cover the dough with a napkin and wait until the yeast foams. It will take literally 15 minutes, maybe 40, depending on the temperature in the room.
2. Add 150 g of sugar, one chicken egg and melted margarine or butter to the prepared dough. Mix with a whisk. And be sure to add a pinch of salt.
3. Sift the flour and add to the bowl, knead the dough. It should be non-sticky, elastic and soft. Place it to proof, and then form into balls, while greasing your hands with vegetable oil.
The balls should be the same size.


5. Fold the flatbread in half to make a dumpling or cheburek).

6. And carefully make cuts along the fold with a knife. There should be exactly three of them.
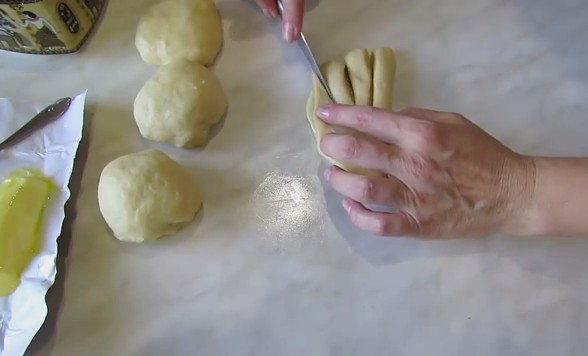
7. A top part bend it into the shape of a head, and you get a bird.

8. Cover the eyes with peppercorns. Leave them on the leaf to double in size. To prevent the dough from drying out, place paper towels on top.

9. Bake in a preheated oven at 180 degrees until done. Ruddy and golden crust. It will take approximately 15-30 minutes. And these are the magical swans that look like something out of a cartoon. Eat for your health. Use when cooled.

Bagels with jam
You can also make croissants or something similar at home in your kitchen. You think it’s too difficult and beyond your power. It turns out that if you look closely, rolling it into such a delicacy is easier than ever.
Moreover, if everything is shown in detail. A great gift if you put such a treat on festive table, children and adults will definitely appreciate it. And for every day, too, this dish deserves attention. Experiment.
We will need:
- Flour 750 g
- Milk – 300 ml
- Granulated sugar - 4 tbsp. l
- Salt - 0.5 tsp.
- Dry yeast - 1.5 tsp. (fresh 35 g)
- Egg - 3 pcs. + 1 for lubrication
- Vegetable oil 4 tbsp. l
- Apple or plum jam - 0.5 kg

Stages:
1. Heat the milk to 35 degrees and add sugar, salt and dry yeast. And put flour here (a couple of spoons), sift it directly over the cup.
This is done in order to enrich the flour with oxygen and to prevent excess debris from getting caught.
2. Then stir and leave for 1 hour. Start kneading the dough. Take a large bowl, pour in two eggs, beat them with a whisk and vegetable oil. Next, add the dough and, of course, flour, in small portions.
The dough should not be clogged with flour. To prevent it from sticking to your hands, lubricate your hands with vegetable oil.
Do the kneading not in a cup, but on a table or board greased with vegetable oil. Afterwards, roll it into a ball and place it in a clean bowl. Grease the bottom and sides of the bowl with oil. Cover with cling film and let stand warm for 1.5 hours.
Remember that there should be no drafts in the room, otherwise the dough may fall.
3. After this period of time, knead and you can begin to form the finished products. To ensure that the bagels are the same shape, weigh on a scale, each piece is 40-45 g.

2. Roll each donut into a circle with a rolling pin, put a piece or spoonful of jam. And then twist.

3. But don’t do it all the way, cut the other part of the circle into 7 parts.

4. And then brush the top with egg. And wrap each strip in the same way as shown in this picture. Wrap the ends under the very bottom. Give it a bagel shape, make a rainbow.

5. Place it on a baking sheet lined with parchment paper and greased with oil. Let stand for 30-40 minutes. Before baking, brush each piece with egg.

6. The first batch is ready. The aroma is simply incomparable. By the way, they bake for about 30-40 minutes in a preheated oven at 180 degrees. But then they get caught up in literally 10 minutes). Bon appetit, friends!
By the way, you can also sprinkle with coconut flakes or sesame seeds to give it more chic.

Homemade Cinnabons Recipe
I remember back in student years and I ate such curls with great joy, but I couldn’t even think that they were called that. Interesting name, sounds funny.
By the way, last year this pastry blew up the Internet; there were so many descriptions and videos that it was crazy. In this post I will show only one performance. And then there will be a separate article on this topic. So don't miss it, it's on its way.
Interesting! In essence, this is ordinary fast food, which is sprinkled with cinnamon, but today a wide variety of types allows everyone to find their own unique masterpiece.
Moreover, the most piquant and amazingly tasty thing in this culinary creation is the gravy prepared using a special technology.
Awesome snails with raisins
If you want it to be budget-friendly and at the same time tasty and the dough to be soft and porous, then add fresh steamed raisins to the dough. He will attract everyone to him. After all, it is very common in such sweet bread.
From this quantity you will get about 25 buns, which can be treated to everyone. What could be better than homemade buns, especially if you made them yourself.
By the way, in addition to raisins, you can also use poppy seeds, and you will get two options; this is, of course, at the discretion of the chef).
We will need:
- premium flour - 0.8 kg
- cow's milk - 200 ml
- sugar - 145 g
- instant yeast— 11 g
- butter - 200 g
- eggs - 3 pcs.
- poppy seed – 55 g
- raisins – 90g
- butter for lubrication— 50 g
- vanillin - at the end of the knife
Stages:
1. Cow's milk heat in a water bath until warm. Add yeast, sugar and a spoonful of flour. Stir and leave the cup covered with a napkin for 40 minutes until the mixture bubbles.
Then add chicken eggs and melted, but not hot, butter, otherwise the eggs will curdle. Stir. Add vanillin and sifted premium flour or use all-purpose flour for general purpose.
The flour should be sifted in advance and be at room temperature, not cold.

Knead the elastic dough and knead it on the table surface. Thanks to the butter, it will be elastic and your hands will like it.
If you put margarine instead of butter, the baked goods will not go stale for a long time. Great, isn't it?
It should sit for about an hour in a bowl. closed lid or a towel, double in size. Apply it and leave it to rise one more time.
2. Then divide into two parts, roll out into a large circle with a rolling pin. Grease it with softened butter and sprinkle with raisins and granulated sugar.
Pour boiling water over the raisins in advance and let stand for 15 minutes, then drain and dry with paper towels.

If you also take poppy seeds, then do the same with it, brew and drain the water. If desired, you can also crush it using a whisk in a mortar. Grease the second flatbread with butter and sprinkle with poppy seeds and sugar.
The dough layer should be approximately 0.5 - 0.6 mm thick, measuring about 45 cm x 29 cm.
3. Roll it into a roll or sausage. Cut into pieces, try to keep them the same, around 2-2.5 cm.

4. Place the treats on a piece of parchment paper, wait again for another 25 minutes, and then bake in a preheated electric oven until done. So that a brown crust appears.

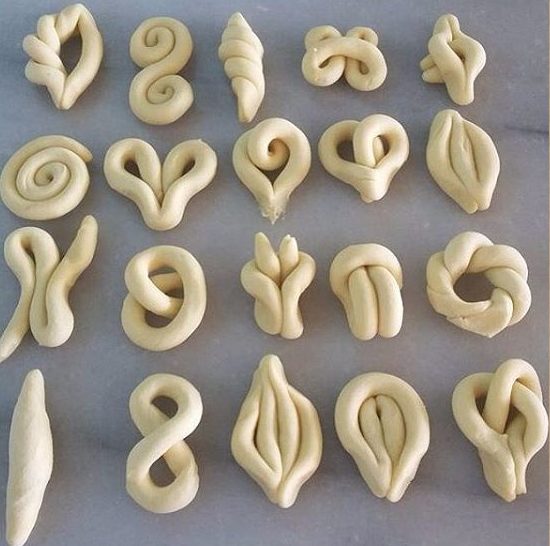
Master classes on making beautiful buns
Before you start making these crafts, you need to make sure your dough rises well. Then you need to roll it into a flat cake, or make sausages, etc. All this will depend on the form you want to get.
Today there are a huge number of them. Let us now consider only the easiest ones, which even a child can handle. If you want to create something more serious, then expect another series of articles.
In any case, no matter how you design it, it will still come out great if you do it with love.
Tip of the day! To make the buns shine, they need to be greased after baking. sugar syrup. To do this, take 2 tablespoons of water and 1 tablespoon of sugar and bring this liquid to a boil and boil for 1 minute, and then cool.
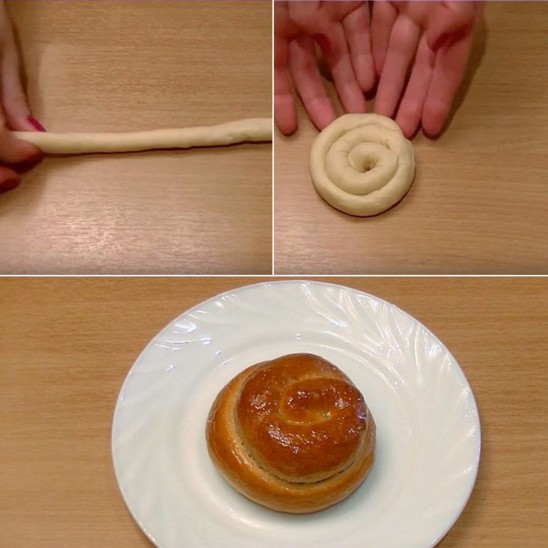
I really like the snail shape. For this purpose, you need to roll out the dough into a flagellum and then roll it clockwise. You will get something like this.
Or you can actually create something weird and make a lamb, for example.

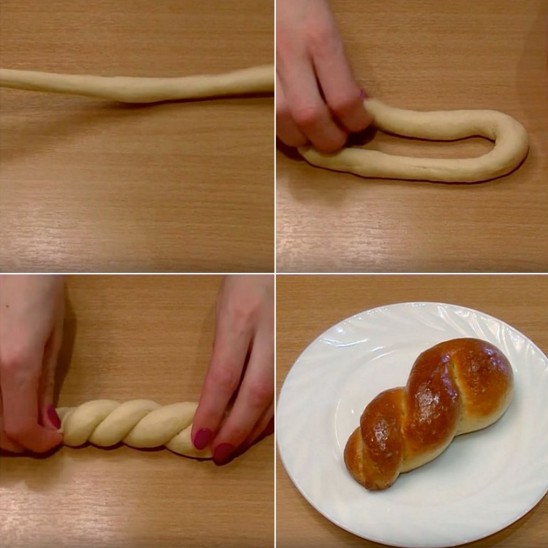
The next option is a curled bun, the essence is the same, form a flagellum with your hands, and then twist each end in a spiral.

There is nothing easier for children than to recreate a pyramid from koloboks.

Or you can use such a masterpiece. Such a sweet treat will work.

This wrapping method is called two tails. Some may be reminded of folding a bow.

The most beautiful, but a little labor-intensive method, since you need to make a lot of blanks in the form of circles, and then put them in a row and you will get a rose.

Now tie a knot.

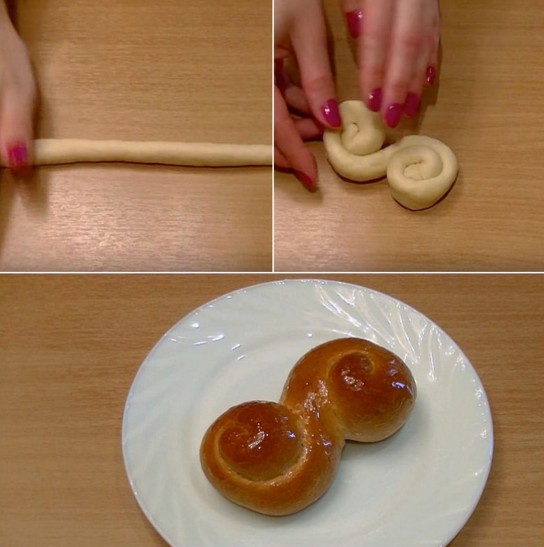
Or you can make a curled figure eight. Or you can make a dollar.
And another popular store-bought option is the shape of a curly roll.


Or here’s another wonderful masterpiece in the form of a chick.

Or real birds.

In general, you can do magic on the dough in different ways. The main thing is just to want it, take a look. You can even wrap it with a heart.
That's all my friends are. I’m glad I was able to introduce you to such baked goods as buns today. Let them turn out to be the most delicious and incredibly lush and beautiful.
I wish you to be in a good mood and always have inspiration. Don’t forget to join the group in contact, write reviews and wishes. Bye everyone!
To make baking delicious, you need to prepare a good, airy and soft dough. After all, it is by this that not only baked goods are judged, but also the housewife herself: how skillful she is.
There are a lot of recipes. After all, it is used not only for buns, but also for pies, pizza, and Easter cakes. The list could take a very long time. Also, the flour mixture can be either shortbread or butter.
Many people use methods that they inherited from their mothers and grandmothers. But not everyone is so lucky. Beginning housewives are constantly looking for their own option. They search, ask friends or relatives. But even if you knead it exactly according to the recipe, there is a chance that it won’t work out for you.
After all, even experienced housewife sometimes fails. You don’t always want to show the result of your masterpiece. And all because the products did not come out quite as airy and tasty.
There are simply rules that you need to know and always apply. Excluding any item will lead to another failure.
Today I will share with you not only my cooking secrets, but also several recipes that will not leave you indifferent. And you will definitely want to bake something!
Many of us make our own instead of buying it from the store. And of course, we are faced with the fact that it doesn’t always turn out the way we would like. It's simple, there are a few rules, following which will help us make him lush and soft.
1. Yeast: it should only be fresh. Always check the manufacturing date and expiration date. Believe me, you can actually buy them in a store that are already expired.
2. The milk or any other liquid you use in cooking should be warm. Never use food from the refrigerator for dough. Yeast begins to work only when warm temperature. It should be heated slightly above room temperature. This will be an ideal environment for them.
3. Oil it should also not be cold or hot. It is melted in a water bath so that it does not get lost beneficial features, and cool a little. If it's hot, the yeast will simply die and you'll have to start all over again.
5. Flour: always sift it through a sieve. Don't neglect this point. Since in the process it is saturated with oxygen, which gives our products fluffiness and airiness. It will be better if you do this more than once.

6. Eggs: the product itself depends on their quantity. If you need butter, then put more of them than usual for pies. For 3 pieces you need 20 grams of yeast.
7. Gravity: The dough will take longer to rise if you overdo it with sugar, eggs and butter.
8. Salt: don't neglect it. They add flavor to the products, as if shading the sugar. Even a very small amount will not allow the product to become bland.
9. Temperature: For the dough to ferment well, it needs warmth. Choose the warmest spot in the room and use it for elevation. If there is none, then use the oven. Warm it up for two minutes, check the temperature with your hand (it shouldn’t be hot). This method allows you to reduce the infusion time.
10. Mixer: When kneading, do not use mechanical devices. Of course, they make our task much easier, but the dough loves affection. Therefore, it is better to use a whisk or a spoon, and when using them becomes impossible, use your hands.
11. A flour product is considered ready when it is sticky, but does not stick to your hands. If it is not like that, then there is not enough flour.

12. Time: the longer we knead it, the more carbon dioxide comes out, which helps oxygenate our mass.
13. Draft: the dough does not like it when there is wind in the room. This cools it down, which means it won’t be as manageable and won’t be fluffy. The oven should also not be opened so as not to cool it. Avoid temperature changes.
14. Mood: always cook only with good mood. Then not only the products will be delicious, but so will everything you prepare.
Recipe for delicious yeast dough with milk
This recipe is also called sponge recipe, but it does not require much time to rise. On average, it takes about 1.5 hours of total time.
You can use it to make not only buns, but also pies, pies, cheesecakes and many other baked goods.

Ingredients:
- Milk – 2 glasses;
- Pressed yeast – 30 gr. (11 grams dry);
- Flour – 700 gr.;
- Sugar – 5 tablespoons;
- Salt – 1 teaspoon;
- vegetable oil – 1/3 cup;
- Vanillin – 1 pinch (optional).
Preparation:
1. Take a small cup. Put yeast in it and add 1 tablespoon of sugar. Add 3 tablespoons of warm milk. We begin to thoroughly rub everything until completely dissolved. Then add 2 tablespoons of flour and mix. Let stand for 10 – 15 minutes. The mass should rise like a cap.

2. Sift all the flour into a deep bowl and pour the remaining bulk ingredients into it: salt, sugar and vanillin. Stir lightly. Make a well in the middle and pour in milk and vegetable oil. We also transfer the finished dough to them. Mix first with a spoon. Then grease your hands with oil and continue kneading. Transfer the finished dough to a larger container and cover with a clean towel. Leave to rise for 1 hour. Then we knead it with our hands again and begin to prepare delicious rolls.

The next recipe will be no less tasty.
Yeast dough with kefir for buns
I really like this method. After all, you can do anything from it. The buns turn out to be the most delicious and remain soft for a long time.
Flour products using kefir can be used for pancakes, pancakes, pies and more. I think you will find many uses for it.

Ingredients:
- Kefir – 300 ml;
- Flour – 550 gr.;
- Pressed yeast – 15 gr. (5 grams dry);
- Butter – 50 gr.;
- Chicken egg – 1 pc.;
- Salt – 0.5 teaspoon;
- Sugar – 100 gr.
Preparation:
1. Warm up the kefir a little. Crumble the yeast into the container in which we will knead the dough. Add kefir to them and stir with a whisk until they are completely dissolved.

2. Melt the butter in a water bath and cool. Pour it into the yeast mixture. Now we send them all the remaining ingredients: salt, sugar, sunflower oil, egg and part of the sifted flour. Mix first with a spoon and then with your hands.
To prevent the dough from sticking to your hands, grease them with vegetable oil.
3. Sprinkle the table with flour and continue kneading on it for 5 - 7 minutes. After this it will become soft and obedient.
4. Grease the cup with vegetable oil and transfer the mixture into it. Cover cling film. Leave to infuse for 1.5 hours at room temperature. During this time it will increase in volume by 2 times. Keep this in mind when choosing your bowl size.

After time, knead it a little and you can form buns.
How to make sweet dough with sugar
We will make this recipe using the steamless method. It turns out to be quite sweet, since quite a lot of sugar is used here. The products will be incredibly tasty.
Ingredients:
- Water – 100 ml;
- Milk – 200 ml;
- Pressed yeast – 15 gr. (2 teaspoons dry);
- Chicken egg – 2 pcs.;
- Flour – 800 gr.;
- Butter – 100 gr.;
- Sugar – 150 gr.;
- Salt – 0.5 teaspoon;
- Vanillin – 2 pinches;
- Vegetable oil – 2 tablespoons.
Preparation:
1. Crumble the yeast into a deep container and pour warm water into it. Stir and add milk, which has been slightly warmed.
2. Melt the butter and cool. Pour into our mixture. We also put eggs, sugar, salt and vanillin into the container. Whisk.
3. Sift the flour through a sieve and mix it into the mixture in parts. The amount of flour is approximate, since it is different for everyone. If it is runny, add more. At the end, add vegetable oil.
The flour mass should be soft and elastic.
4. Transfer it to a larger container, having previously greased it with vegetable oil. Cover with cling film or lid. Leave to increase in volume. Then knead again and cover again. After 40 minutes you can sculpt it into whatever you want.
Bread machine dough recipe
Kneading this method does not happen with your hands, but in a bread machine it is very simple. Because we don't need to put a lot of effort into it. It turns out just as tasty and airy.

Ingredients:
- Flour – 500 gr;
- Water – 100 ml;
- Milk – 150 ml;
- Chicken egg – 1 pc.;
- Sugar – 3 tablespoons;
- Salt – 1 teaspoon;
- Butter – 70 gr.;
- Dry yeast - 2.5 teaspoons.
Preparation:
1. Pour water and milk into a container. We also send the egg and salt there.
2. Sift the flour and pour into a bowl along with sugar and yeast. Place soft butter there too.

3. Place the container in the bread machine and turn on the “ Yeast dough" Now we just have to wait sound signal, notifying us of readiness.
Quick butter dough with dry yeast
This recipe is perfect for those who are in a hurry or don't like to wait for the dough to set. It is also good for pies and buns baked both in the oven and in a frying pan.

Ingredients:
- Water – 3 glasses;
- Flour – 6 tablespoons + 8 glasses;
- Sugar – 4 tablespoons;
- Dry yeast – 1 tablespoon;
- Salt – 1 pinch;
- Vegetable oil – 1 cup.
Preparation:
1. First we will prepare the dough. To do this, pour warm water into a deep cup. Add 6 tablespoons of flour, salt, sugar and yeast to it. Mix with a whisk and leave for 10 - 15 minutes until a yeast cap appears.

2. Pour vegetable oil into the prepared dough and add flour. Knead the mixture first with a spoon, then with your hands on a floured table. Ready dough does not stick to hands.
It can be used immediately or wrapped in a bag and refrigerated until needed.
Such wonderful recipes, and I’m sure any of them will become your favorite. Now you can always please your loved ones with delicious buns.
And I wish you a pleasant tea party!