Do you still remember how we used to watch movies using a VHS tape recorder or DVD player? Before enjoying watching a movie, sitting comfortably on the sofa, it was necessary to perform a kind of ritual. We inserted a disc into the player or a cassette into the tape recorder and pressed a couple of buttons on the remote control. And before that, you should have spent a little time setting up the equipment once. Everything was simple and convenient. With the advent of computers and unlimited Internet in our homes, it has become much more convenient and at the same time a little more difficult. We had access to so many films that a disc collection that had once been a source of pride was now nostalgic at best. At the same time, we had the opportunity to master the capabilities of new technology.
A modern TV has already become a computer in itself, but still connecting a regular PC or laptop to it opens up interesting possibilities.
No matter how good the monitor is, the TV will be better for viewing. First of all, due to bigger size screen, and often due to higher image quality. After all, TVs are created taking into account the wishes of movie lovers. At the same time, using the TV as a monitor, you can not only experience the bliss of watching movies. It’s also great to play games on the big screen, watch photos and videos on YouTube, etc. You can even chat in in social networks and on Skype. In general, the TV can be used as a monitor. Believe me, it's worth a try! In addition, by connecting the TV to the computer, you do not need to disconnect the monitor. You can use both displays in turn. For example, watch movies on a large panel, and surf the Internet on a monitor.
We will tell you how to connect your TV to your computer. Connecting a computer and laptop to a TV is the same. Therefore, our advice is relevant in both cases. We will look in detail at how a computer is configured using Windows 7 as an example. This version of the system is often installed on home computers.
The easiest way to connect is with an HDMI cable. In household audio and video equipment, this interface has firmly taken its place as the best, and now it has begun to be used in computer technology. Your TV, if it is a modern LCD or plasma model, will probably have a corresponding input. If there are several versions of the HDMI standard. Now almost all AV equipment has already switched to HDMI 1.4 (1.4a or 1.4b), which fully satisfies our needs, including the transmission of Full HD 3D video.
PC IN - this is often called the VGA input (PC input), but this is already an obsolete option

Our choice is HDMI!
First, check if your desktop or mobile computer has it. The HDMI port of a desktop PC should be found on the rear panel system unit(more precisely, on the motherboard or video card), and for a laptop - on the right or left side of the case. Is there such a port? Fine. You will need an HDMI cable. On one side it connects to the computer, and on the other to the TV. The advantage of HDMI cables is that their length varies from 1 to 20 meters. Select the cable of the length you need - do not overpay for “extra meters”. The second advantage of HDMI cables is that they transmit not only video, but also audio. By connecting your computer to your TV via HDMI, you can use the TV's built-in speakers. If you don't have acoustics at hand, then this is a good compromise. Even if the TV speakers are modest, they are better than no sound at all.
So, for clarity, let's divide the first connection process into steps:
1) First of all, unplug your computer and TV. If your TV is connected to a cable from a shared antenna, disconnect it for now.
2) Connect the HDMI cable to the appropriate ports on your TV and computer. Connect both devices to the network.
3) Turn on your computer and wait for Windows to load.
4) Turn on the TV and select in its menu (using the remote control or buttons on the body) the HDMI input to which you connected the cable. Modern TVs usually have several such inputs. In the TV menu they will be designated something like this: HDMI 1, HDMI 2, etc.
Before diving headfirst into the world of cinema, you should also configure Windows. So that the computer perceives the TV as a monitor. Let's divide the setup process into several steps:
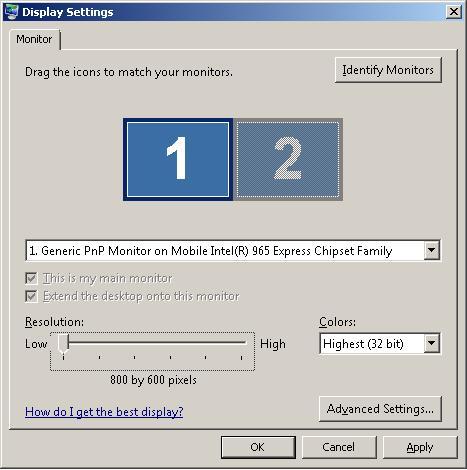
1) Right-click on the Windows “Desktop” and select “Screen Resolution” from the context menu. The Screen Settings menu appears. You will see which monitor is connected to the computer, what resolution it is set to, and what image orientation is selected.
2) Click on the “Find” button that the computer has detected the TV. In the “Screen” line, in addition to the monitor, a second item will appear (in our case, this is SONY TV - see screenshot). This is our TV. Yours will most likely have a different name. In the future, Windows will “remember” the second monitor and it will be displayed in this menu when a TV is connected. By default, “Orientation” will be landscape - there is no need to change this item. Make sure that the proposed resolution (in the item of the same name) matches the resolution of your LCD or plasma panel. By the way, if in the TV settings there is an option to display the image pixel-to-pixel, activate it.

3) Here a surprise awaits us. Windows allows you not only to use a TV instead of a monitor, but also to use it together with a monitor. There are two use cases. First, you can “clone” the image on the displays. Moreover, even if they have different sizes, resolutions and aspect ratios. Secondly, you can extend the “Desktop” to both screens. In this case, for example, a child can watch cartoons on TV, and you can go about your business on the computer using the monitor. You can select a mode in the “Multiple screens” line.
4) When connecting your TV with an HDMI cable, you can use its built-in speakers. After all, the HDMI interface provides for the transmission of video and audio over one cable. You just need to tell Windows that you want to use the TV for audio output. In Control Panel, select Sound. A menu of the same name will appear, in which you will see a list of sound devices. It should have an item with the word HDMI in the title (we have AMD HDMI Output). Select this item and click on the “Default” button - the sound will go to the TV speakers. When you turn off the TV, the corresponding item in this menu will disappear... and will appear the next time you connect. And to activate a regular sound card, you need to perform a similar operation in the “Sound” menu (for us it’s “Speakers”).

What if your computer or laptop does not have an HDMI port? In this case, you need to use alternative interfaces: DVI, DisplayPort, or use a device such as. Your computer should have a DVI or VGA port, because a monitor is usually connected to it, but DisplayPort is still rare. In terms of quality, it is best to use DVI or DisplayPort. TVs usually do not have such inputs, so you need to use an adapter or a special DVI-HDMI or DisplayPort-HDMI adapter. If your TV has such an input, use a regular DVI-DVI or DisplayPort-DisplayPort cable. And the connection and setup process is the same as with HDMI. Except for the step about setting up the sound.

Memo: what connectors do modern TVs have (HDMI 3, 4, 5 and 6 on the left in the top row)
If your PC does not have an HDMI, DVI or DisplayPort port, you can use a VGA connection or another analog interface (S-Video, etc.). True, this option will not be ideal in terms of signal transmission quality. Therefore, an analog connection for modern TVs should be used when it is not possible to connect via one of the digital interfaces.
When connecting the TV to a PC to watch video, you do not need to make any special settings. You watch movies the same way as before: use the same player and watch the same files. When you use a large TV screen for games, then in their graphics settings, select the same screen resolution as your TV. In the vast majority of cases - HD (1366×768) or Full HD (1920×1080). Also, check your TV's settings to see if it has a special Game mode. When you select it, the TV is optimally adjusted to make games look impressive, and responds to commands most quickly, which is important for dynamic games. By the way, some models with passive 3D technology have a two-player game mode on one screen with a different image for each person (for example, LG 55LM960V and Philips 46PFL8007T).

IN Lately TVs have received many new features. Thus, it is difficult to imagine modern TVs without the function of displaying 3D video and the Smart TV software shell. In addition, their switching capabilities have improved. New models of LCD panels and plasmas can be connected to a computer wirelessly - via Wi-Fi! More precisely, the TV connects to a local wireless network and receives content from the computer. Fortunately, most TVs of the latest generation have a built-in Wi-Fi module. If you don't have a Wi-Fi network, you can connect your TV the old, proven way - via Ethernet. IN household appliances The RJ-45 port (also referred to as LAN, Ethernet) was practically not used before, but now many TV models have it. The main thing is that the TV supports the DLNA (Digital Living Network Alliance) standard, which is no longer uncommon these days. By the way, most Smart TV functions require an Internet connection, so it’s worth taking care of it one way or another.

Wireless TV connection has become a reality. Sometimes it is not clear to which source it is connected
Connecting mobile devices to the TV
What about a computer - now you can even connect a smartphone and tablet based on Android and iOS to your TV. True, only new and often not budget models. For example, the VIERA remote App allows you to use your smartphone and tablet as a remote control and content source for Panasonic TVs. And Samsung has developed a proprietary system for exchanging content between Allshare devices. Thanks to it, Samsung smartphones and tablets also transmit video to TVs of their own brand and serve as remote controls. Philips has this feature called MyRemote. In any case, you should install special program on a smartphone or tablet.

No, it's not a remote control that big... it's a tablet
Of course, Apple could not ignore such an interesting direction. The company may not yet have its own TVs, but it does have a content store and various devices who can play it. And thanks to the Apple TV media player, you can stream content from your iPhone, iPad, iPod and Mac to your TV screen (of any brand). Apple TV connects to the TV with an HDMI cable, and receives signals from gadgets via Wi-Fi (using proprietary AirPlay technology). Since you can transfer not only videos, but also photos and music, the content that you have in iTunes will be available on the big screen. In addition, Apple TV allows you to use popular online services YouTube, Vimeo and Flickr and take content viewed on your Mac offline. By the way, there are other media players designed to work with Windows and provide similar capabilities. Moreover, they are compatible with services like Megogo and can even download content from the Internet.

A universal standard has already been developed - MHL (Mobile High Definition Link). The standard is still in development, but some TVs and monitors already support it. In this case, using the appropriate cable, you can display the image from the gadget (which must also be compatible with MHL) on a large screen, almost the same as from a computer.

So, to summarize, we predict that TVs will soon be able to display content from various devices: simply and wirelessly. In the meantime, the simplest and most accessible way to connect a desktop PC and laptop to a TV is to connect them using an HDMI cable. By the way, the method we described is also suitable for connecting a second monitor or projector.
You can read about how to connect a TV to a computer below on this page.
Part 1. Before you start
To successfully connect a TV to a computer and output an image to the TV, you must first make sure that both the TV and the computer have the necessary outputs and inputs for connecting the appropriate cables, as well as all the necessary adapters:
If you have a desktop type computer (stationary computer), then you need to make sure that on the back side of the system unit the video card has at least one of the following outputs and the TV must have at least one of the corresponding inputs:
 |
- intended for outputting an analog signal. You can connect a cathode ray tube (CRT) or liquid crystal display (LCD) monitor to it, as well as a TV with given input present. |
 |
– analog video output for connecting a TV. The signal quality is higher than when connecting via the VGA output. |
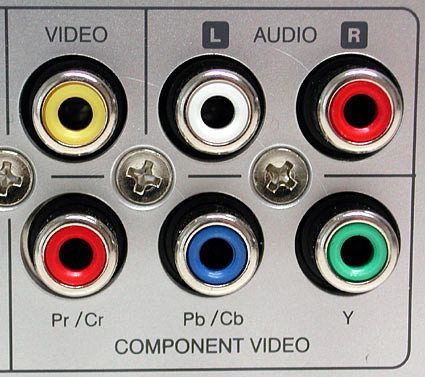 |
Composite video output (“tulip” or RCA) is a traditional analog video output found on most TVs. |
 |
DVI output; - intended for outputting a digital signal. You can connect to it any modern LCD monitor and TV that has an appropriate input for connection. Sometimes it is necessary to use special adapters to provide signal output to another connector (see the description below “Required cables and adapters”). |
 |
version provides a picture resolution of 2560x1440 pixels with a billion (48-bit) color shades and progressive (full-frame, not interlaced) scanning. In addition to HDTV, all major TV formats are supported, including PAL, NTSC, ATSC, etc. Synchronization of video and audio by markers is provided: movements of the actors’ lips. |
The combinations of these outputs on video cards for Desktop computers along with connectors for connecting monitors can be different (see below):
 |
 |
If there is a need to connect a TV to a computer with an existing monitor, but there are no S-Video, composite or DVI outputs on the video card, then you can replace the existing video card with a new or used one with such outputs. For high-quality viewing on a TV, we recommend having a video card with a video memory capacity of at least 128 MB and higher (the larger the video memory, the faster the video signal is processed). When video cards have a non-standard 7-pin output, then in this case it is better to keep that adapter , which
included with the video card, because there are several standards for wiring such a cable.
If the computer has integrated video card(this can be determined by the VGA output in the immediate vicinity of the keyboard and mouse connectors), then such a video card do not support connecting a second monitor (TV). Then, if the motherboard has a special connector for installing an “external” video card (today these are AGP or PCI Express standards), then you can install such a video card with some kind of output for connecting to a TV, while the integrated video card should be disabled in the BIOS.
If you have a laptop type computer(laptop), then most often the connection to the TV is made either through the S-Video output
(available on almost all laptops), or via the VGA output (see below):
 S-Video output from a laptop type computer |
 VGA output on a laptop type computer |
Required cables and adapters (depending on connection method):
 |
 |
 |
| SVideo cable | S-Video connector (enlarged) | VGA cable |
 |
 |
 |
| DVI cable | S-video to RCA adapter (“tulip”) | DVI-I -> VGA adapter |
You also need an adapter for audio streaming from a computer to a TV - in order to control the volume from the television remote control, and not on the computer speakers. These adapters with Jack Stereo on RCA are connected to the output on the computer's sound card (where speakers or headphones are usually connected) and may look like this:
 |
|
| Examples of adapters from Jack Stereo to RCAA | |
Part 2. Connection and configuration
Connection procedure and precautions Never connect the TV while the computer is on! Disconnect the plugs of both the TV and the computer from the power outlets, otherwise you can burn the inputs on both the TV and the video card!
Connection order:
- Turn off the TV, unplug the plug from the outlet.
- Unplug the antenna plug from the TV - since a TV connected to a collective antenna may have a potential difference of more than 100 volts with an ungrounded computer, as well as all wires belonging to audio/video equipment (VCRs, DVD players, stereos, etc.).
- Turn on the TV. Connection settings look different for different video cards, and the names of tabs, groups of controls and buttons may also look different - all this does not allow you to give universal instructions for setting up absolutely all video cards,
but in each case, approximately the same procedures are performed. It should also be noted that the quality of the video signal will not deteriorate when connecting the TV to a computer.
For computers with Windows XP operating system in this example To connect to the TV, a desktop computer with the Windows XP Service Pack 2 operating system installed and a GeForce FX 5600 video card via an S-Video cable was used.
Connection order:
- Turn off the TV, unplug the power plug, and disconnect the antenna cable.
- Turn off the computer, disconnect the plug from the outlet.
- Connect the TV and computer with the necessary video and audio cables using the appropriate adapters
- Turn on your computer, wait for it to load operating system.
- Turn on the TV, select the INPUT S-Video function in the TV settings. 1) Right-click on an empty Workspace table, go to Display Properties, select the tab | Settings

Click on the monitor with the number 2, right-click and select Enable:

If the Extend my Windows desktop onto this monitor operating mode is selected, then it becomes possible to move the window with the player onto the television screen with the mouse. Double clicking on the image or a key combination will expand the player to the entire television screen. Double-clicking on the image or pressing the keys again will return the image to windowed mode. After finishing watching the program, you need to return the player window from the television screen to the monitor.
At the bottom of the settings window, click the button Advanced(Additionally). In the window that appears, select the Default Monitor and NVIDIA GeForce FX 5600 Properties, and in the section nViewDisplay Settings select the mode Clone as below:

After pressing the button Apply You may need to restart your computer.
In the following example, a laptop computer with the Windows XP Service Pack 2 operating system installed and an ATI RADEON 7500 video card via an S-Video cable was used to connect to a TV. The connection procedure and basic settings are practically the same as those discussed for NVIDIA video cards (see below):
Mode Extend my Windows desktop onto this monitor install as desired. In the most simple case You don’t have to make additional settings using the Advanced button. For computers with the operating system Windows Vista In this example, a Dell Inspiron I1520 laptop computer with Windows Vista Home Premium installed via an S-Video cable was used to connect to the TV.
Connection order:
- Turn off the TV, unplug the power socket, unplug the antenna cable.
- Turn off the computer and unplug it from the socket.
- Connect the TV and computer with the necessary video and audio cables using the appropriate adapters
(in this example – via S-Video cable). - Turn on the computer and wait for the operating system to load.
- Turn on the TV, select the function in the TV settings INPUT S-Video.After turning on the computer, the resolution may immediately change (for example, 720*480), and a screen like this should appear:

It is necessary to set the mode Duplicate my desktop on all displays (mirrored) , then click OK. Then right-click on an empty space on the desktop and select Personalize -> Display Settings
Next, you need to right-click on the monitor under the number 2 and select the item in the menu that appears Attached. Then click on the Advanced Settings button and select the tab Intel® Graphics Media Accelerator Driver for Mobile (see below):
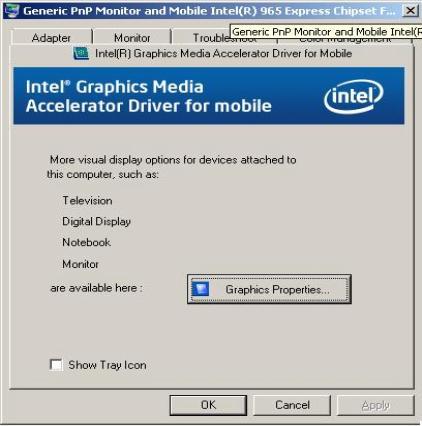
Next, click on the button Graphics Properties, along the way to confirm the settings changes in the window that appears User Account Control choose Continue and in the window that appears, select the mode Intel® Dual Display Clone and for Secondary Device select the mode Television(or Monitor ):

after clicking OK you need to return to the window with Display Settings, click on the monitor with the number 2. There are 2 viewing modes on TV:
- the image is displayed both on the monitor and on the TV at the same time - in this case, you must uncheck the box ;
- the image from the monitor is “dragged” with the mouse beyond it onto the TV (as on the 2nd screen), making it possible to work on the computer with other applications and at the same time watch programs on the TV - in this case, you must check the box Extend the desktop onto this monitor - see below:

If the operating mode is selected Extend the desktop onto this monitor, then it becomes possible to move the window with the player onto the television screen with the mouse. Double-clicking on the image or a key combination will expand the player to the entire television screen. Double-clicking on the image again or pressing the keys again will return the image to windowed mode. After finishing watching the program, you need to return the player window from the television screen to the monitor.
In some cases, after making changes, you may need to restart the computer.
1) There is a program TV Tool(you can download it from the website http://tvtool.info/), which does not require any video card settings. It is quite simple to operate - when you launch this program, you can simply click - and the picture from the video card will go through one of the video outputs and the corresponding cable to the TV. TV Tool works with any video cards based on nVidia chips, with the exception of GeForce4 MX. Video cards with chipsets from other manufacturers (ATI, SiS, Trident, etc) are not supported by TV Tool. Supported by Windows 98, Me, Windows 2000, XP, Vista operating systems. After installing TV Tool, you need to make some settings - select the signal type, resolution and picture size, as shown below:

Settings TV-format depends on the television standard (format) adopted in your region - see table:

Now, every time before outputting an image from a computer to a TV, the procedure will be as follows: - launch TV Tool; - go to www.vidachok.tv and select a program to watch; - open the program to full screen on the monitor; - press on the keyboard - on the monitor the picture should disappear and appear on the TV. 2) Sometimes, after connecting the computer to the TV, the image becomes quite cloudy, with interference, and synchronization may also “fail.” This may happen for the following reasons:
- The cable resistance is below 75 ohms (the cable resistance is written directly on it);
- The power supplies on your computer or TV may become unstable. When connecting additional equipment, this leads to the operation of such unstable power supplies at the limit of their capabilities, which affects the quality of the picture;
- When you connect a grounded computer to the TV, you get two grounding points (one at the far end of the TV
- cable, the other in the computer), as a result of which image interference is possible. You can get rid of this by disconnecting the antenna cable from the TV during operation.
- Poor quality cable and poor cable connection.
When buying a flat-screen TV, it is best to take a laptop, connection cables with adapters to the store, and try connecting it to the selected TV there in the store. This way you can immediately find out whether it is possible to connect such a TV to a computer at all, and also see quality of the signal output to the TV.
Modern monitors are increasingly starting to catch up with TVs. Just 10 years ago, monitors with a screen diagonal of 24 inches would have been the dream of any user, but today they are an inexpensive and quite accessible reality.
And still, this is not enough for users and they want to connect a large LCD TV to their computer to watch movies and play games comfortably. Moreover, modern TVs allow you to do this without problems. But if the task itself is quite clear and understandable, then there may be a hitch with the implementation.
Then I suggest you take a closer look - what cable is needed to connect the TV to the computer?!
At the time of writing (and this is the end of 2016), there are several main connection types:
- DisplayPort (DP)
- LAN (Ethernet)
The most interesting thing is that modern TVs are so versatile that they have at least two of them at once, or even all of them at once. Here's a clear example:

This budget Samsung has 3 ports at once, using which you can connect a laptop or PC to it.
At the same time, a modern computer video card has two or three different connectors:

Laptops, netbooks and ultrabooks are also not far behind:

Let's look at each connection option in more detail.
Analog VGA
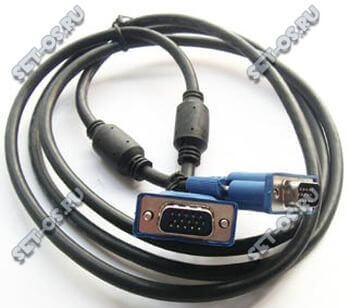
Video Graphics Array— VGA is practically the oldest standard, which was developed by IBM and was used to connect monitors 30 years ago, back in 1987. It can still be found on cheap video cards and inexpensive laptops. It only transmits video. The audio signal is not transmitted through the VGA.
Digital DVI

Digital Visual Interface - DVI - a more recent video signal transmission standard. It appeared as soon as LCD monitors with a diagonal of more than 19 inches began to appear due to the fact that the old analog VGA could not provide high definition at high resolutions.
Unfortunately, the DVI port on LCD and plasma TVs is not common, and therefore this cable is used least often to connect a TV to a computer.
Common HDMI
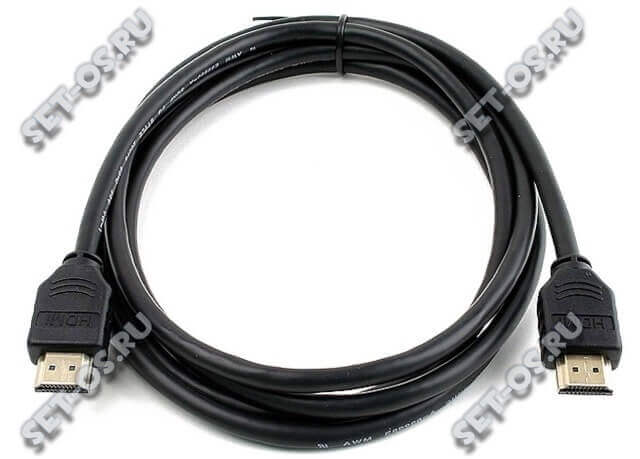
High-Definition Multimedia Interface— HDMI is the most common port on modern equipment. Initially developed for connecting video equipment working with HD video. It is available on video cards, media players, TVs and laptops. The best part is that it can transmit not only video, but also audio. In addition, as a rule, in order to connect a TV through a computer, you do not need to install additional software on the latter except the video adapter driver.
It should also be noted that now there are several varieties of HDMI connector - in addition to the usual Type A, there are also Mini (Type C) and Micro (Type B).
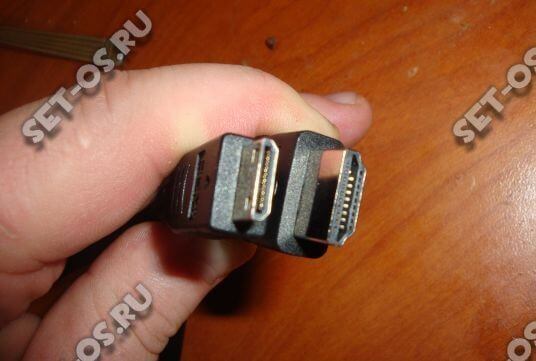
Smaller connectors have appeared for connecting various portable equipment to TV - tablets, camcorders and cameras. Such connectors are usually not found on PCs.
Modern DisplayPort
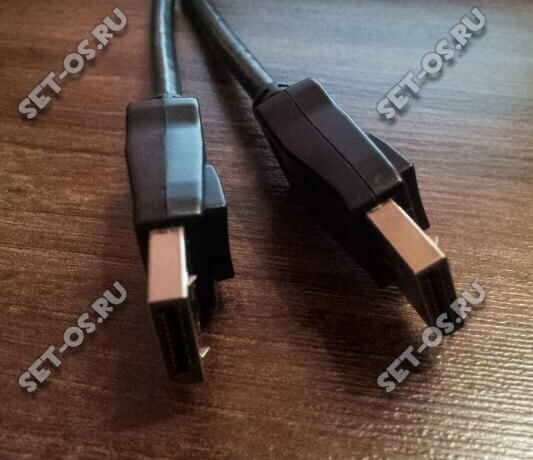
Today, DP or DisplayPort is the most modern solution for connecting video equipment. This cable has the highest bandwidth - up to 10.8 GB/s). You can find a DP connector on many modern video adapters and, in principle, this is the most successful option for connecting a TV to a computer or laptop.
Connect the TV to the computer via a LAN (Ethernet) port
The presence of a LAN connector on the TV allows you to connect it to your home local network(LAN). To do this, you will need this cat 5e Ethernet cable.
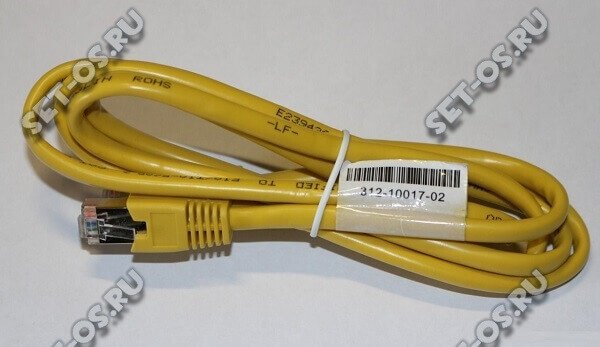
Moreover, you can connect the TV and computer either directly or through a router. This is probably the best option for SMART TV, because it allows you to give it access to both a PC and the Internet. And if you have a NAS-type network storage device, then you will also have access to your movies, photos and music on your TV.
Sometimes you need to play data from your computer on a large TV screen - perhaps you downloaded a good movie or, for example, decided to look through vacation photos with the whole family. In this article we propose two options for resolving this problem.
Modern TVs can now be connected to desktop computers or laptops. Thus, your computer becomes the playback device, and the TV is used as a monitor. Using HDMI (High Definition Multimedia Interface) is the easiest way to do this.
Note! These cables are significantly more expensive. Nevertheless, experts agree that it is not worth buying a more expensive “designer” cable, but a relatively cheap one is quite capable of doing the job.
instructions
You will need:
- a computer with an HDMI ‘out’ connector, a sound card and a video card;
- TV with HDMI input jack;
- HDMI cable for connecting a PC to a TV.
Step 1. Place your laptop next to your TV or make sure your desktop computer is close enough to run the HDMI cable through. Both devices must be turned off.
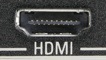
Step 2. There is an HDMI connector on the back of the computer (see below). It looks a bit like a USB connector, but it's not rectangular, and it will have the "HDMI" label next to it. Connect the cable to your computer.

Note! The HDMI cable is the same on each end (see below). It doesn't matter which side you connect it to the computer.

Step 3. On the front or side of the TV, or behind it next to network cable there is a panel. There you will find all kinds of buttons and input jacks (see photo below). Connect the remaining free end of the HDMI cable to your TV via the HDMI connector, which you will find under the flap.
Step 4. Turn on the TV. Use the "Source" button on the remote control to select from the menu provided the input through which you connected the cable - this is usually HDMI 1 or HDMI 2.

Step 5. Turn on your computer. It will now broadcast a “connection handshaking protocol” (mutual identification) with your TV. You should see information from your computer appear on your TV screen. You may have to negotiate a couple of changes on your computer. Use your mouse or touchpad to click the buttons as usual.
Step 6. The TV is now a monitor for your computer. Make sure you select the Full Screen option on your computer.

Step 7. Start the movie you want to watch. Move your mouse cursor away from the screen so that the Play and Pause buttons are not obstructed. Don't worry - if you move your mouse again, they will appear again.
Step 8. When your session is finished, close the file containing the movie or video and turn off your computer. Disconnect the HDMI cable and select a different input by pressing the Source button on your TV.
Connecting a laptop to a TV via a wireless network (Wi-Fi)
You will need:
- laptop with Wi-Fi connection;
- TV with Wi-Fi support.
Step 1. Turn on the TV and computer.
Step 2.

Step 3. Select the Wi-Fi input on your TV, options vary depending on the TV model, standard inputs are Video 1 and DVR.
Step 4. On your PC, you will be asked to select a Wi-Fi connection to your TV. Some PC manufacturers (notably Sony) have a special button on their laptops to activate this connection.

Step 5. Follow your TV manufacturer's instructions on how to connect your TV to your Wi-Fi network. You may need to enter a security key or password before your network can recognize the TV as an access point (your network router may need to be rebooted).
Step 6. The TV may display a four-digit passcode to log into the PC.
Step 7

Step 8 Even with the correct input selected on the TV, there is a chance that the image will not appear. If this is the case, then you need to go to your PC's control panel and select "Adjust screen resolution."

Step 9 You will see images for two different displays. Click on display number 2.
Step 10 Now select “Extend the desktop on this monitor” and click “Apply”.

Step 11 The HDTV screen should now display the Windows desktop picture. When prompted, click Save Display Settings.

Step 12 You may need to adjust the resolution to get a larger picture on your TV.
Step 13 Open windows on the PC screen, you may need to drag it to the TV.
Step 14 Everything must be set! But be careful and keep in mind that Wi-Fi networks can be quite finicky when it comes to adding devices or making changes.
Voila! You have connected your computer to your TV wirelessly!
Note! Mac users will need to go through a similar process for setting up multiple screens via System Preferences/Displays/Arrangement/Display to either extend the desktop across two screens or create a mirror image of the computer monitor.
We hope that the article was useful! If you have any questions, we suggest watching the video.
Video - How to connect a TV to a computer
Modern plasma TVs have little in common with the rectangular units with convex screens that used to be in every home. They boast outstanding technical characteristics, high image clarity and a number of additional functions. Nowadays, connecting a TV to a computer no longer seems surprising or fantastic.
Many PC and laptop owners are trying to expand the scope of their devices. And so they have a completely logical question: “How to connect a TV to a computer?” Let's talk about this.
Why is this necessary?
Each user determines for himself whether he needs equipment connected to the TV or not. In fact, there are many reasons that push us to take such a step, and in each individual case the question arises of how to connect a TV to a computer and how difficult it is.
Before answering it, let’s consider the main advantages of such a “tandem”:
- Computer games on the big screen.
- Watching movies and videos.
- Communication via Skype.
- Launch various slide shows, etc.
On the hard drive of a modern computer, thanks to unlimited tariffs On the Internet, a huge amount of various content accumulates - games, films, music videos, videos, photographs, etc. And sometimes you really want to try all this in a “new format” - to display it on the big screen. And to do this, you need to understand how to connect a computer to a TV.

Features of connecting various equipment
In general, the possibility of “combining” different technologies has appeared a long time ago. Even old TV models and not very modern PCs can be connected to each other. However, this will require a special video card and cables. It should be noted that the quality of the resulting picture will not be very high, so not many people previously tried to connect a TV to a computer via VGA.
Modern audio and video equipment is much more technologically advanced and sophisticated, which is why the need to set up a connection arises much more often.
At the moment, three main ports are used to carry out this procedure:
- HDMI.
In some cases, difficulties arise with the VGA port, because it is often completely absent on modern video cards. Many laptop models, as well as plasma TVs, are produced without it. Therefore, it is better to use the other two options or purchase the appropriate VGA-DVI adapter.
Connection via VGA interface
Despite the fact that these types of connectors are losing their position, many users continue to use them for work. Most still have old equipment in good condition. And quite a few people are now digitizing videotapes, viewing recordings from old hard drives, etc.
The VGA interface is considered obsolete. It provides image transmission using analog signals at low speed (by today's standards).
If you have the appropriate equipment that supports these ports and special cables, you can both connect the TV to your computer and perform further setup.
The procedure is carried out in several stages:
- The power to both devices (TV and computer) is turned off.
- The cable is connected to the appropriate connectors.
- Devices turn on.
- Settings are being made in Windows.
It’s easy to guess that connecting a TV to a computer itself does not cause any particular difficulties. Much more questions arise when it comes to setting up Windows directly. Without this, it is impossible to achieve a high-quality connection.
If the image is not transmitted to the TV or any problems or interference are observed, then, most likely, errors were made in the settings. Particular attention should be paid to the display modes - “only on TV” or “display and TV at the same time”.
If you need to connect the TV to a VGA computer, you should make the following settings in the operating system:
- On the desktop, in the context menu (right mouse button), select "Screen resolution".
- Open the Screen panel.
- Select the required display mode.
- Apply and save.
In some cases, you will additionally need to make a small adjustment to the TV - select the VGA signal source in the appropriate menu.

Advantage of DVI and HDMI ports
Nowadays, when the question arises of how to connect a computer to a TV, many experts advise using HDMI and DVI ports. They look different, so it is almost impossible to confuse them. Also, if necessary, you should use various adapters. You can find the necessary interfaces on the back panel of the system unit, as well as on the back and sides of the TV and laptop.
Why is it better to connect your TV to your computer via HDMI?
The advanced technology has gained enormous popularity among both specialists and ordinary users. Currently, modern LED TV models have up to 2-3 HDMI connectors, so there are no connection problems. You just need to purchase the appropriate cable.
The DVI port is in many ways similar to HDMI - it also allows you to transmit signals in digital quality. Corresponding adapters are commercially available, so these ports are almost identical in their ability to perform the task.
What should you pay attention to when connecting your computer to an HDMI TV?
- Display and TV resolution.
- Correct connection.
- Settings in the operating system.
Usually special problems does not arise during the connection process, but you still need to pay attention to every detail. This is especially true for matching screen resolutions.
If you use HDMI from a computer to a TV, the latter will take over the functions of the primary display. If at this moment both the main monitor and the LCD TV are connected, then it is necessary to configure the display modes.
Some modern TVs have an actual resolution of 1400 x 1900 pixels, while the video cards of personal computers and laptops are set to the “standard” 1280 x 720 or 1920 x 1080 pixels. With such a discrepancy, the TV often produces just a black screen. To correct the situation, it is necessary to set the exact parameters in accordance with the characteristics of the equipment.
If you are trying to figure out how to connect a TV to a computer for the first time, experts recommend also connecting the main monitor (for example, via DVI or VGA) or using a laptop. Then it becomes possible to change the settings of the operating system or video card drivers.

HDMI connection process
To complete this task, you must purchase an HDMI cable. In specialized stores you can find products of any length (from 1 to 20 meters). Next, you should find the corresponding ports on the TV and PC.
Thus, the main connection steps are:
- Direct connection of devices (when switched off).
- Turning on the computer and TV (waiting for full loading).
- Switch on the TV to the corresponding HDMI port (source - port).
- Setting up a connection in Windows OS.
As a rule, the default is to display only on the second display, i.e. the TV becomes the main one. Due to a resolution mismatch, the image may not be transmitted. To understand how to connect a computer to a TV, you need to dig into the settings.
It is best to select “Multiple monitors” in the “Screen” menu, and also select the “Duplicate screens” option. After this, everything should work, and the Windows desktop will be displayed on the TV.
To obtain the highest quality image, it is necessary to accurately determine its resolution. Usually in this question the main attention is paid to it (otherwise why did the TV need to be connected at all?). By properly connecting your TV to your computer via HDMI, you can freely work with your new screen.

Problems with sound transmission
Displaying a picture on the TV screen is only half the battle. Sound settings raise a lot of questions. As a rule, with such an approach, you want to use all the available capabilities, including the correct output of an audio signal. Modern plasma TVs are often equipped with good, powerful speakers, and third-party audio systems are also connected to them, so using them is much more reasonable than standard laptop speakers. In the case of a desktop computer, difficulties often arise due to the lack of any systems for sound output.
In some cases, getting the right sound through your TV speakers can be quite difficult. Common problems when connecting the mentioned device are:
- Complete absence of sound.
- Various interferences.
- Sound delay.
- Low volume.
As you can see, there are several options, so first of all you need to deal with the root cause of the problem.

Sound settings features
When the TV is connected to a computer, sound is also transmitted through the HDMI cable used. As with image adjustments, in some cases you will have to try different options.
The HDMI interface is a universal high-definition multimedia cable, and this is its main advantage. That is, having only a standard adapter for this connector, you can solve the problem of making a full connection. And for this you will not need to purchase additional cords, etc. Since HDMI, along with USB, is considered a widespread global standard, this leads to the fact that many types of equipment support it.
Thus, when making a connection, the HDMI cable performs two main tasks:
- High definition image transmission.
- Transmission of surround stereo sound.
Versatility is also evident in the settings. With some models of computers and televisions there is no such need at all. In other situations, you will need to change something in the operating system settings. There is almost never any need to install additional software, except perhaps to simplify management.

Primary connection of two devices
When we work with this or that technology, we try to take advantage of all the inherent possibilities. When connecting a TV to a computer with HDMI, we face various difficulties. First we set up the image, and then everything else. But sometimes we find that with a full connection, the sound is still transmitted through the small laptop speakers or PC speakers. What to do in such situations?
It is necessary to configure the sound signal transmission. Let's start with the "Taskbar":
- The "Hardware and Sound" menu in the "Control Panel".
- Opening tab "Manage audio resources".
- AMD HDMI Output item.
Finding all this will not be difficult, because all the settings are literally on the surface, so the whole procedure will only take a couple of minutes.
There are several aspects to consider Special attention. If the video card of your computer or laptop supports audio transmission, then you can set the “Digital Audio S/PDIF” item in the AMD HDMI Output parameters. Otherwise, the sound signal will be transmitted through motherboard, which must also be connected to the video card with an S/PDIF cable.
Additional Settings Options
It is necessary to understand that specific equipment, despite uniform standards, still has its own characteristics. That is why sometimes difficulties arise even if all the rules and recommendations are followed. What should you do if you still experience connection problems?
- Check the serviceability of the equipment.
- Update drivers (primarily sound drivers).
- Try other settings options.
Not all users know about all the basic parameters of a PC or laptop and the TV itself. And in order, for example, to connect an LG TV to a computer, you have to study the technical specifications.
What problems are most common?
To transmit audio via HDMI, you must have the appropriate driver. We are talking about support for High Definition Audio - a high-definition audio signal.
To check the presence of this driver, go to the "Device Manager" menu, which is located in the taskbar of the operating system. And already there you need to select the “Sound, video and gaming devices” tab. Next, you should carefully study the proposed list and find there “Device supporting High Definition Audio,” which was already mentioned above. If such an item is present, then the computer is capable of transmitting sound signal via HDMI cable.
What should you do if you don't have the appropriate driver?
In this case, you will need to download and install it. There should be distribution kits for installation on the laptop or specific sound card manufacturer's website. In addition, in some cases, the OS is independently capable of identifying the missing drivers for correct operation.
Another option for configuring the system is to check the available playback devices. Finding them is not difficult - in the system tray (lower right corner of the computer screen) you need to find the sound playback icon. If you right-click on it, a context menu will open, one of the items labeled “Playback devices”.
This is where the connected TV should appear, along with other options (speakers and headphones). All that remains is to select it and click “OK”.

Setting up a wireless connection via Wi-Fi
Today, modern models of laptops and TV devices allow you to use a variety of options, including connecting the TV to your computer via wireless networks.
What will it take to create such a connection? First of all, of course, you need to pay attention to the characteristics of the TV. Unfortunately, at the moment only advanced models support data transfer technology via Wi-Fi. In addition, if you wish, you can try a special adapter for TV, connected via a USB port.
The advantages of such a connection are obvious:
- Simple connection without using wires.
- Free arrangement of devices (no need to move the computer).
- Ability to view files directly from your hard drive.
- Internet access.
In this case, however, additional software is required - special utility, which comes with the TV. It would be a good idea to look at the official website of the device manufacturer.
As a rule, the main task of the mentioned utility is to quickly connect a computer via WiFi to a TV, so the interface is quite simple and understandable. Most often, a special folder is created on the PC hard drive into which files for TV are sent.
Many users use a router (router) to solve such problems. A single Wi-Fi network covers various devices, including a plasma TV. As a result, you can freely view various files.
General conclusion
If there is a need to combine two devices, you need to select the appropriate solution to the problem. The most popular is to connect the TV to a computer via HDMI or via Wi-Fi wireless networks.
When connecting, first of all, you should set up the correct image transmission, and then check the quality of the supplied sound (in this case, you need to make sure that the drivers are available and select the items related to the signal source in the menu).
To set up a Wi-Fi connection, most often it is enough to use special software that will solve the problem on its own.