No need to write files or install programs on HDD or a USB flash drive containing the information you want to recover. This is connected with the principle of deleting information, the fact is that when you click on the “delete” button, the information is not actually deleted, but only its header is erased, the file or folder itself remains, but the next time it is written to a disk or USB, it is replaced in the place where the remote file is located or the folder is being written to new information, the old one can no longer be restored.
Ways to recover a deleted file or folder.
1) Check cart
The first and simplest thing to do is check the Recycle Bin to see if there is a deleted file or folder there. To do this, click on the Recycle Bin shortcut on your desktop and if you see a file or folder there that you accidentally deleted, right-click on it and select "Restore". The data will be restored to the same location where it was before it was deleted.
If you are unlucky and you do not find the deleted file or folder in the trash, then you need to use one of the recovery programs described below
2) Use the free data recovery program Recuva.
First of all, go to the site Recuva and download latest version programs. Then you start installing the downloaded program, the installation process is very simple, the first step is to select the installation language.

Then we specify additional parameters (whether to create a shortcut on the desktop, whether to search for program updates...), you can leave them as default. Please note that if the deleted file was on the disk where it was installed operating system(often drive C), then the Recuva program should not be installed on this disk, otherwise by installing it you can overwrite the file and it cannot be restored. To select a different drive to install the program, click the button "Additionally" and specify a different installation path for the program.

After this, you will be prompted to install the Google Chrome browser; if you do not want to install, uncheck the box.

After installation, the Recuva wizard will launch to help you recover your files or folder. I strongly recommend using the wizard, as it is more understandable and convenient. Click "Next"

Selecting the type of recovered file

Select the location where the file or folder was located.

Put a tick "Enable in-depth analysis", press "Begin".

After this, the search for files will begin, this can take up to several tens of minutes, depending on many factors (computer power, disk or USB device capacity, disk speed, USB device, etc.).
After searching, you will see a list of files that can be recovered. If you want to get more detailed information about files, you can click on the button "Go to advanced mode".

To restore a file, check the boxes next to them and click the button "Restore", then indicate where to restore the file and within a few seconds the file will be restored. 
3) Using the paid program EasyRecovery.
I, like many, am for free software, but in this article I will describe file recovery using a paid program, since during my test recoveries this program saw more deleted files than Recuva (2385 files versus 2461). I would recommend using this program if the free one did not help. You still won't lose anything, because with this program you can find for free deleted files, but to restore these found files and folders you will need license key.
So, first of all, download the latest version of the program EasyRecovery (V in this example I will use the Home version). Install... the process is not complicated, we agree with everything and click "Next", let me remind you that the program must be installed on a volume (disk) from which you will not restore the file or folders, since you can overwrite the file or folder being restored. After installation, run the program, the first window to appear is the licensing window, which you can skip if you click "Run as a DEMO". The first EasyRecovery window appears in front of us, click "Continue".

In the next window, select the location where the file that needs to be restored is located.

The next step is to select a recovery script. If the file or folder was simply deleted, it is recommended to select "Deleted File Recovery", if the hard drive/USB flash drive has been formatted, you must select "Formatted Media Recovery".

After this, an information window will appear in which all the specified search settings are indicated, if you have not confused anything, click "Continue".

The search for files will begin, this process may take quite a long time, depending on the size of the volume hard drive or USB device, computer power, etc. After the entire disk or USB flash drive is scanned, all deleted files will appear in front of you, divided into groups depending on the extension. If you click on a file and try to open the file (Open) or save it (Save as), you will be prompted to enter a license key; without it, the file will not be restored.
I hope so step by step guide helped you recover your files and folders, saving a lot of time and possibly money. In the future, I recommend using backup of important files, if possible, store important files on several media or at least in different folders.
When an important file is lost, a document you spent a week on is erased, and photos disappear from a suddenly formatted memory card, there is no need to worry ahead of time. When you delete a file from the disk, its description in the system is erased. The set of bytes that made up the file remains in place until something else is written on top of them. So you can try to recover your data using any of these applications.
Be careful if you install applications on a drive where deleted files were located. There is a risk that application files will be overwritten during installation. It is better to select another partition or physical disk for installation.
Platform: Windows.
Price: free, $19.95 for premium version.
Recuva can recover data lost by mistake, for example from an accidentally emptied Recycle Bin. The program can return photos from an accidentally formatted memory card in the camera or music from an empty MP3 player. Any media is supported, even iPod memory.
Platform: Windows, Mac.
Price: free, $89 for premium version.

Disk Drill is a data recovery application for Mac, but there is also a version for Windows. This program supports most types of disks, files and file systems. With its help, you can restore erased files using the Recovery Protection function, as well as find and clean the disk. However free version does not allow you to recover files lost before installing Disk Drill.
Platform: Windows, Mac, Linux, FreeBSD, OpenBSD, SunOS, DOS.
Price: for free.

A very functional and versatile open source application. It has a text interface, but it is not difficult to understand.
TestDisk supports a huge number of file formats. In addition, the program can be burned onto a LiveCD to recover data from a disk on which the system does not boot. The utility can recover a damaged boot sector or lost data.
TestDisk comes with the PhotoRec program, which recovers erased files, photos, music and videos.
4. R-Undelete
Platform: Windows, Mac, Linux.
Price: the free version recovers files up to 256 KB in size; $79.99 for full version.
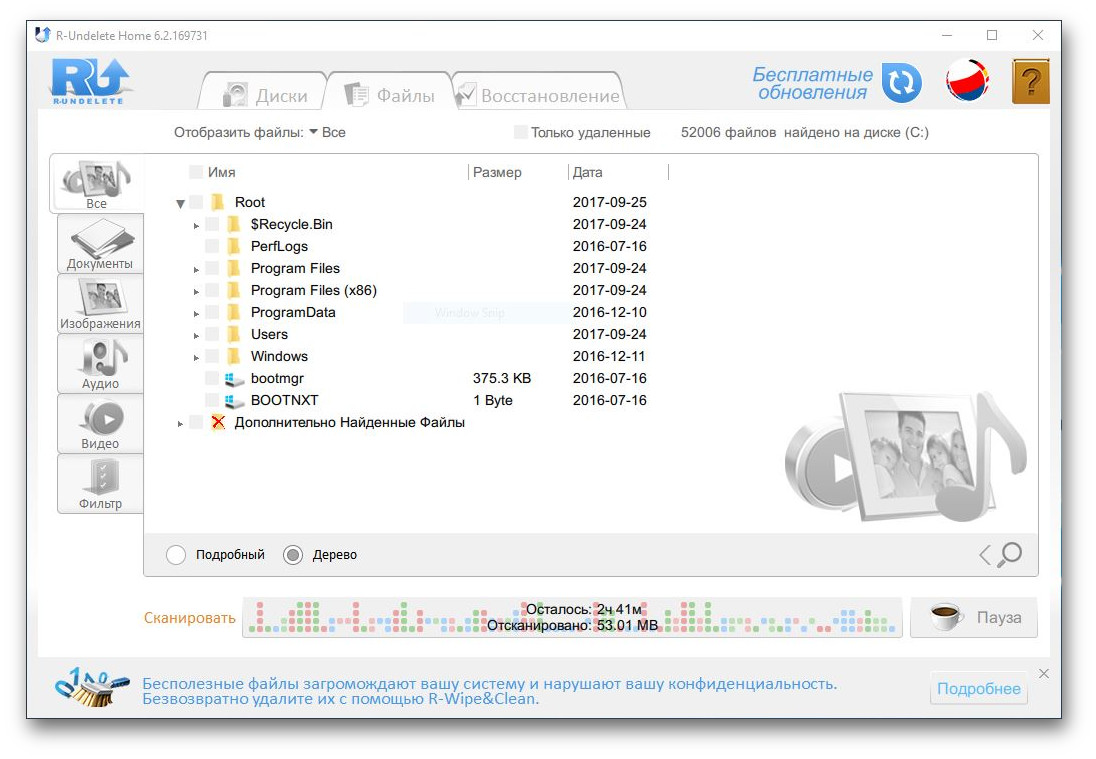
R-Undelete is part of R-Studio. It's a whole family powerful programs for data recovery. Supported file systems are FAT12/16/32/exFAT, NTFS, NTFS5, HFS/HFS+, UFS1/UFS2 and Ext2/Ext3/Ext4.
R-Studio applications can recover deleted data as local disks, and over the network. In addition to data recovery, the utilities provide tools for advanced partition copying and searching for bad blocks on disks.
Platform: Windows.
Price: free in trial mode with recovery of up to 1 GB of data; $69.95 for full version.

Eassos Recovery recovers deleted files, photos, text documents and more than 550 file formats. The application has a very simple and intuitive interface.
Platform: Windows.
Price: the free version does not save found files; $37.95 for full version.

The Hetman developer provides a set of utilities for recovering various types of data: entire sections or individual photos and documents. The program supports all hard drives, flash cards, SD and microSD.
Platform: Windows.
Price: free, $19.97 included with Glary Utilities.

Glary Undelete can recover any deleted files, including compressed, fragmented or encrypted ones. Filtering of recovered data is supported.
Do you know more convenient and functional data recovery applications? Tell us about them in the comments.
Accidentally pressing the “Delete” button, inattention, program failure, unsuccessful mouse click, virus activity - all this can cause information loss. Files can be easily deleted unintentionally on a hard drive, flash drive, CD, etc. DVD discs, on any other storage medium. If it is very valuable, then it is worth fighting to restore it. Most often successful.
Start with the trivial - look in the “Basket”. There is a huge chance that you will find accidentally destroyed data there. Without giving in to panic, open the “Trash”. All deleted information is stored in this folder until it is completely cleared. Restoring from it is simple: open the “Recycle Bin”, right-click on the desired file (folder), and select “Restore” from the list of commands. The file will return to its original location where it was deleted. In more difficult situations, when the file is not in the Recycle Bin, you will need to resort to help special programs. There are a lot of them. Let's look at the work of the most popular and proven ones. These include Recuva. The utility easily copes with the return of lost files of any type: a document, a picture, a spreadsheet - almost anything deleted.


Always restore files using programs to a different drive than the one where they were previously. The main thing is to act thoughtfully, without panic, but quickly. When working with important information, be careful and attentive, and do not forget to periodically create backup copies of files.
Hello!
How often do you have to lose important files in the computer era...
An amazing fact - in most cases, file loss is associated with the user’s own mistakes: he did not make a backup copy in time, formatted the disk, deleted files by mistake, etc.
In this article, I would like to look at how to recover a deleted file from a hard drive (or flash drive), what to do, how and in what order (a kind of step-by-step instructions).
Important points:
- When deleting a file, the file system does not delete or erase areas of the disk where information about the file was recorded. It simply begins to consider them free and open to recording other information.
- The second point follows from the first point - until new ones are written to the “old” areas of the disk where the deleted file was previously located (i.e., for example, a new file is copied) - the information can be restored, at least partially!
- Stop using the media from which the file was deleted.
- Windows, when connecting media from which information has been deleted, may offer to format it, check for errors, etc. - do not agree! All these procedures can make file recovery impossible!
- One last thing... Do not restore files to the same physical media from which the file was deleted. For example, if you are restoring information from a flash drive, then the recovered file must be saved to the hard drive of your computer/laptop!
What to do when you notice that a file in a folder (on a disk, flash drive) is no longer there:
1) First, be sure to check your shopping cart. If you haven't cleared it, then the file may be in it. Fortunately, the Windows OS itself is in no hurry to free up space on your hard drive and always protects you.
2) Secondly, do not copy anything else to this disk, it is better to disable it altogether.
3) If files are missing on the Windows system disk, you will need a second hard drive or flash drive from which you can boot and scan the disk with deleted information. By the way, you can remove the hard drive with deleted information and connect it to another working PC (and start scanning one of the recovery programs from it).
4) By the way, many programs, by default, make backup copies of data. For example, if you have lost a Word document, I recommend reading this article:
How to recover a deleted file (step-by-step recommendation)
In the example below, I will recover files (photos) from a regular flash drive (as in the figure below - san disc ultra 8gb). These are used in many cameras. From it, I mistakenly deleted several folders with photographs, which later turned out to be needed for several articles on this blog. By the way, you need to connect it to a computer or laptop “directly”, without the camera itself.
Flash card: san disc ultra 8gb
1) Working in Recuva (step by step)
Recuva- a free program for data recovery from flash drives and hard drives. It has an intuitive interface, thanks to which even a complete novice user can understand it.
After starting the program, you will be presented with a recovery wizard. Let's go through the steps...
In the first step, the program will offer a choice of which files to restore. I recommend selecting All Files (as in Figure 1) to find all deleted files on the media.
Rice. 2. Selecting the disk on which to search for deleted files
Then Recuva will ask you to start searching - agree and wait. Scanning may take long time- it all depends on your media and its volume. So, an ordinary flash drive from a camera was scanned very quickly (about one minute).
After this, the program will show you a list of found files. Some of them can be viewed in the Preview window. Your task in this step is simple: select the files that you will restore, and then click on the Recover button (see Fig. 3).
Attention! Do not restore files to the same physical media from which you are restoring them. The fact is that new information being written can damage files that have not yet been recovered.
In fact, thanks to Recuva, we were able to recover several photos and videos that were deleted from the flash drive (Fig. 4). Not bad already!
2) Working in EasyRecovery
I couldn’t help but include in this article such a program as EasyRecovery(in my opinion one of best programs to recover lost data).
Pros: Russian language support; support for flash drives, hard drives, optical media, etc.; high degree of detection of deleted files; Convenient viewing of recovered files.
Cons: the program is paid.
After starting the program, the step-by-step recovery wizard starts. In the first step, you need to select the media type - in my case, a flash drive.
Rice. 5. EasyRecovery - media selection
Rice. 6. Selecting a drive letter for recovery
After which there will be a rather important step:
- first, select a recovery scenario: for example, recovery of deleted files (or, for example, disk diagnostics, recovery after formatting, etc.);
- then specify the file system of the disk/flash drive (usually the program itself automatically detects the file system) - see fig. 7.
Rice. 7. Selecting a file system and recovery script
The program will then scan the disk and show you all the files found on it. By the way, many photos, as you can see in Fig. 8 can only be partially restored (Recuva could not offer this option). That is why, at the beginning of the review of this program, I talked about the high degree of scanning and detection of deleted files. Sometimes even a piece of a photograph will be very valuable and necessary!
Actually, this is the last step - select the files (select them with the mouse), then right-click and save to some other medium.
1) The sooner you start the recovery procedure, the greater the chances of success!
2) Do not copy anything to a disk (flash drive) on which you have deleted information. If you have deleted files from the Windows system drive, then it is best to boot from a bootable flash drive () or CD/DVD drive and scan the hard drive from there and restore the files.
3) Some utility kits (for example, Norton Utilites) contain a “spare” basket. All deleted files also fall into it, and in it you can even find those files that were deleted from the main Windows Recycle Bin. If you often delete necessary files, install this set of utilities with a backup recycle bin.
4) Don’t rely on chance - always make backup copies of important files (). If earlier, 10-15 years ago, as a rule, a piece of hardware was more expensive than the files on it, now the files placed on this piece of hardware are more expensive than it. This is the evolution...
PS
As always, I will be very grateful for additions on the topic of the article.
The article has been completely revised since its first publication in 2013.
All the best!
Many have found themselves in situations where necessary documents have been deleted from the computer. However, even if you deleted a file, this does not mean that it cannot be found on your computer and restored. There are various free programs that can deal with such problems.
You will need
- -computer;
- -Internet.