Since the advent of multiplayer in the game, users have had the opportunity to play with several people, connecting their PCs into one network. From the article you will learn how to play Minecraft on a server or with a friend over the network and how to create your own virtual server. We present several interesting solutions.
Game via Hamachi
Let's figure out how to play Minecraft using Hamachi. Download the Hamachi client for Windows. Then unpack the archive and install the program. During installation, uncheck the “Install LastPass” box.
When Windows completes installation, you can start working in the program:
- Press the power button.
- The registration/login window will pop up.
- To create an account, just enter your address Email and come up with a password.
- Check the box to accept the license agreement.
After successful registration, you can start creating a Hamachi server. To do this, in the main window, click “Create new network" Then fill out three forms:
- network name (identifier);
- password;
- his confirmation.
If successful, the newly created virtual server will appear in the program window. Here you can see the permanent IP address issued by the application.
All that remains is to connect to the server. Anyone who is going to log into the created server must also install the program and register in it.
- Click Network.
- Then - “Connect to an existing network.”
- Enter the server ID and password.
- Your computer will appear in your contacts list.
Check the connection between computers. Right-click on the visiting friend and select “Check Availability.” You will see a console showing the sending/reception of data packets. If the message “Request timeout exceeded” pops up, the connection is interrupted.
The main problems in this case lie in the operation of the firewall and antivirus. They should be disabled.
Now you know how to play on a server in Minecraft using Hamachi.
Connecting to a Minecraft server
You can create two types of server.To play with friends, all users must have the same versions of the game clients. You can create two types of server:
- built-in – runs in the game client;
- dedicated – you will need to download the server assembly separately.
The second option is preferable.
To connect to the built-in server, create new world, press "Esc", open the server for the network. Here it is important to find out the port - it is registered in the game chat and looks like this: 56777.
With this option for creating a server, the port will be random each time.
The second player just needs to launch Minecraft, go to “Network Game”, select “Direct Connection” and enter the Hamachi address, followed by a colon, and then the port. It looks like this - “25.33.75.165:56777”.
To connect to a dedicated server, you will have to download the assembly. It is necessary to register the Hamachi IP address in the settings. To do this, go to the server folder and open server.properties with Notepad. Find the lines server-ip= and server-port=.
After the first line, write down the IP address where the server will be located. In the second line, enter the port. Usually it is already set to the default - 25565. Save the changes. Now the second player can go into “Network Game” and click “Add”. It remains to enter the Hamachi IP address and port in the line. As a result, the newly created server will appear in the list of available servers.
Playing on a local network
We'll tell you how to play Minecraft together by connecting computers to each other. You can connect computers network cable or via Wi-Fi.
In the first case, go to the Network and Sharing Center and select “Change adapter settings.” Find your network card in the list. The name can be Ethernet, or anything else. Right-click on it and go to properties. In the list that opens, find IP version 4 (TCP/IPv4) and go to its properties.
Turn on “Use the following address” and write:
- IP address: 192.168.0.X (X is any number in the range from 1 to 255);
- subnet mask: 255.255.255.255.
Do the same steps for the second computer. Different devices must have different IP addresses. Now all that remains is to check the connection between the computers. Open a command prompt (Start - All Programs - Accessories - Command Prompt) and enter ping 192.168.0.X (the X address of the other PC).
After adding a world or opening it online, you can start playing. The user of the second PC enters the address and port of the first one in the game.
When connecting via Wi-Fi, find out the wireless address local network possible via the command line. Just type and enter “ipconfig” and the required information will appear in the window.
Conclusion
You can go to any server offered on the Internet by typing their name and address in multiplayer. Creating your own virtual server or connecting to another computer over the network is a little more complicated. With the instructions described above, these steps will be much easier.
Video: How to play on a server in Minecraft.
Using only a local network, without being able to connect to the Internet, in this news we will look at several options on how to do this. The first option will be simpler, but will require an active connection to Wi-Fi router, and most importantly, the router may not be directly connected to the Internet; in our case, it will simply work as a means of transferring data from one phone to another, or to a friend who plays on a tablet. These methods are completely free.
The second method will be a little more complicated, but does not require you to have a Wi-Fi router; the connection between devices will occur through the created mobile point, which can be any Android phone.
Wi-Fi Router. Method number 1
As you understand from the text above, we will need a Wi-Fi router, thanks to which you will transfer information between devices. Just connect all devices to one Wi-Fi, then from any of the devices, preferably the most powerful one available, enter the game.After that, click on the "Play" button and go to the game world creation menu. Choose the settings based on your needs, if you just want to have fun, then choose the creative mode, if you want teamwork, definitely choose the survival mode.


After you create a game world, ask your other friends to go into the game and go to the game world selection menu, where after a few seconds they can see the local server you created and start playing Minecraft PE over the local network.


As you can see, this method of playing over a local network in Minecraft PE is very simple and only requires the presence Wi-Fi router, even if there is no internet cable connected to it, you will still be able to play. This method is perfect if you are in a place where there is no Internet, but there is electricity.
The phone is like a Wi-Fi router. Method number 2
This method is somewhat different from the previous one in that you will not need a Wi-Fi router, since one of your Android devices will be configured to transmit mobile data and essentially become a router itself.First, we need to go to the settings of the Androdi-based phone and find the “Modem and access point” menu item there, on different versions OS Android, it may be called a little differently.

After that, click on it and you will be taken to a menu where you will see the item "Mobile hotspot"

Click on this inscription and a description will open in front of us this method creating a Wi-Fi router to which up to 10 other devices can subsequently connect.

After that, find the “Settings” button on the screen; in my case, it is located in the upper right corner of the screen, you can have it anywhere, even at the very bottom.

Going to the mobile hotspot settings, you will be asked to select the name of the hotspot, I called it “Minecraft PE” to make it easier to find later. After entering the name, you must enter a password, which must be at least 8 characters, after entering these parameters, click "Save".


Next, turn on the access point using the horizontal slider, after which a warning will appear on the screen that the Wi-Fi module of your device will switch to router mode and will not be able to connect to other routers, click “Ok”.

After this, you can safely enter the game and create a game world in Minecraft PE. After the creation of the world, you need to connect other devices to the access point you created, this is done in the same way as the process you use to connect to a regular Wi-Fi router. In the list of available networks, select the one you created and enter the password.


After which, all players can safely launch Minecraft game PE and enjoy playing on a local network, where only your friends will be and where no one can interfere with your joint gameplay.


As you can see, this method of playing over a local network in Pocket Edition is somewhat more complicated than the previous one, but it allows you to play anywhere, be it a street, a school classroom or a deep forest.

The only limitation that such a game imposes is that the same version of the game must be installed on all devices (phones, tablets), since if you create a game in version 0.13.1 people with earlier ones (0.13.0 or 0.12.3) or later (0.14.1 or 0.14.0) versions will not be able to connect to you, keep this in mind!
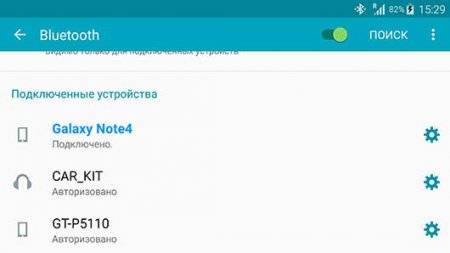
Play via Bluetooth. Method number 3
This method will talk about playing over a local network without using Wi-Fi at all. This method has several advantages over others, but at the same time it has significant disadvantages, but let's talk about everything in order. In this method you will learn how to play Minecraft PE via Bluetooth. To do this, you will need to create a Bluetooth modem from your device so that other devices can connect to it.The first thing to start with is to turn on Bluetooth and make it visible to other devices; to do this, check the box next to the name of your device; this menu appears automatically after turning on Bluetooth. After you check the box, a timer will start counting down, which shows how long your device will still be visible to everyone else.


Then go to the settings and find the “Modem and access point” menu item, go into it, you can see an example of this item in the screenshot below, but your name may be slightly different or located in a different location.

After going to the “Modem and access point” menu, find the “Bluetooth modem” item and turn it on, this is required so that several phones or tablets can connect to your device at once via a Bluetooth network.

Now you need to go into the Minecraft PE game and simply create a world, after which everyone else can safely turn on Bluetooth on their devices, find your device in the list and calmly connect to you.

Now let's talk about the disadvantages of this method, firstly, it imposes a restriction on playing on different versions of the game, all players must have the same version of the game. Another important disadvantage of this method is that the bandwidth of the Bluetooth channel is much lower than that of Wi-Fi, so the more players connect to you, the more glitchy the game will be. I would also like to note that when using this method, you must be at a fairly close distance with other players, since the signal strength compared to Wi-Fi is much lower and the closer the devices are, the more stable the gameplay will be.
Pros this method is lower power consumption, high mobility thanks to which you can play anywhere and of course ease of use.
Not everyone knows how to play with a friend online, so I will explain to you... There are two ways (there may be more, but I only know these), the first method is very easy, the other is a little more difficult.
Let me start with something more complex.
How to start playing with a friend online #1:
1. Open Minecraft ---> Create a new game world, wait, then click on the Esc button and click “Open for the network.”
2. Set the same settings that you set when creating the world.
3. Click on the “Open the world to the network” button, and in the chat we will see the incomplete IP of our Minecraft local network.
4. After this, we will need to find out our computer’s IP address, I won’t bother and will write the following request to Yandex - “My ip”. We are immediately given our IP, so there should be no problems.
In the end, I ended up with this creation: 95.153.186.94:51678 . You give this (only your) IP to a friend, he adds it in multiplayer, connects, and you play together.
How to play with a friend on a local network No. 2:
1. We also open Minecraft ---> create a new world, open it for the network, with the settings that were specified earlier when creating the world.
2. Open another Minecraft, yes, you heard right, and go under a different nickname, open “Network Game”, and see the local world that we have opened for the network, rewrite the IP (which is indicated by the arrow, it’s different for you), and give it to a friend. It couldn't be simpler.
My IP has changed, because it is dynamic... The local world was created in Minecraft v.1.5.2. So we figured out how to play Minecraft with a friend!
You can also play single player with a friend on the Survival Minecraft client.
All you have to do is register on the Survival Minecraft website and download the launcher.
Well, you can do the same with everyone else play on servers and find new friends or enemies :)
Have a good game!
February 11, 2014
Online game in cs 1.6 without a doubt one of the most important aspects. An online game can be played either via the Internet or via local network. With the Internet, everything seems to be more or less clear; there are a great many ways to find a server to play over the Internet. How are things going with playing locally? What to do if you want to play with a person who is in close proximity to you? Or maybe you actually live in a student dormitory and dream of organizing a communal server? There may be many options, but it is not always possible to realize your plans. So let's get started.
Step 1. For local network games, of course we will need client cs 1.6. You definitely won’t have any problems with this, because you can always choose from our portal, choosing exactly what you like. And finally, the second thing we need is the the local network(this could be wifi router, router, etc.) to which all users who want to play are connected.
Step 2. Next, in the simplest scenario, after installing and launching the game, you need to click New Gam e (Depending on your build, this item may be called differently. Most often, it is located at the very top of the game menu).
Step 3. In the window that appears, configure the server. Selecting a card, round time, amount of money at the start, etc. Then click Start.
 All. The server should appear in the Lan tab (menu Find servers->Lan), and your friend with whom you wanted to play online can connect to the server in this way.
Everything seems simple, but there are a number of problems that are difficult for beginners to cope with. Let's try to solve those that occur most often.
Possible difficulties when playing on a local network
Problem: The server is not visible in the Lan tab.
Solution: Try connecting to the server not through the game interface (i.e. not through the Lan tab), but by entering the command in the console connect ip:port. To find out the server address (ip:port) you can use different ways. The simplest one is that the server administrator (the one who created the server) must enter the command in the console status, in response to which he will receive short information about the server and the players on it. In that small list and there will be a very important point for us, which is called tcp/ip. Opposite it the IP and server port will be indicated in the ip:port format.
The second method is a little more complicated:
-Run command line Windows - start->run->cmd(on new versions of Windows you can write cmd directly in the start and press enter);
-In the window that opens (command line) write the command ipconfig ;
-In reply command line will produce several lines. We are only interested in the line “ Link local IPv6 address" Opposite this line there will be your IP address in approximately the following format: 192.169.88.254 - this is exactly what we need;
As for the port, everything is much simpler here. Firstly, we can view it using the Status command on the server. Secondly, the port in almost 100% of cases is 27015.
So, to connect to a server that is not visible in Lan in this case, we need to enter the command “connect 192.168.88.254:27015” without quotes in the client console.
 Problem: I did everything as stated above, but the connection to the server does not occur.
Solution: Most often in this case, the reasons may be a firewall, a third-party firewall, or an antivirus. We recommend that you disable these methods of protecting your operating system while playing.
Despite the fact that the word Firewall is quite scary, disabling it is quite simple.
— Go to the control panel.
- Find “Windows Firewall”.
— Double-click the left mouse button to open its settings
— On the left side of the menu, click Turn Windows Firewall on or off
— In each section, select Turn off Windows Firewall
After this, the firewall will be disabled.
To disable the firewall or antivirus (if any), the most common way is to right-click on the tray icon (bottom right - where the clock is) and click the “exit” or “pause protection” button.
This article describes the process of playing online with a friend, via hamachi (via LAN), if you are interested in other information, for example, how to play Minecraft online on multiplayer servers, then read one of the related articles:
(in multiplayer, on the server)
(how to play, what to do)
So, the easiest way to play Minecraft with a friend is to use the Hamachi program. With this program you will not have problems opening ports, that is, you do not need any sysadmin skills. The program is free, you can download it here -. Download and install it on both computers.
1st player
1. Run the Hamachi program on the first computer, turn it on:

2. Create a network. Enter any name, password, confirm password:

3. Log into Minecraft and start the game in single player mode. In the game, press the “Escape” keys on your keyboard - “Open for the network” - “Open the world for the network.”

Remember the port that the game gave you via chat - “The local server is running on the port...”. We need to pass this port to the second player, but first he must receive an IP address.
2nd player
4. Launch the Hamachi program on the second computer, click “Network - Connect to an existing network”, enter the network name and password that the first player created in step 2.

4. Copy the IPV4 address and paste it into notepad, after the address without a space we put a colon (:) and add the port number that the 1st player gave us after completing the 3rd step, for example, you get the following address: 25.71.185.70:54454