Exercise therapy exercises are designed to strengthen muscles that are weakened for some reason. The most relevant today is exercise therapy for the back, since the spine is the most common place where pathological changes occur. And it is these changes that greatly spoil a person’s life.
What is exercise therapy
Medical Physical Culture- this is a large group of special physical exercise, the purpose of which is to help restore the tone of any muscle groups. From the point of view of anatomy and physics, the most vulnerable place in the human body is the back and spinal column: from the sacrum to the neck. Therefore, the most relevant today is therapeutic exercises for the back.
There are a lot of exercises in physical therapy. You already know some of them, since you have probably done exercises at least once in your life.
Neurological departments often admit people who cannot straighten up. One day their back was pinched and they couldn’t straighten up on their own. This is due to the pinching of a certain nerve due to the fact that the muscular corset of the lower back cannot provide adequate protection to the spine.
Why are back exercises so necessary? See for yourself:
- Hands - they are always doing something, moving. Even when eating, you hold a spoon in your hands. In general, the arm moves too much for the muscles to atrophy that much.
- Legs - since a person walks, their muscles are also constantly trained.
- What remains is the body. To maintain a straight body position, the back and abdominal muscles must be evenly developed, toned and receive good blood supply. If these conditions are violated (say, with a sedentary lifestyle), the muscles weaken and can no longer perform their functions.
For example, the longissimus dorsi muscle, which runs along the spine, is constantly under stress. During long and motionless sitting, blood flow to it becomes difficult, which reduces its capabilities.
So gradually, depending on our bad habits, the core muscles lose the ability to reduce compression of the spine, the intervertebral cartilage is worn out, and the spinal nerves are pinched. This causes pain and limited mobility.
Thus, the back requires training. If you don’t go to the gym, don’t do exercises in the morning, or are overweight (even if you just have a belly), one day you will have to perform therapeutic exercises to save your back from the progression of diseases.
Types of exercise therapy
Gymnastics to strengthen the back muscles is not the only type of exercise therapy. First of all, physical therapy is designed to restore muscle tone in any part of the body. For example, after wearing a cast for a long time and forced immobility, muscle rehabilitation is required.
As for the back, this is a separate issue, since almost half of the entire earth’s population needs exercise therapy for the spine.
The most vulnerable part of the spine is the neck, because the vertebrae here are the smallest and most fragile. She holds her head, the weight of which can reach 2 or more kg. Imagine - the neck muscles hold this weight for most of the day. Titanic work that we don't notice. And add to this prolonged sitting, tilting your head to the side or stretching your neck forward. Under such conditions, not only does blood supply become difficult, but the load is also distributed unevenly. Some muscles are loaded more than others and cannot stand it. So therapeutic exercises for the neck are also necessary.
As a result, the classification of physical exercises can be based on the following:
- Training target muscle groups: gymnastics for the muscles of the back, arms, legs, etc.
- Prevention or treatment of various diseases: for example, for a sore back, etc.
These are all conditional classifications. Often the same exercises are used to achieve multiple goals.
Three complexes for the back of varying difficulty
Any disease has several periods. For example, the manifestation of spinal osteochondrosis can be divided into 2 stages. There is an acute period, and then there is a decrease in the severity of symptoms and the rehabilitation stage. And at each stage there are different exercises to strengthen the back muscles.
With exacerbation of osteochondrosis
Depending on the severity of back diseases, special exercises will be different. And they differ in their complexity and load.
You should start doing exercises only after the acute pain has been relieved.
For example, a primary set of exercises could be like this:
- We lie down on a soft and warm mat, with our legs thrown over a thick cushion. We squeeze and unclench our palms and feet. We do 10 simultaneous compressions.
- They moved the cushion aside and placed their feet on the floor. The left leg was bent at the knee, placing the foot on the floor. The right leg remains straight. Move your right leg 10 times to the side (sideways).
- Place your feet on the roller again, starting position with your arms along your torso. Alternately lift each arm up as if you were floating on your back - 10 strokes for each arm.
- Now do exercise number 2, but for the other leg.
- And again, legs on the bolster, bend your arms at the elbows, keep your palms at your shoulders. Make a circle with your elbows in a horizontal plane. That is, you draw 10 circles above you with both elbows at the same time. Try to draw even circles.
- The legs are still on the bolster, knees bent. Straighten each leg one at a time. 10 times for each leg.
- Now a more difficult exercise that may cause pain in the acute period, be careful. The roller was removed and the legs were bent at the knees. Alternately pull each leg with your knee towards your chest. 10 times.
- From the same starting position, turn your knees to the side, trying to touch the floor with each knee. Avoid sharp pain.
- At the end of the complex, breathe by inflating and deflating your abdomen - 10 inhalations and exhalations.
These exercises are suitable for daily use. You can see that a very light load is used for treatment. But it is enough to help a person.
When the acute period is over, you can do a more serious complex physical therapy exercises.
When symptoms began to subside
When the symptoms are no longer so severe, you can gradually increase the load. But listen to your body - if doing something hurts ( sharp pain) – reduce the range of motion. This will definitely help.
- Lying on your back with your arms extended along your body, raise your head and at the same time strain your abs. This is a lightweight version of raising the body from a lying position. We repeat the movement 10 times.
- We lean on the shoulder blades, arms along the body, bend the legs at the knees. Raise the pelvis 10 times. There is no need to bend it too much towards the ceiling, just raise it by 10–15 cm. A large amplitude can cause you pain at this stage.
- Lie straight on your back, tense your buttocks and relax them. Try to achieve maximum tension. This is a static exercise.
- We lie down with our legs bent at the knees, alternately touching our knees crosswise with our hands, slightly raising our head and body above the floor. 10 times for each hand.
- Place a large cushion under your knees (or an ottoman). From this position you need to raise your pelvis above the floor - again by 10-15 cm.
- We stood on our knees and hands, with our backs arched upwards. We sat down with our backs on our heels and stood back up. So 10 times.
- Now we stand in the same position as in exercise 6 - we arch our back up, lower it back to a straight position. So 10 times. This exercise works well the longissimus muscle and other muscles of the spine.
Well done, more strenuous exercises now that the pain has subsided!
Exercises for rehabilitation
At this stage, when there is no longer pain, you need to gradually strengthen the muscles of the spine so that they can withstand the normal load of your life.
The main targets are the abs, the longissimus spinae (all its parts), and the core muscles.
The complex is as follows:
- Lifting the body while lying down. You have already raised your head, now try to tear it away from the same position. top part backs off the floor. You need to put your knees over the ottoman.
- From a lying position, lift your straight legs one at a time. Over time, you can lift both legs. Press your lower back to the floor. This can be painful at first, so you need to work each leg individually first.
- Raising legs from a vertical position. You need to hang on the gymnastics wall or use a horizontal bar or special supports. You don't need to keep your legs straight; in your case, it is enough to raise your legs with your knees bent. Just try to touch your knees to your chest.
- Very effective exercises in exercise therapy is rolling back and forth on a round back. Wrap your arms around your knees and roll. But do it on a mat, since rolling on a hard surface is not the most pleasant experience on your spine. You can lean slightly to the side to get a longer trajectory and stretch more muscles.
- Hyperextension and reverse hyperextension are the most best exercises to strengthen your back. Regular hyperextension should be done in parallel with abdominal strengthening. This is the key to lower back health.
- Exercises for stretching the legs and lower back are also a mandatory part of exercise therapy. To do this, stand up straight, fix your lower back and try to reach the floor with your hands. If you are good at this, grab your shins with your hands and reach closer to your legs. When performing the exercise, try to maintain the curve in your lower back, which is characteristic of correct posture.
There are, as already mentioned, a lot of exercises. You need to do them regularly and monitor your feelings.
Here are a few simple tips that will help you recover faster:
- Don't do anything through pain. But, do not immediately abandon the exercise if it causes pain. Reduce the range of motion and conduct an experiment. As a result, you will know exactly at what stage the pain occurs and where to stop.
- Don't lift weights. In your case, hyperextension and abdominal lifting cannot be done with additional weight.
- For osteochondrosis, it is useful to simply hang on the horizontal bar; this stretches the spine.
- Avoid drafts while exercising as you are exercising on the floor. Cold is an enemy for the back not only with osteochondrosis, but also with other diseases.
Performing physical therapy exercises to strengthen the back muscles allows you to achieve good results. The health of this part of the body is important. Existing back problems for a long time may not manifest themselves, appearing after some time, when the situation risks becoming uncontrollable. Loads deplete the resources of the back, so it is necessary to take appropriate measures to strengthen it.
Rules for performing gymnastics
Therapeutic exercise is good for health, but you need to follow the rules and perform the exercises correctly. To avoid harming yourself, you should consult a specialist and follow his instructions.. The rules are presented with simple requirements that are not difficult to comply with. If the goal of physical exercises for the back is not only to strengthen muscles, but also to eliminate pain and pathologies, then the complex is prescribed only by a doctor after an appropriate examination.
Before performing gymnastics, you must warm up your muscles. The back must be prepared for stress, since an abrupt start to exercise is stressful for any part of the body and organism. In this case, there is a high risk of injury.
A common mistake newbies make is overloading. In one session it will not be possible to correct all existing deficiencies and develop the back muscles; this requires a long period of physical therapy. A competent increase in load is the right decision.
If during the training you experience any discomfort, discomfort or pain, then the training should be stopped immediately. In some cases, changing the exercise helps, but this seems possible when performing the exercises under the supervision of a specialist who has the necessary knowledge and is in complete control of the situation.
It should be understood that when strengthening your back, it is difficult to achieve good results if the load is not applied to other muscle groups in the body. The overall load is more beneficial than impacting one category of muscle corset. You can conduct classes both in the gym and at home, using improvised means.
Performing exercises: stages of training
A complex of physical therapy must necessarily include several stages, which allows you to achieve good results. The stages are presented in the following categories:
- Warm-up - warming up the body and muscles.
- The basis is the maximum degree of load and the basic exercises of physical therapy.
- Relaxation - exercises that allow you to recover after exercise.
Each stage is important, so you cannot refuse even one of the presented ones. Without warming up, a person runs the risk of injury; the foundation is the foundation of the entire complex, and it makes no sense to abandon it. Relaxation is also important, as it allows you to consolidate the results achieved and recover.
Preparing the body
A strengthening complex for the muscular corset begins with a warm-up. This will help prepare the body for further work and ensure increased blood circulation. Indicators of flexibility and elasticity are also important, so warming up is an important and necessary stage.
Warming up the muscles should be gradual. We must remember that this stage is not the main one; you need to save your energy and not waste it completely. The following complex can be used as warm-up exercises:
- Performing movements in a circle with your shoulders.
- Move your shoulders forward and back.
- Head movement in different sides and in a circle.
- Circular rotation of the pelvis, tilts back and forth, left and right.
- A small amount of squats. The heels should not leave the floor during the exercise.
- Swing your arms to the sides, up and down.
- Arm flexion at the elbow joint and rotation.
The presented stage is performed slowly and calmly, breathing must be even. There should be no jerking or sudden movements. You can monitor your pulse and heart rate. After warming up, your pulse and heartbeat should speed up, but not too much.
Main stage and relaxation
When warming up is completed, physical therapy should be performed. All or most muscles will be involved, but the main focus should be on the back. The first exercise is represented by twisting while lying on your back. Hands should be placed on the back of the head or on the chest in a cross position.
The next exercise is also performed lying on your back. You are required to lift your legs alternately and perform the “Scissors” and “Bicycle” exercises, which are familiar to many. In the first case, swings of the legs are performed, imitating the principle of operation of scissors. In the second case, the rotation of bicycle pedals is simulated. The exercise affects not only the back, but also the abs, which is its double benefit.
For next element you need to get on all fours and put your hands on the floor. The legs are raised one by one and pulled back. You can also use your hands, which will complicate the action. In this case, you should follow the rule: when lifting your right leg, you need to move it forward left hand. A similar situation with the left leg and right hand.
After completing the main block of physical therapy, they move on to relaxation. Simple exercises will help with this, allowing you to normalize your pulse, relax your muscles and restore your breathing. With the help of exercise, the body receives a signal to stop working, which allows it to easily return to normal mode.
Relaxation through exercises after completing the complex appears as a result of the rotation of those parts of the body that were involved in the work. You can also use muscle stroking, shaking and patting.
Thus, physical therapy is not a complex exercise and is suitable for children and adults.
It is required to conduct classes every day, then the effect of the event will be better.
The complex must be selected individually.
Moderate physical activity is necessary; it normalizes the functioning of the spine, strengthens the muscle corset and tones the body.
Do you need exercises for radiculitis? Yes, all doctors will tell you this. Strong muscles will prevent compression of the nerve roots in the lumbar region, thereby reducing pressure on the spine.
If you feel unwell after exercise, this is not a reason to give up exercising, you need to reduce the intensity of their implementation, and after the condition improves, resume the system. However, if severe pain occurs, you must stop performing the complex and consult a doctor.
Contraindications
Do not ignore the importance of agreeing on a set of exercises for lumbar radiculitis with your doctor. Doing exercises incorrectly can seriously harm the body, so you need to know when they are contraindicated:
- for cardiovascular diseases;
- during exacerbation of radiculitis;
- in case of severe physical illness.
You can do exercise therapy not only in the clinic’s offices, but also at home. Gymnastics is performed 1.5-2 hours before or after meals.
No special clothing is required, as long as you are comfortable and your body can breathe. The execution time takes approximately 20 minutes per day, and the course of treatment is 30 days.
Charger
Exercise for radiculitis is a very important event for the treatment and prevention of the disease.
- Take a position lying on your stomach, clasp your hands behind your back. In this position, lift your chest and head without lifting your legs off the floor 8-10 times. Hold for a few seconds and return to the starting position. With each approach, you should try to increase the delay time, but no more than 20 seconds. The exercise relieves tension in the lower back and pressure on the roots.
- Exercises to relax the muscles in the back and lower back. Take a position lying on your back, bend your knees, feet resting on the floor. Hands are on the buttocks. You need to try to reach your chest with your knees, while keeping your feet on the floor, while at the same time, raising your body, your head reaches towards your knees. Perform the exercises 10 times.
- You can relieve pressure from the spinal muscles with the following exercises. Lying on your back, legs bent at the knees and motionless, arms crossed on your chest. Raise your shoulders and head several times. It is important to perform all movements slowly and smoothly.
A video will help you understand how gymnastics is performed for lumbar radiculitis, where each movement is described and shown in detail.
Cervical sciatica
Exercise therapy for radiculitis has two main goals - to reduce pain and increase mobility of the affected area. You can reduce pain by improving blood circulation during muscle contraction. To strengthen muscles and increase mobility, a set of isometric exercises is prescribed.
Turn your head
Treatment of lumbar radiculitis with the help of gymnastics will give a good result if you follow all the recommendations. It is important to perform exercises carefully without sudden movements, with correct posture while sitting straight on a chair. Keep your head straight.
The head turns behind the shoulder as if you need to look back. Turns are made until the comfort zone is violated. At the first sign of pain, you should stop exercising or reduce your turning radius.

Imagine that you are in a large vessel of water and the tip of your nose is just above the surface of the water. You need to keep your nose above the water and turn your head.
Head tilt
Sit on a chair, posture straight, tilt your head towards your shoulder, as if you want to touch it with your ear. In this case, there is no need to try to raise the shoulder itself towards the ear. Bends are done until it causes discomfort, as soon as pain appears, the exercises stop.
To avoid breaking the rules, do your exercises in front of a mirror. Make sure that the tip of your nose does not deviate towards your shoulder. If your shoulders are still pulling towards you, fix them by placing your hands under your buttocks.
Gymnastics for lumbar radiculitis
Whatever area gymnastics is done for radiculitis, lumbar or cervical, it is carried out very carefully. No heavy lifting, deep bending or jumping required.

During the period of exacerbation of the disease, you should refuse any exercise. My patients use a proven remedy that allows them to get rid of pain in 2 weeks without much effort.
Before doing gymnastics for lumbar radiculitis, you need to prepare the muscles, for example, with cardio exercise, walking or running.
- In a standing position, place your feet together, hands in front of you. With a big inhalation, raise your arms and bend your body. Return to the starting position and repeat again 5-10 times;
- In the same position, place your hands along your body and roll from toe to heel. Hands perform movements as when walking;
- Stand straight, place your feet shoulder-width apart, place your hands on your waist. While in this position, lean to the left, bending your right leg at the knee. Same with the other side. Performed 5-10 times;
- Squat as you exhale in the same position, and as you inhale, straighten up, lowering your arms. Run 10 times;
- Lie on your back, hands on your waist. As you inhale, you need to raise your right arm and left leg at the same time. As you exhale, return to the starting position. Do 5-10 times on each side.
By doing exercises for radiculitis of the lumbosacral spine regularly for 1 month, devoting at least 20 minutes to them daily, you can notice an improvement.
It is known that any serious workout should begin with warming up the neck muscles. If simple exercises neglected, the exercise may result in pain in the cervical spine or even serious injuries. Performing regular neck exercises is necessary to maintain health.
But there is another reason why you should stretch your neck. The daily load on the spinal column begins to become worse and worse with age. Lack of exercise can lead to premature wear of cervical cartilage, osteochondrosis, and chronic pain. From lack of movement, the skin becomes flabby and the muscles sag. An area of the body that usually does not attract attention will begin to become noticeable due to its unpleasant appearance.
The simplest movements can prevent aging and even reverse the process of degradation.
Goals

The greatest benefit from exercise is received by those who early realized the need to pump up their neck muscles. A feeling of vigor, good health, normal blood flow to the head - this is what a person gets who regularly performs exercises for the neck muscles. But in most cases, people who already have problems face the need to expand their training program.
When selecting a set of activities, the seeker usually pursues one of the following goals: treatment (exercises for pain in the cervical region), sports to give the neck an aesthetic appearance, or as a preventive measure. Let's consider each of these cases.
Treatment
Pain caused by a sedentary lifestyle, tightness and inflammation are rarely limited to the back area. Soon the patient notices that he can hardly move his neck. Gymnastic exercises are an excellent remedy against osteochondrosis and its companions.
In this case, you should be prepared for a long period of training, since the restoration of cartilage tissue takes time. In addition, you will have to be very careful when starting exercises - there is a risk of causing an exacerbation.
Sport
For weight lifting and other intense physical activity strong muscles necks are no less important than pumped back muscles. They bear a significant portion of the load, so they must be as durable as the muscles in other parts of the body.
A basic warm-up is not enough here; you will have to add strength loads. If you are studying in gym, try tensing your neck muscles every time the other muscles are stressed.
By following the exercise regime, you can achieve amazing results in just a couple of months.
Aesthetics

Ointments and creams are not particularly effective in preserving and restoring the visual youth of the neck, no matter what cosmetologists promise. But gymnastics actively copes with this task.
What are the benefits of exercise:
- Movements cause blood to move through the vessels more actively, cells are renewed faster.
- Flabbiness disappears, flexibility and elasticity appear.
- Following the neck, the entire spinal column straightens.
- Posture improves and skin rejuvenates.
To stay young, the neck must be toned. True, movements for beauty are not difficult, but you will have to perform them throughout your life.
Prevention
With the development of public awareness, all more people do gymnastics simply because it is useful. And primarily because improved blood flow helps the brain work better throughout the day.
Other advantages:
- The head, supported by strong neck muscles, switches more quickly from sleep mode to activity mode and back again.
- Gymnastics prevents premature aging spine and inflammation, extinguishes the harm from a sedentary lifestyle.
Of course, you will have to practice regularly. But the result is worth it, and it is achieved with little effort.
Gymnastics classes
Exercises are selected in accordance with the objectives. Most neck movements do not have an “entry threshold” and can be performed without preparation. Caution should be exercised only by people suffering from osteochondrosis or other cervical diseases, as well as those who have a natural tendency to such pathologies.
Over time, the muscle fibers will become stronger and basic movements will begin to seem too easy. If you play sports, then feel free to increase the load progressively. If not, then determine the average value for yourself: the movements should not be too difficult and not take too much time, and the warm-up should be felt.
If your only goal is to restore youth and elasticity to your neck, then you can limit yourself to the simplest exercises. The main thing is to watch the sensations when bending and turning. You should feel how the cartilages are warming up.
Morning exercises

Many people complain about the inability to devote time to exercises to strengthen their neck muscles. Instead of following in the footsteps of most people, start your day with a light workout. It will help you wake up and speed up blood flow in your neck, setting a great mood until the evening.
You don’t need to go anywhere or make your bed; exercise immediately after waking up. If the pillow is too soft and fluffy, then it should be removed from under the head. If necessary, you can replace it with a rolled towel or a small roller.
- Lie straight without getting out of bed. Place your arms at your sides and bring your legs together. Smoothly lift your head, tensing your neck muscles. Try to keep your neck straight. Fixed in highest point, also smoothly lower yourself back. If you are performing the exercise for the first time, you can limit yourself to five repetitions. Over time, try to increase the number of repetitions to 20.
- Sit on the bed, placing your back against the headboard or wall. Place your hands on your knees, straighten your back and straighten your shoulders. Place your head on your chest. Smoothly tilt your head to the side, to the left, to the maximum point. Try to reach your left shoulder. Then return to the starting position and do the same movement in the other direction. This is a stretching exercise, five repetitions for each shoulder are enough. If stretching makes you dizzy, close your eyes and slow down.
- Sit cross-legged, keeping your back straight. Perform head turns on a straight neck, pointing your chin alternately to the right and left side. Make sure your body doesn't follow your chin. It is also enough to repeat this exercise 5 times in each direction.
- Maintaining the starting position, perform smooth circular movements with your head. Strive to describe a circle of maximum diameter, to reach the most distant points. Perform the exercise with great care and take your time. Close your eyes to prevent dizziness and nausea. Rotate alternately clockwise and counterclockwise. No more than 5 repetitions in each direction.
Then you can get out of bed and head out to face a new day (or start general exercise).
There are practically no strength exercises for the neck in this complex. Therefore, it is great for prevention and rejuvenation, but it will not work to pump up the neck muscles.
Physiotherapy
You can perform these simple movements anywhere: at home, in the office, at school. Warming up, however, may require a little more space and freedom of movement. As a last resort, you can remove unnecessary moving elements from it, but then it is strongly recommended to include them in your morning exercises.
Preparation for the main part is carried out as follows:
- Stand on your toes and walk around the room. Don't take big steps. Then walk at a normal pace, then on your heels. Everything together should take no more than three minutes.
- Stand up, straighten your back. Allow your arms to hang loosely at your sides. Gradually tense your arms without raising them, while trying to move your shoulders and shoulder blades down and forward. Return to the starting position. Repeat up to 6 times. When performed correctly, you will feel the neck muscles relax.
- Without changing position, place your head straight and smoothly turn it to the side, while simultaneously twisting in the chosen direction (bend). Also slowly return to the starting position. Repeat for the other side. 5 times in each direction is enough.
- Stretch the muscles and cartilage closest to your neck in a loose form. You can perform arm swings, circular rotations of the shoulder joint, deep back stretches, and shoulder blade movements. Perform the selected exercises 10 times.
Now you can move on to the main part of the lesson. The complex is selected taking into account your well-being and individual sensations. If any movement causes pain, it should be eliminated and tried again next time.
The persistence of pain may indicate neck pathology, inflammation and other disorders missed by doctors. Contact a specialist for a diagnosis.
Basic exercise therapy

Start small, increase the volume of loads gradually. Normal dynamics are an increase in the number of repetitions by one and a half to two times within a month. Having found the ideal balance of workloads, try to maintain it and not miss classes without a good reason.
Gymnastics may consist of the following movements:
- Sit on a chair or stand on the floor, keep your back muscles tense, and maintain your posture. Slowly stretch your head to the right and left. Start with 10 reps for each side.
- Without changing your position, alternately stretch your chin forward and the back of your head back. Keep it smooth and do 10 reps.
- Close your eyes and very slowly move your head in a circle, trying to touch the lowest points with your chin and back of your head and reach your shoulders with your ears. 10 reps on each side.
- While tilting your head to one side, simultaneously push it with your hand to the other (when tilting to the right, push to the left with your left hand, when tilting forward, push back with either hand, etc.). This movement strengthens the neck muscles and makes the arms stronger. Start with 10 repetitions on each of the four sides.
- Stand up straight. Stretch your arms straight in front of you, raise your shoulders to the extreme position. Count to eight and relax, smoothly return to the starting position. Start with five reps.
- Lie down on any hard and flat surface. Relax your back muscles. Smoothly raise your head, trying not to pull your shoulders up, and look at the tips of your toes. Slowly count to seven and lower yourself. Start with 10 reps.
Regular exercise is the best prevention of osteochondrosis and its exacerbations. With the development of the muscle frame, your well-being will improve. The main thing is to follow all the rules for performing gymnastics. A careful approach will help you achieve success.
Osteochondrosis of the back or neck of the third or fourth degree does not allow patients to engage in therapeutic exercises. Congenital pathology may also be an obstacle to starting classes.

Neck exercises can significantly improve the well-being of patients suffering from osteochondrosis. They relieve spasms caused by overwork and improve metabolism in cartilage tissue.
If you are planning to introduce exercise therapy, do not forget to adhere to the following simple rules:
- You cannot move while jerking. Each movement must be performed as smoothly and accurately as possible.
- You can't exercise when your neck hurts. Wait until the pain subsides, then carefully resume exercise. Don’t ignore back pain either: they signal overload and improper exercise.
- You should not exercise after taking painkillers. The pills suppress the “useful” pain that tells you when to fix the stretch or stop the activity.
- You can't exercise without warming up. Even if you have been exercising for a long time, do not refuse to warm up your neck and back.
- You cannot return to normal activity after a long break. Regular exercise gives maximum results. But if for some reason you haven't exercised for a couple of weeks or more, don't pick up where you left off. Reduce the number of repetitions to half your normal amount. Spend at least a few sessions gradually returning to exercise.
When starting exercises, do not forget to assess the degree of readiness for physical activity. You should consult your doctor on this issue.
Before you begin exercises to strengthen your child's back, you should determine whether your child's muscle strength is appropriate for his age.
Some anatomy questions
To do this, there is a special test for the back muscles - these include:
- trapezius muscle, originating from the occipital region and located in the upper back. It is responsible for extension of the head and displacement of the shoulder blades;
- The latissimus muscle is located in the lower back and covers the side of the chest. In action, it brings the torso closer to the limbs, and is also responsible for lowering the raised arm;
- muscle that straightens the spine. It is located along the line of the spinal column.
Rules for preparing for classes
Testing can begin after the baby reaches six months of age. To do this, you need to place the baby on your stomach, and then lift the baby, holding your hands at the waist. Normally, it should be held in a canopy, while leveling the back to the so-called “swallow”. This exercise helps determine whether children need to strengthen their back muscles.
Once the level of muscle development and muscle strength have been determined, you can begin training. You will also need to return to this test periodically to analyze the results of your training and note your results and achievements.
Complexes for training
There are special back exercises for infants:
- You need to strengthen your baby's back in those moments when he is in the arms of an adult. For this purpose, you need to carry the baby with his back to you, supporting him with his hand under the butt. You can also hold it in this position and lean forward a little and straighten up. This method helps the child learn to independently hold the upper body upright. The exercise must be repeated periodically throughout the day. It is imperative to secure the baby and clearly control the position of his body.
- A gymnastic ball is good for muscle development. How to strengthen a child’s back with its help? It is necessary to place the baby on the ball on his stomach, while his legs should be directed towards the adult. At the beginning of training, it must be kept in the armpits. Carry out rolling movements, directing the baby either away from you or towards you. In this way, the baby, regardless of age, learns to arch his back in the shape of a boat. Do not overload the child, especially at the initial stage of training; it is enough to repeat this exercise three to four times. After this, you can change the direction of movement by turning the baby in a circle (clockwise or counterclockwise).
- When the previous exercises begin to be easy for your baby, try to complicate the task a little. To this end, support the baby no longer in the area armpits, and by the hips. So the baby will independently hold his back in the canopy, first for a few seconds, then the time will constantly increase.
Massage and its role in the physical development of a baby in the first year of life
In addition to gymnastics, there is a strengthening back massage for children. It is also necessary as children learn to sit independently at six months. Therefore, it is important that by this age the baby tries to keep his back straight. This will help to correctly distribute the load on the skeleton and will be a good prevention of various curvatures of any segment of the spinal column.
Massage technique for a child of the first year of life
How to strengthen your baby's back muscles with massage? To begin with, you should place the baby on his stomach. At the same time, his legs should be directed towards the adult.
The massage is carried out in several stages:
- Stroking. Use your hands to move your hands up and down along your spine. After this, stroke with your fingertips in the direction of the ribs from the spine to the side.
- Trituration. Rub the area near the spine in a spiral with your fingertips, moving from bottom to top, then along the growth of the ribs.
- Kneading. You need to warm up the muscles on the sides of the body, directing movements from bottom to top. In this case, you should grab and slightly pull the muscles with your hands. And at the end of the massage, you need to relax the baby’s muscles by stroking.
No matter what level physical development will be detected in a child at the initial stage of training, regular classes by parents (or a professional instructor in physical therapy and massage for children) will help catch up with “successful” peers. If a significant lag is detected before starting classes, it is advisable to consult the child with an experienced orthopedist-traumatologist, and begin the classes themselves with a qualified instructor.
To help you use this machine most effectively, Domyos Club trainers have prepared video exercises for you.
For maximum effectiveness, class time should be from 30 to 45 minutes, depending on your level of training. the main objective exercises - muscle endurance training: work alternating blocks of exercises - this will allow you to use different groups muscles.
Keep your back straight during all exercises. To do this, choose a fixed point that is convenient for you, which helps maintain the correct position of the spine. Do not make sudden movements when returning to the starting position, so as not to damage the joints and keep the abdominal muscles in constant tension.
Forearm abduction
Degree of difficulty: level 1
Muscles involved: pectoral and shoulder
Doing the exercise. Starting position: Place Body Power between your forearms. Keep your hands at chin level and your elbows at stomach level. Squeeze the machine with your hands and then release it.
Breath: exhale, squeezing your elbows, and inhale, returning to the starting position.
Repetitions:
Hip reduction
Degree of difficulty: level 1
Muscles involved: thigh muscles, quadriceps
Doing the exercise. Starting position: Sit down and place the Body Power between your thighs with the center of the machine pointing down. Bring your feet together and squeeze Body Power solely through your hips.
Breath: exhale while squeezing the exercise machine and inhale as you return to the starting position.
Repetitions: 3-5 sets of 30 seconds at an accelerated pace, 30 second break between sets.
Lateral flexion
Degree of difficulty: level 1
Muscles involved: quadriceps
Doing the exercise. Starting position: sit on the floor and, with your legs stretched out in front of you, bend them. Place Body Power on the floor near the left calf muscle. Press the machine with your foot, then release it and repeat the exercise.
Breath: exhale as you press the machine and inhale as you return to the starting position.
Repetitions: 3-5 sets of 30 seconds at an accelerated pace, 30 second break between sets.
Strengthening the biceps
Degree of difficulty: level 2
Muscles involved: biceps
Doing the exercise. Starting position: Press Body Power with your left hand to your right chest. While holding the machine in this position, lift the free Body Power handle with your right hand towards your chest, then gradually release it.
Breath: exhale as you bend your arm and inhale as you return to the starting position.
Repetitions: 4-6 sets of 30 seconds at an accelerated rhythm, changing hands for each set. 30 second break between sets.
Strengthening the biceps
Degree of difficulty: level 2
Muscles involved: biceps
Doing the exercise. Starting position: sitting on a chair, place Body Power on your thighs in an upright position. With both hands, grab the handle opposite the one on your thighs and press it down.
Breath: exhale while pressing Body Power and inhale as you return to the starting position.
Repetitions: 3-5 sets of 30 seconds at an accelerated pace, 30 second break between sets.
Oblique exercises
Degree of difficulty: level 2
Muscles involved: lateral abdominal muscles
Doing the exercise. Starting position: place Body Power under your left arm so that central part the exercise machine was under your arm. Fix the position with your right hand, pressing the handle to your chest. With your left hand, press Body Power onto your right hand, then release.
Breath: exhale as you press with your hand and inhale as you return to the starting position.
Repetitions: 3-5 sets of 30 seconds at an accelerated pace, 30 second break between sets.
Maintaining pressure with your thighs
Degree of difficulty: level 2–3
Muscles involved: thigh muscles, quadriceps
Doing the exercise. Starting position: Sitting on a chair, place the Body Power between your thighs so that the center of the machine is pointing down. Feet should be on a short distance from each other. Squeeze Body Power using your thighs exclusively. Hold this position for a few seconds, then release the pressure.
Breath: exhale as you squeeze the machine and hold the position, and inhale as you return to the starting position.
Repetitions: 3-5 sets of 30 seconds at an accelerated pace, 30 second break between sets.
Strengthening the pectoral and shoulder muscles
Degree of difficulty: level 2–3
Muscles involved: pectoral and shoulder
Doing the exercise. Starting position: Hold Body Power in your hands straight in front of you. The center of the machine should be near your chest. Squeeze the machine with your hands and then release the pressure.
Breath: exhale as you squeeze with your hands and inhale as you return to the starting position.
Repetitions: 3-5 sets of 30 seconds at an accelerated pace, 30 second break between sets.
The core abdominal muscles are a series of muscles that begin under pectoral muscles and reach the pelvis. It also includes several muscle groups in the back and other groups throughout the body. A “strong back” means a good physique and a healthy body. If you want to learn how to achieve this, learn to exercise at home or at the gym. Once you have achieved this power, you can also learn to maintain it.
Steps
Strengthening core muscles at home
- To find your core muscles, get into a push-up position for about 1 or 2 minutes and notice which parts of your body are tired. Usually these are your hands.
- When you get into a push-up position or do any exercises for a major muscle group, tense your muscles abdominals during each exercise. These are the muscles we were talking about.
- To perform these exercises correctly, inhale as you contract the muscles and exhale as you relax them.
-
Planks. Planks are simple and help engage all of your core abdominal muscles. This is a great exercise for training the core muscles of the body. To do them, get into a push-up position. Place your feet shoulder-width apart and balance them on a ball or stool. Keep your arms slightly bent, not closed, and hold for a minute, engaging your core abdominal muscles.
- When you're just starting out, aim to do 2-3 of these sets. A minute each if you can. If this proves too difficult, hold on for at least 30 seconds, or as long as you can.
- If you want a more challenging exercise, ask the instructor to balance a manageable amount of weight from the weight on the back of your legs.
-
Do the exercise on one side. Lie on one side, propped up on your elbow. Place your feet on top of each other and extend your other arm. Engage your abs as you lift your hips off the floor. Keep your back straight, forming a triangle with the floor. Hold for 30 to 60 seconds, then repeat the exercise on the other side. Try to do 3-5 sets on each side.
Begin push-up positions with your core muscles engaged and your back straight. In one quick movement, jump into a squat position and stand up. Then squat back down and continue into a push-up position. You should do this as quickly as you can comfortably do.
- When you start, try doing three sets of 15. If you want a more challenging challenge, do jumping jacks or do the exercise while holding a weight.
-
"climber". Start in a push-up position with your core abdominal muscles engaged and your back straight. Take a big step with one leg, pull it towards your waist, and then repeat with the other leg. Do this as quickly as possible, but without leaving your comfort zone.
- Try to stay in this position and do this exercise within 30 seconds. If you can, try doing 3 sets.
-
Do leg raises. There are many leg raise exercises to strengthen your core abdominal muscles. To begin, lie on your back and place your arms under your body. Keep your feet together and lift them 6 inches off the floor. Raise your legs 45 degrees, then lower them to 6 inches off the floor. Repeat these movements as many times as possible within 30 seconds and repeat the complex three times.
- You can also do an exercise called a bicycle exercise with your hands under your head as if you were going to squeeze it and with your back straight and a few inches off the floor. Lift one leg at a time, lift your knee and reach towards it with the other side of your body. Keep your back straight.
-
Walk in a push-up position. Get into a push-up position with your hands slightly wider than shoulder-width apart. Stand firmly on your feet, then walk slowly with your arms. Go as far as you can. If you can, repeat the exercise 10 times.
Climb the rope. Sit with your legs extended forward in a "V" shape. Contract your core abdominal muscles and bend your back into a “C” shape. Raise your arms up and pretend to be climbing a rope, turning your body slightly as you do so. Do 20 exercises with each hand.
It is better to do a little exercise, but do it properly. Lie on your back with your knees bent and feet flat on the floor. Place your hands behind your head or cross your chest. Keep your back and neck straight and sit down, engaging your abdominal muscles. Raise your body 45 degrees, then lower yourself, but do not reach the floor. Repeat.
- For the first time, do several sets of 30 presses. Do them slowly, engaging your abdominal muscles throughout the workout. The exercise may be difficult, it is by no means easy.
- Some people mistakenly believe that by doing abs several hundred times an evening, they will achieve a rock-hard torso in a few weeks. If that's all you do, you're unlikely to get results. Abs strengthen muscles, but do not burn much fat.
Exercises in the gym
-
Lift the barbell. Go to the free ones, squat down and firmly grasp the barbell with your hands, keeping your hands shoulder-width apart. Stand up, keeping your back straight and engaging your abdominal muscles.
- Many people can lift a fair amount of weight, but there is no need to push it. Lift as much weight as you can lift 10-15 times.
- Because This exercise strengthens the lower back; it is better to wear a belt. Make sure to use proper form and keep your back straight. Ask an instructor to help you keep your form correctly.
-
Swing the hammer. Many gyms have hammers, often next to the tire. Hold the hammer firmly with both hands, place your feet shoulder-width apart, bend your knees, and keep your back straight. Swing the hammer over your shoulder to your other side and hit the tire or pad. Control the hammer as it jumps up, then hit the other side in the direction of the first. Repeat 10-15 on each side. Repeat 3 times.
- It is very important to hold the hammer and not let it hit you in the face. This is not just swinging, you also need to control the hammer after impact. Be very careful.
- If your gym doesn't have a hammer and splint, you can do this exercise using a weight. Hold the load as you would a hammer.
-
Climb the rope. Nowadays, many gyms have ropes that you can use for exercises. A rope consisting of several weighty threads, as a rule, is attached to the ceiling at one end, and you can grab onto the other.
- For this exercise you need to grab the rope in sitting position, involving the abdominal muscles in the process and keeping your back straight. Swing your pelvis forward, raising your arms up to swing the rope (the swing should reach the wall), then bring it to the starting position.
- Remain in a sitting position, engaging your abdominal muscles during the exercise. Repeat the exercises for 30 seconds and try to do 3 sets.
- Some are heavier than others, so try to properly assess the situation before you begin the exercise.
-
Swing the weights like a rope. The actions are largely similar to the previous ones. Hold the kettlebell firmly and swing it upward, starting at your feet, keeping it level in the middle, and lifting it up to your chest, not your head. Repeat 15-20 times for 3 sets.
Do the Russian swing exercise. Lie on the ground in a basic ab position and hold a moderately heavy barbell with both hands. Extend your arms straight out in front of you and sit down, keeping your back very flat at a 45-degree angle to the ground. Using contraction of your core abdominal muscles, rotate 90 degrees to one side, keeping your arms straight. Then turn the other way. Try to do as many turns as possible in 30 seconds, but do them slowly. Do 3 sets.
-
Raise your legs in a suspended position. Hold yourself in the air on the plank as if you were going to do a pull-up, but lift your legs instead. Make a right angle with your legs, bringing your knees closer to your waist, and keep your legs straight. Do 3 sets of 15 each.
Maintaining core abdominal muscle strength
-
Do exercises that you enjoy regularly. It is impossible to keep your muscles in shape in one or two workouts. If you want to have strong, tight abdominal muscles and slim stomach, you must exercise regularly and eat right. To make it easier for you, find an exercise that you enjoy.
- YouTube, Muscle & Fitness, and a number of other sources offer free workout guides and various training outlines that you can follow. Choose the ones you like and try to do them 3 times a week. Do them to music. It's much easier than trying to do it yourself.
- Some people prefer to turn them on regularly and try new ones each time. Do a workout for one or two weeks, then find a new one. Change them so you don't get bored.
- Focus on all-round fitness. To strengthen muscles, you need to be healthy, and not just have strong abs and back muscles. If you want to achieve results, you must focus on building muscle mass and burning fat, which requires a fair amount of cardiovascular exercise in addition to the basic ones.
- Training schemes contain combinations of one type of exercise described in a specific article, but they are quick, with short breaks between them. Find a group of 10 exercises that you enjoy and divide them into subgroups of 60 seconds of exercise and 30 seconds of rest. Do your core exercises 3 times and finish in an hour or less.
- Consider supplementing your core exercises with other full-body aerobic routines. Look for yoga, Pilates, or push-up classes in your area that you can attend and alternate them with your core workouts.
- Try to exercise every day of the week and on the weekends do something fun that gets you moving. If you work out on Monday, Wednesday, and Friday, play basketball with friends on Saturday, or go hiking on Sunday to keep you moving. This will help you stay healthy in a variety of ways.
-
Use your core muscles throughout your workout. Simply doing the exercise is not enough. Use your core muscles in all exercises to achieve the desired effect.
Does your lower back ache, is it difficult to bend over, does your vertebra click? All these are signs of a neglected back. A weak muscle corset cannot support the spine and internal organs, so pain appears. Exercises to strengthen the back muscles will relieve problems and become an effective prevention of spinal diseases.
Back exercises differ from other exercises in the degree of risk. If you injure your back, then due to the displacement of the support, the spine will be overloaded, organs and blood vessels will be compressed, and this will immediately affect the functioning of the brain.
Before performing the complex, you need to go to the doctor. X-rays and consultation are the minimum that needs to be taken care of.
Safety precautions when performing exercises to strengthen the back are as follows.
- Slow movements. Your task is not to do the complex as quickly as possible, but to feel the muscles working as much as possible.
- Forget about jerking. Sharp lunges, twisting and bending transfer the load to the joint-ligamentous apparatus.
- Progress through more repetitions or complication. Exercises with dumbbells are recommended for strong backs. Weak muscles will not be able to lift the weight, so the legs, arms, and abs will be more involved in the work. The complex will cease to be targeted and will be dispersed throughout the body.
- Monitor your health. Stop gymnastics if discomfort occurs. Overcoming yourself through pain will only harm your body.
- Don't exercise on a full stomach. Do exercises before meals or after 2 hours.
The complex is performed every day. Set aside half an hour in the morning and evening for this. A couple of your favorite exercises can be done every hour as a warm-up for your back.
Watch your breath! It should be uniform. We tense the muscles as we exhale, and relax as we inhale. This is an essential condition for the effectiveness of the entire complex.
Before classes, place a special gymnastic mat or blanket on the floor, folded 3-4 times. This will soften the shocks and remove excess stress from the vertebrae.
Who are contraindicated for back exercises?

The training complex is not designed for everyone. There are precautions.
You should not do exercises to strengthen your spine if:
- there is a spinal injury;
- I recently had an operation and the stitches did not completely dissolve;
- there is a period of exacerbation of a chronic disease;
- bleeding is observed;
- there are problems with the kidneys, lungs, heart or blood vessels;
- You are pregnant.
Still want to work on your back? Make an appointment with an orthopedic doctor. He will recommend the safest exercises for you from the repertoire of physical therapy.
Preparation for training
A good warm-up is the key to a safe workout. Unheated muscles and stiff joints can cost your health. Special attention Take time to warm up in the morning, because before this the body has been motionless for a long time.
How to warm up?
- Let's wake up the body. Run in place or jump. Now you need to wake up and get your heart pumping.
- We develop joints. Rotate the joints in different directions, starting from the top. We knead the foot like this: bend it slightly in the middle with your fingers back until there is slight discomfort. Rotations are harmful to the neck. We replace them with tilts 10 times in four directions.
- We stretch the muscles. Stretch slightly to the sides so that the muscles become elastic and receive blood flow.
A set of exercises for the back
The system is designed for average and First level fitness. Exercises are performed at home without weights. Do up to 15 repetitions, number of approaches: from 1 to 5, depending on your level of fitness.
Bridge with hips
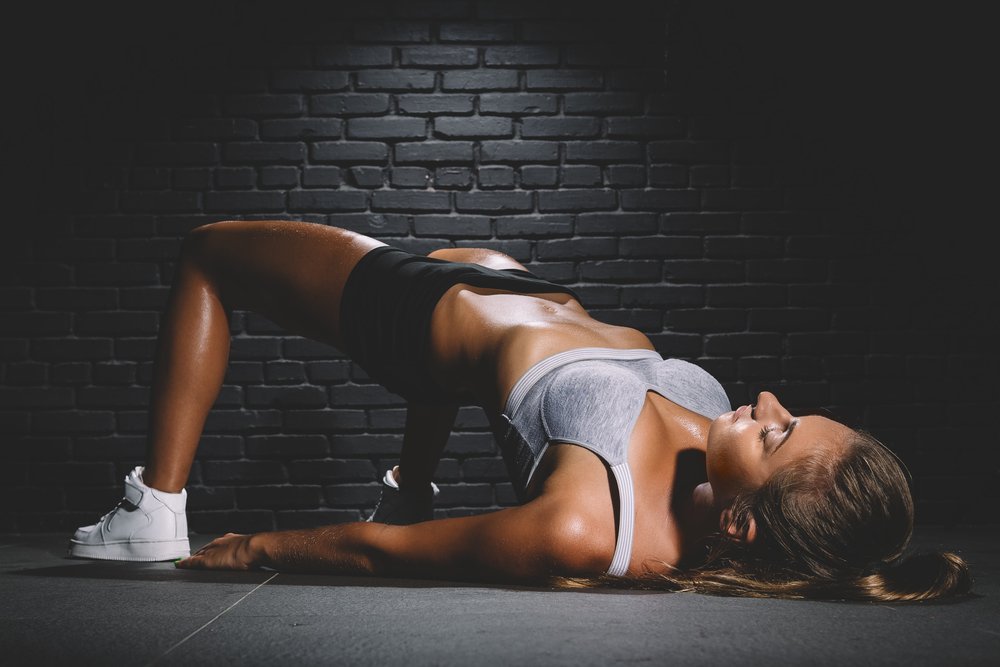
It is often recommended for people with weak supporting apparatus: Correct execution involves muscles to a greater extent than ligaments and joints. Training relieves lumbar pain by strengthening and stretching the back muscles. The work also includes the buttocks, abs and thighs.
How to do it?
- Lie on the floor with your knees bent. The arms are extended along the body, and the back is pressed tightly to the surface.
- As you exhale, strain your buttocks and lift your pelvis up until your hips and chin can be connected by a straight line. At the same time, we slightly round the lower back so as not to overload. The primary movement is made by the pelvis, not the back.
- As you inhale, slightly relax your muscles and lower yourself down.
Keep your muscles tense at all times. Do not throw your body down, but lower it smoothly.
Advanced level: lift your body on one leg, the second is bent at this time and lies on the first leg, the ankle touching the knee.
Dog and bird
The exercise involves the whole body, as you will have to maintain balance. The buttocks will receive an additional stimulus by raising the legs.
How to do it?
- Get on all fours with your arms and legs at 90 degrees to your body. Place your hands shoulder-width apart.
- Tighten your core muscles so that your back is completely straight. The shoulder blades are slightly brought together, the gaze is directed downwards.
- Simultaneously lift and extend your left arm and right leg. They should be parallel to the floor.
- Hold the tense position slightly.
- Smoothly step back and switch arms and legs.
You can make the exercise more difficult by spending more time at the point of maximum tension. Isotonic exercise simultaneously trains and stretches the muscles, increasing blood flow. Try standing with your leg and arm raised for 5-10 seconds, sway slightly while maintaining your balance.

One of the most difficult exercises even with your own weight. The effect is comparable to training in the gym. It differs from a regular plank in the increased load on one side and the powerful development of the oblique abdominal muscles, which are responsible for supporting the back and creating a thin waist.
How to do it?
- Lie on your side, resting on your elbow. The hand is extended forward and pressed to the floor, creating additional support. The second hand rests on the waist.
- Place your legs on top of each other, with only one touching the floor.
- Straighten your back and tighten your stomach.
- As you exhale, lift your body off the floor and lift it up. The ideal option is the body as a straight line.
- Hold the plank position for a few seconds and slowly lower yourself to the floor.
The support is on the arm and leg. A sagging belly is a problem that can cost the health of your spine.
For beginners, a plank on your side with your legs bent at the knees is suitable. This increases the area of support, which helps maintain balance.
The difficulty is also increased by standing in the plank position longer. Hold your back straight for 10-20 seconds and you won't need dumbbells.
Most difficult option: when lifting the body, we also raise the upper arm and leg. They are in a position of 45 degrees relative to the body.

About 90% of people believe that lunges are an exercise for the buttocks. However, this movement involves the whole body, including the back - it holds the body, preventing it from collapsing. The lower back and front of the thigh will receive most of the load.
How to do it?
- Stand straight, your feet are in a medium position, your hands are on your waist.
- Inhale and take a step forward. The weight is transferred to that leg and placed evenly across the entire foot. Make sure your body is straight. The back leg rests only on the toes, and the knee almost touches the floor.
- As you exhale, direct your center of gravity to your back leg and straighten your front leg. Return to the starting position.
When lunging forward, do not drop the knee of the back leg to the floor - the kneecap is fragile. Gently lower your leg and stay one and a half cm to the floor.
Keep your lower back straight and do not touch your stomach with your legs. If it’s difficult, then slightly tuck your back forward, the main thing is to not let your abs sag. Also keep your head straight, your gaze directed forward.
Place your feet shoulder-width apart, not in a straight line. This will make it easier for you to maintain balance and protect yourself from injury.
Stretching on a fitball
Our back bends forward during the day. The lower back is clamped in one position, so it starts to hurt. Exercises on a fitball compensate for this by creating a backbend and relieving tension.
There are several options for stretching on an exercise ball. Let's look at the two most effective ones.
Exercise for the deep lumbar muscles.
- Rest your stomach on the ball. The legs are wide apart, straight and resting on the floor with their toes. Arms are parallel to the body.
- As you exhale, lift your body up, straightening your shoulders. Try to reach higher.
- Inhale and come back.
Bridge on a fitball to strengthen the back muscles.

- Lie with your back on the ball. At the same time, your arms and legs must rest on the floor, maintaining balance. The calves are pressed against the ball.
- Gently roll the ball under your back. The spine is tightly pressed to the fitball; there should be no gaps or unnecessary deflections.
- Try staying on the bridge for a few seconds.
The exercise is safer than the classic version without gymnastic ball. The muscle corset is formed gradually, without overload.
Baby pose
The exercise comes from yoga. Great for relaxing after a workout and during the work day. The muscles tense slightly and stretch more. The muscles most involved are the erector spinae and the lower back. During sedentary work, these muscles contract 90% of the time, which causes back pain.
When the intervertebral discs are stretched, they return to their normal position. Excessive pressure is removed from the nerves and blood vessels, and the influx of fresh blood saturates the body with oxygen.
How to do it?
- Get on your knees.
- Place your body down on your knees and relax. The head rests on the floor with the forehead or temple.
- Stretch your arms along your body without straining them.
- Make sure your shoulders and neck are also relaxed.
- Hold the pose while breathing deeply. As you exhale, relax the muscles one by one from bottom to top: first your feet, then your calves, thighs, etc.
- Slowly return to a kneeling position.
Due to deep breathing, the abdominal organs receive a light massage. This increases blood flow and improves their functions.
Prevention of back pain
Do not wait sharp pain, take care of your back in advance. All prevention is based on compliance with traffic rules.
- Watch your posture.
- Stretch regularly: Our bodies are not designed to sit constantly.
- Sit with your back straight in an appropriately sized chair.
- Don't strain yourself by carrying heavy things.
- Exercise; For busy people, our complex is suitable for half an hour.
If you have back problems, visit an orthopedic doctor at least once every six months. He will track the dynamics of your condition and help correct it. Healthy back- the key to the health of the whole body!